Step 1
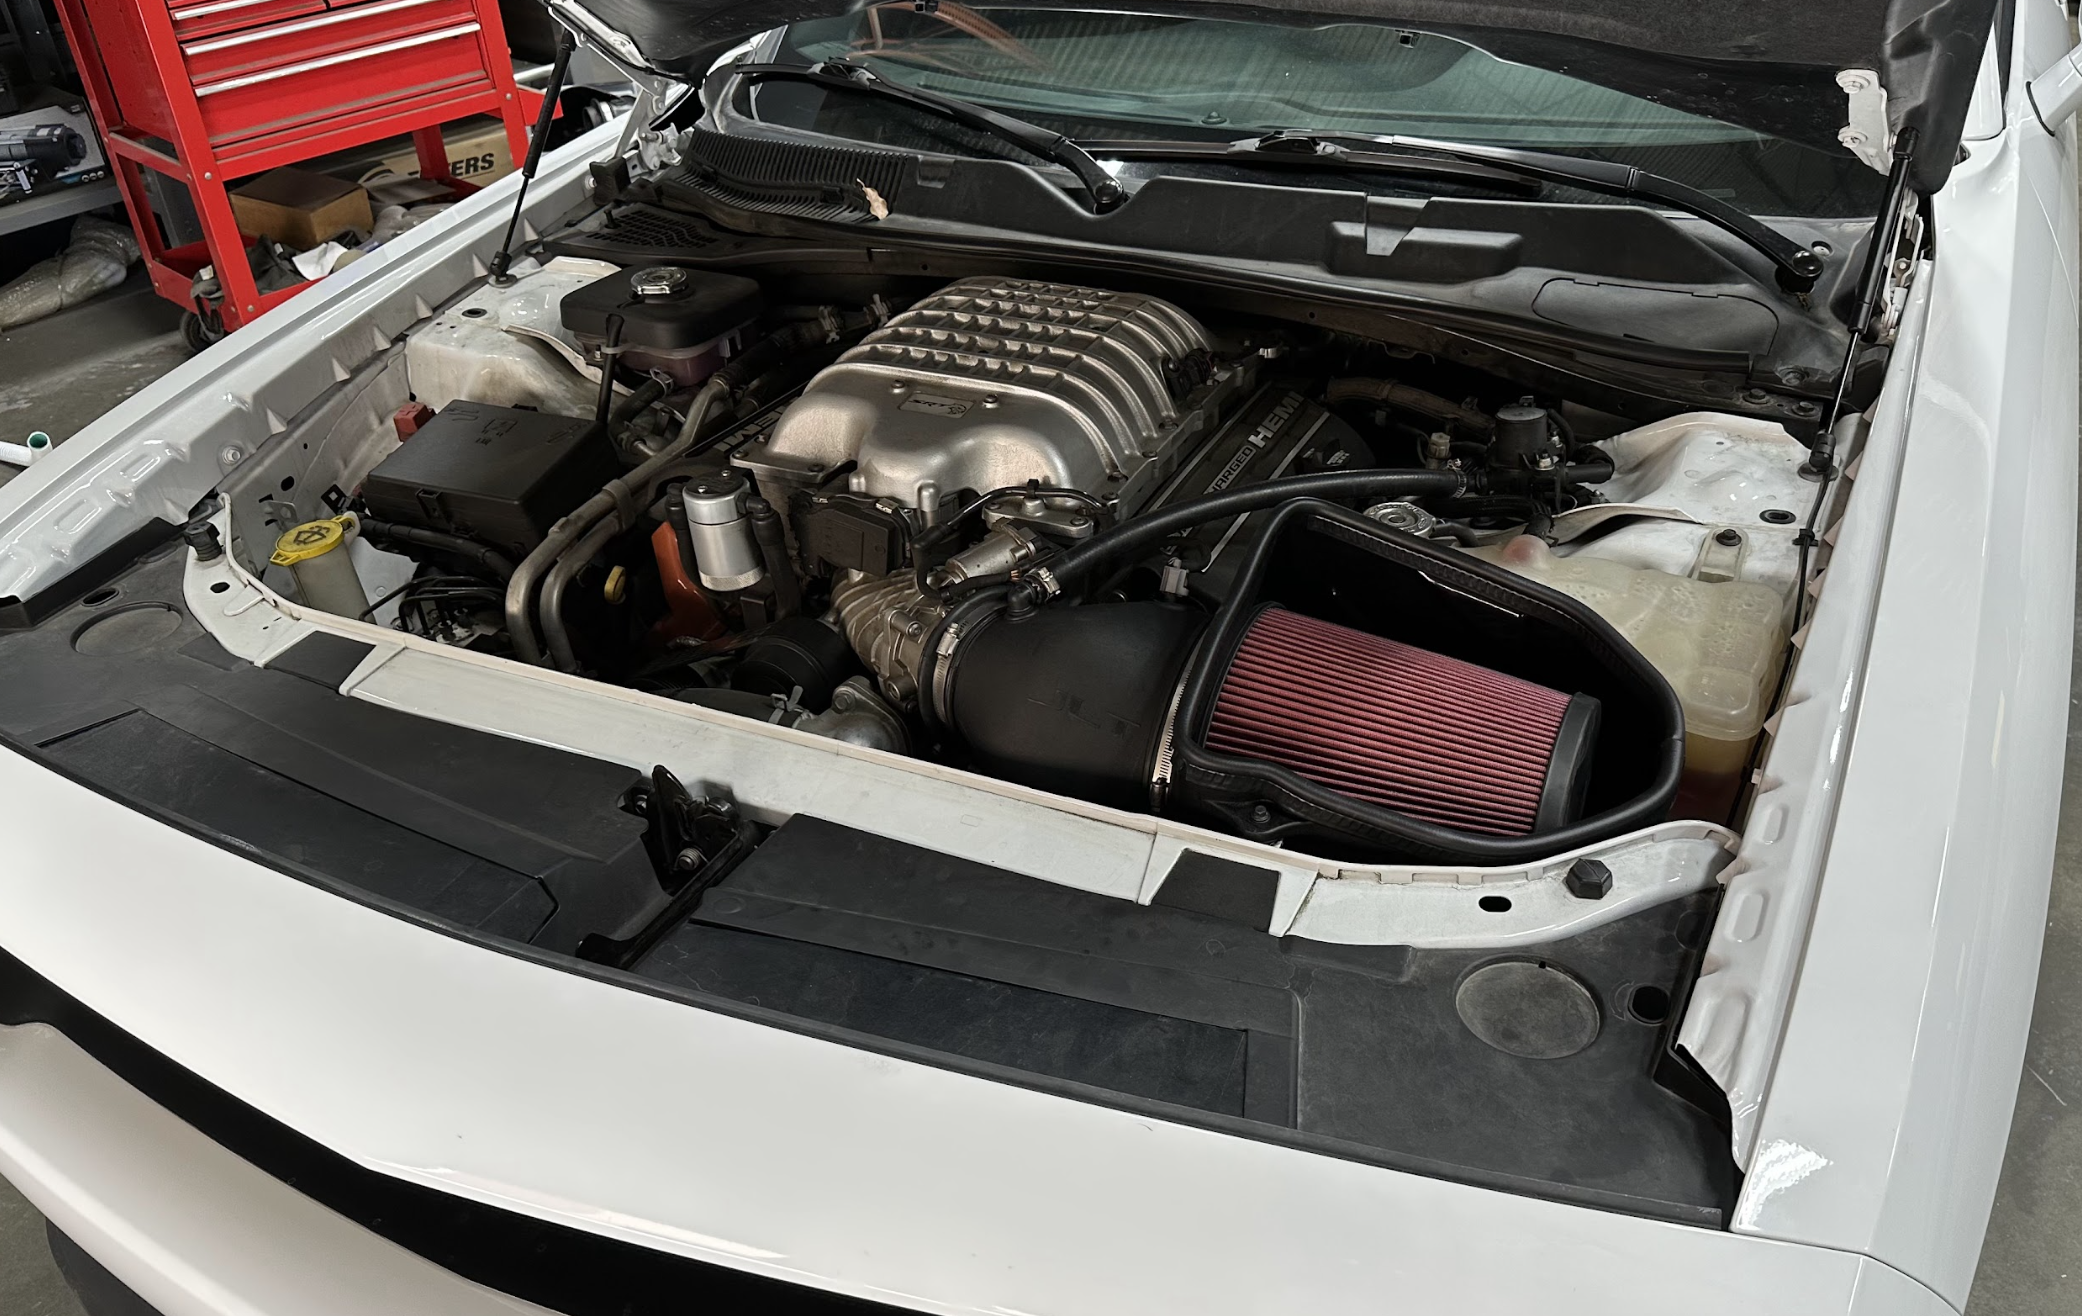
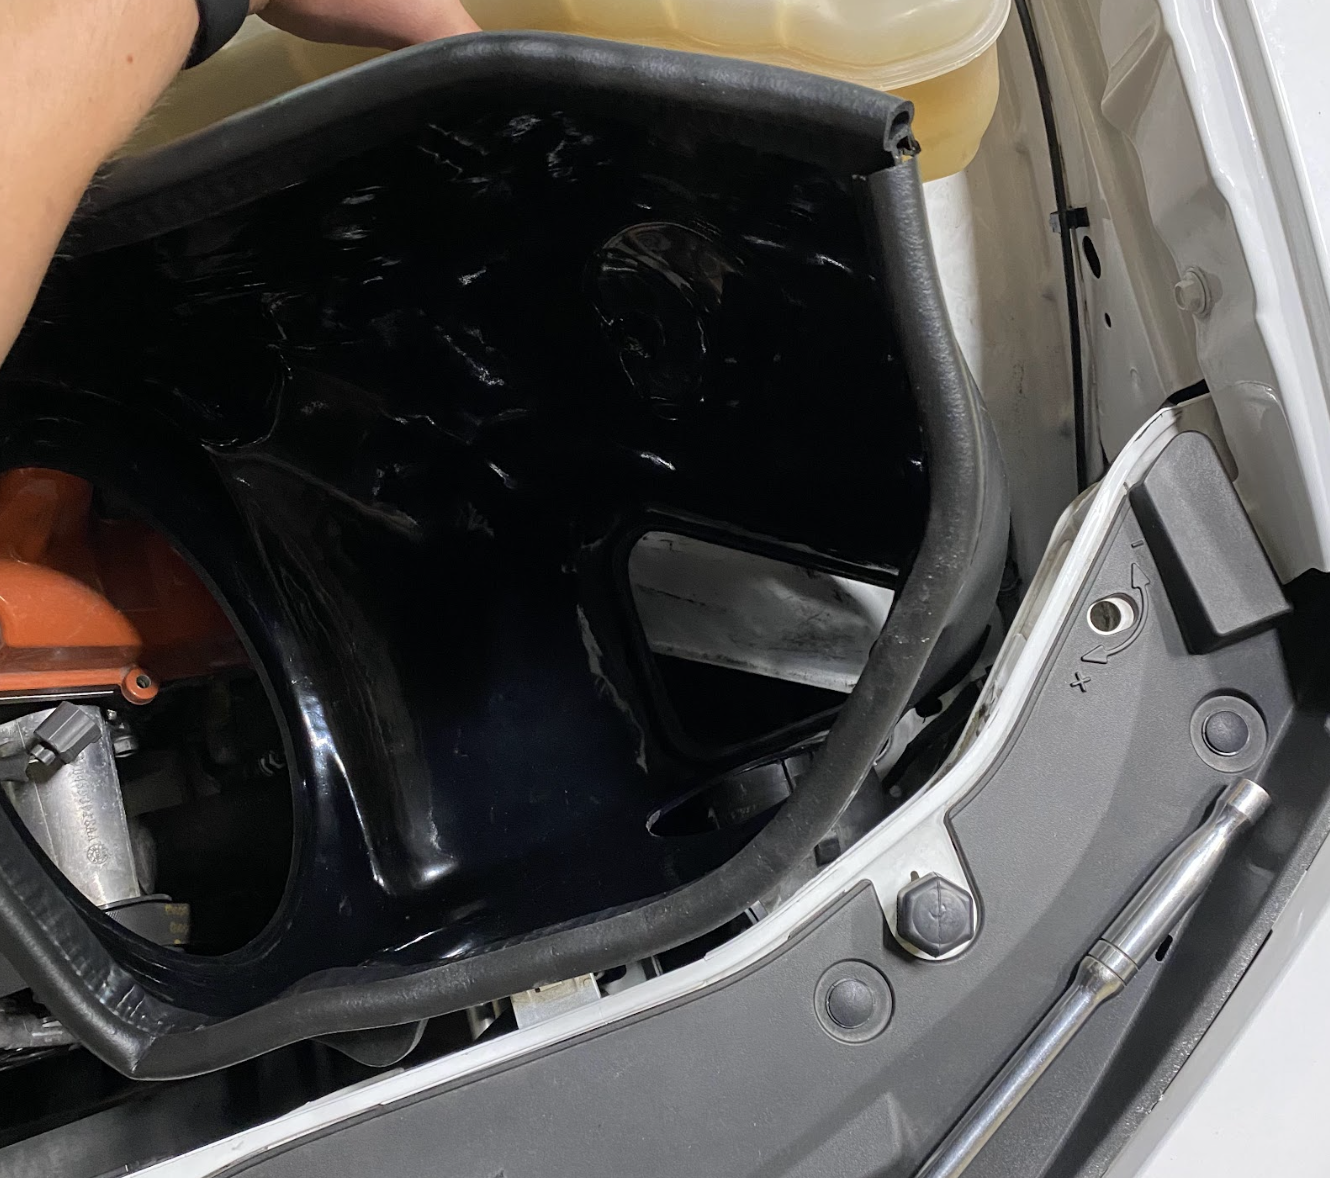
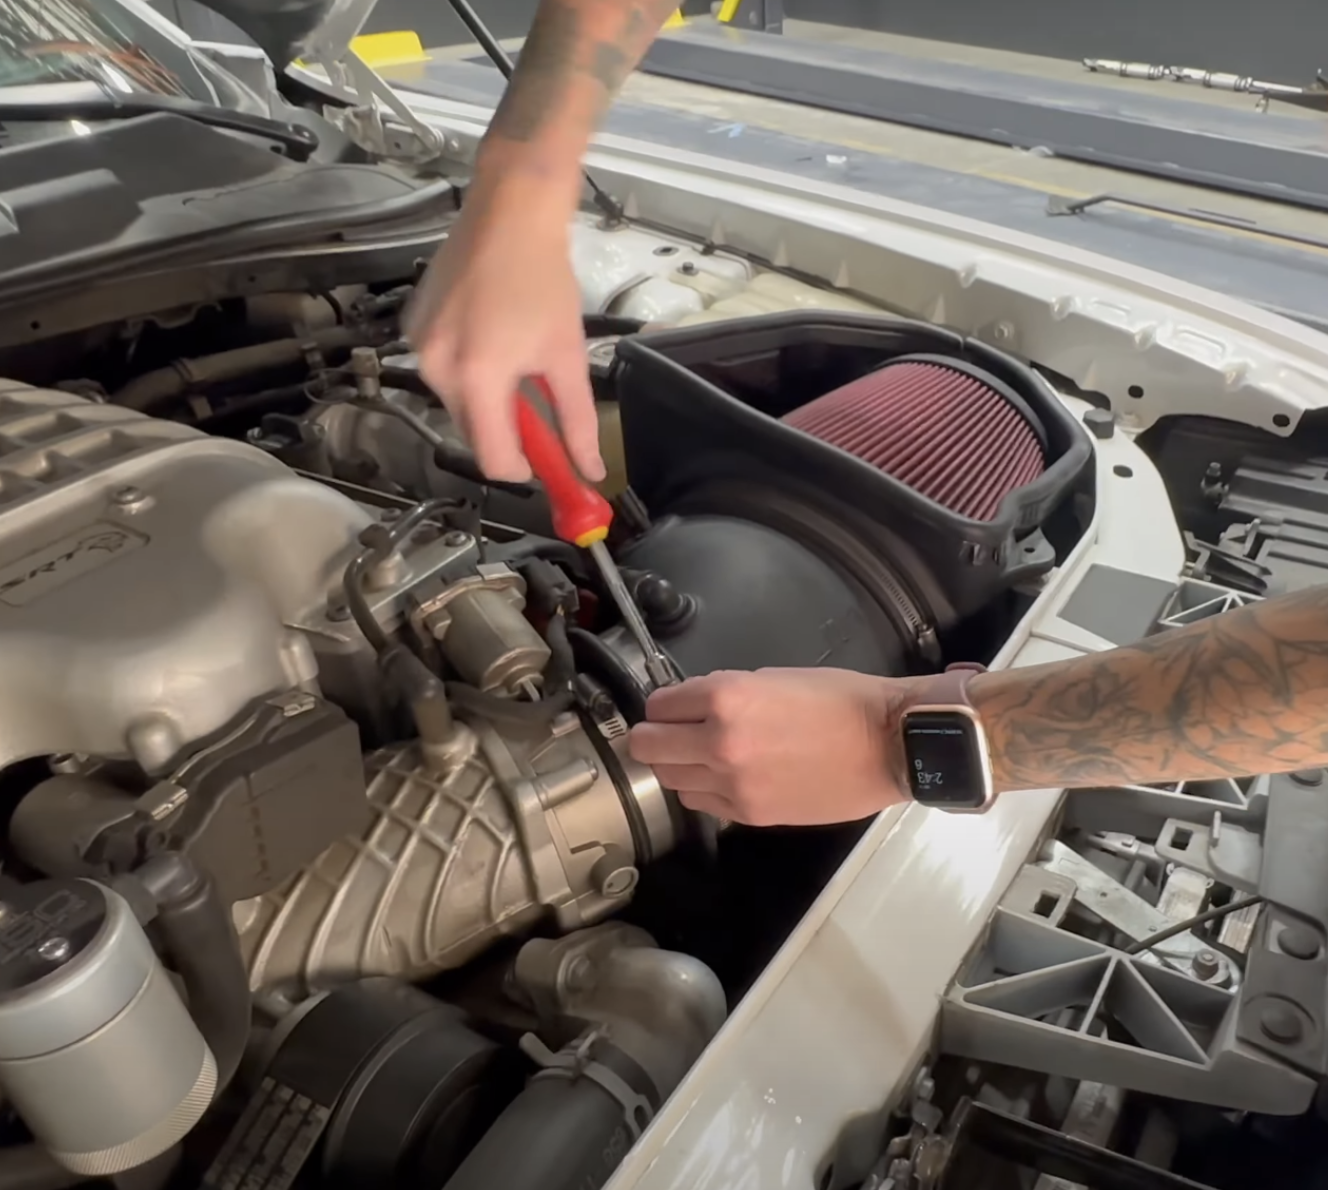
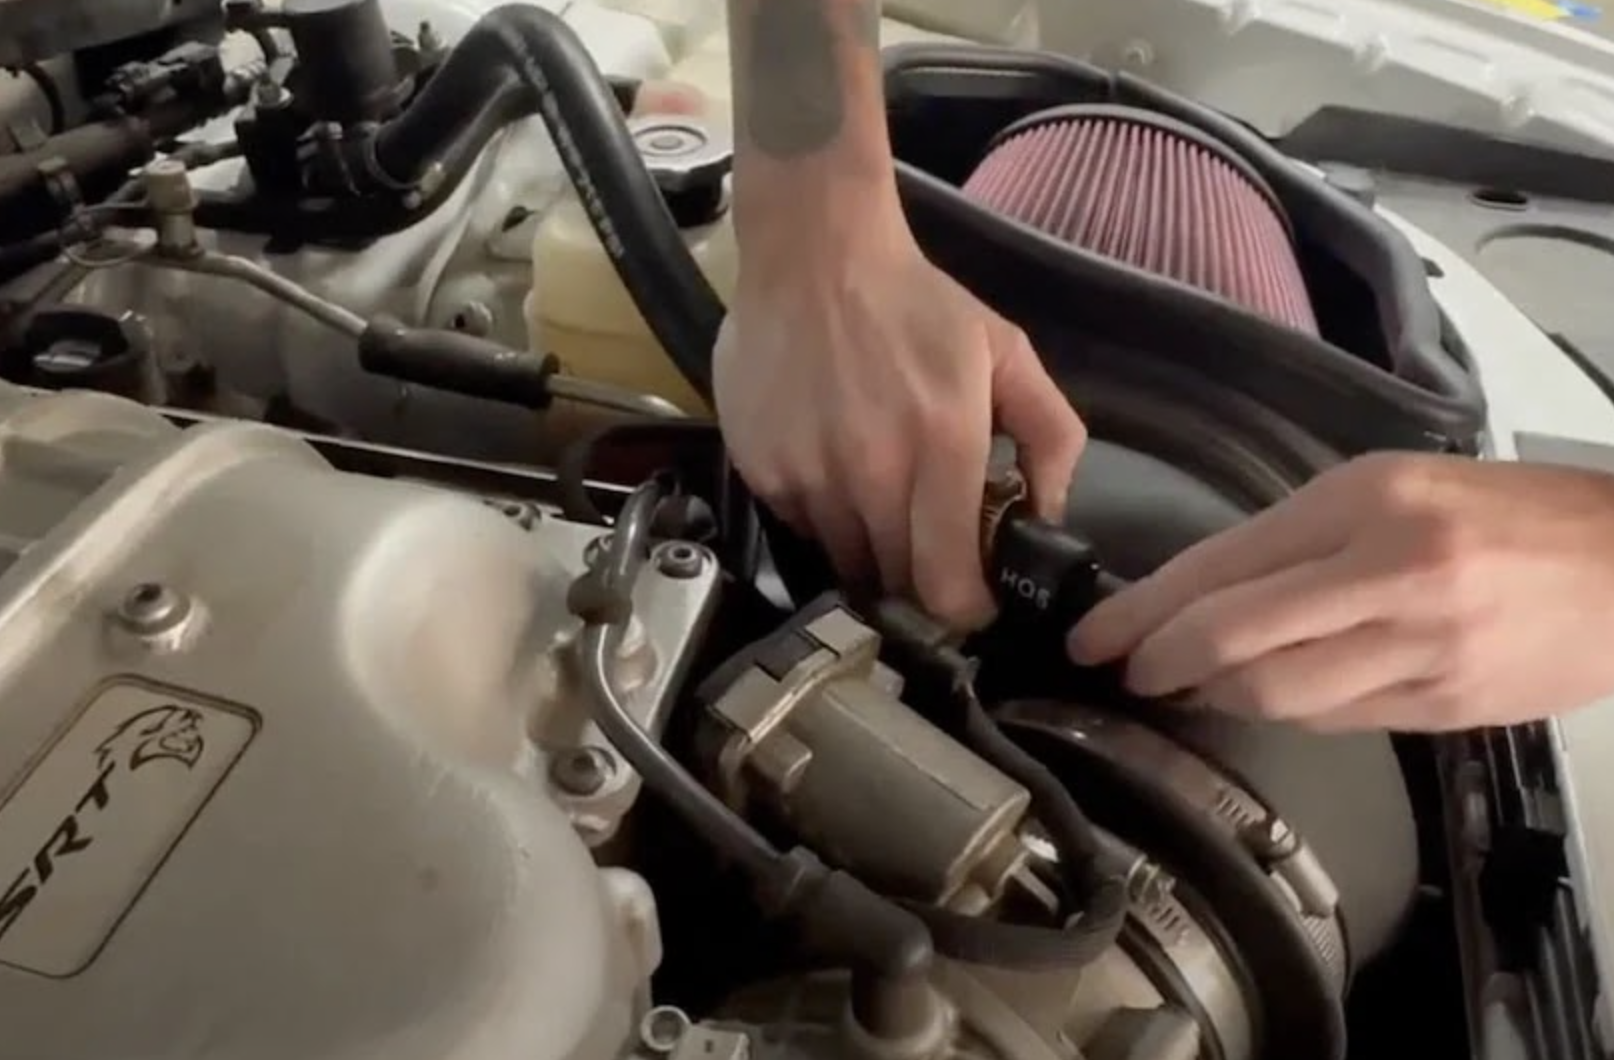
Remove the screw holding the airbox to the car, disconnect the IAT sensor, and loosen the hose clamp connecting the stock intake to the throttle body.
Note: This intake kit may not fit with the following Aftermarket Parts installed:
- Body Lift or Lowering Kit
- Custom Hood
- Throttle Body Spacer / Upgrade
Please read the entire product guide before proceeding.
- Ensure all parts are present.
- If you are missing any of the components, call our customer support at (909) 947-0015.
- Do not work on your vehicle while the engine is hot.
- Make sure the engine is turned off and the vehicle is in Park or the Parking Brake is set.
- 5/16 or 8mm socket/nut driver
- Flat head screw driver
-X-Acto knife
- Phillips Head screw driver
Remove the screw holding the airbox to the car, disconnect the IAT sensor, and loosen the hose clamp connecting the stock intake to the throttle body.
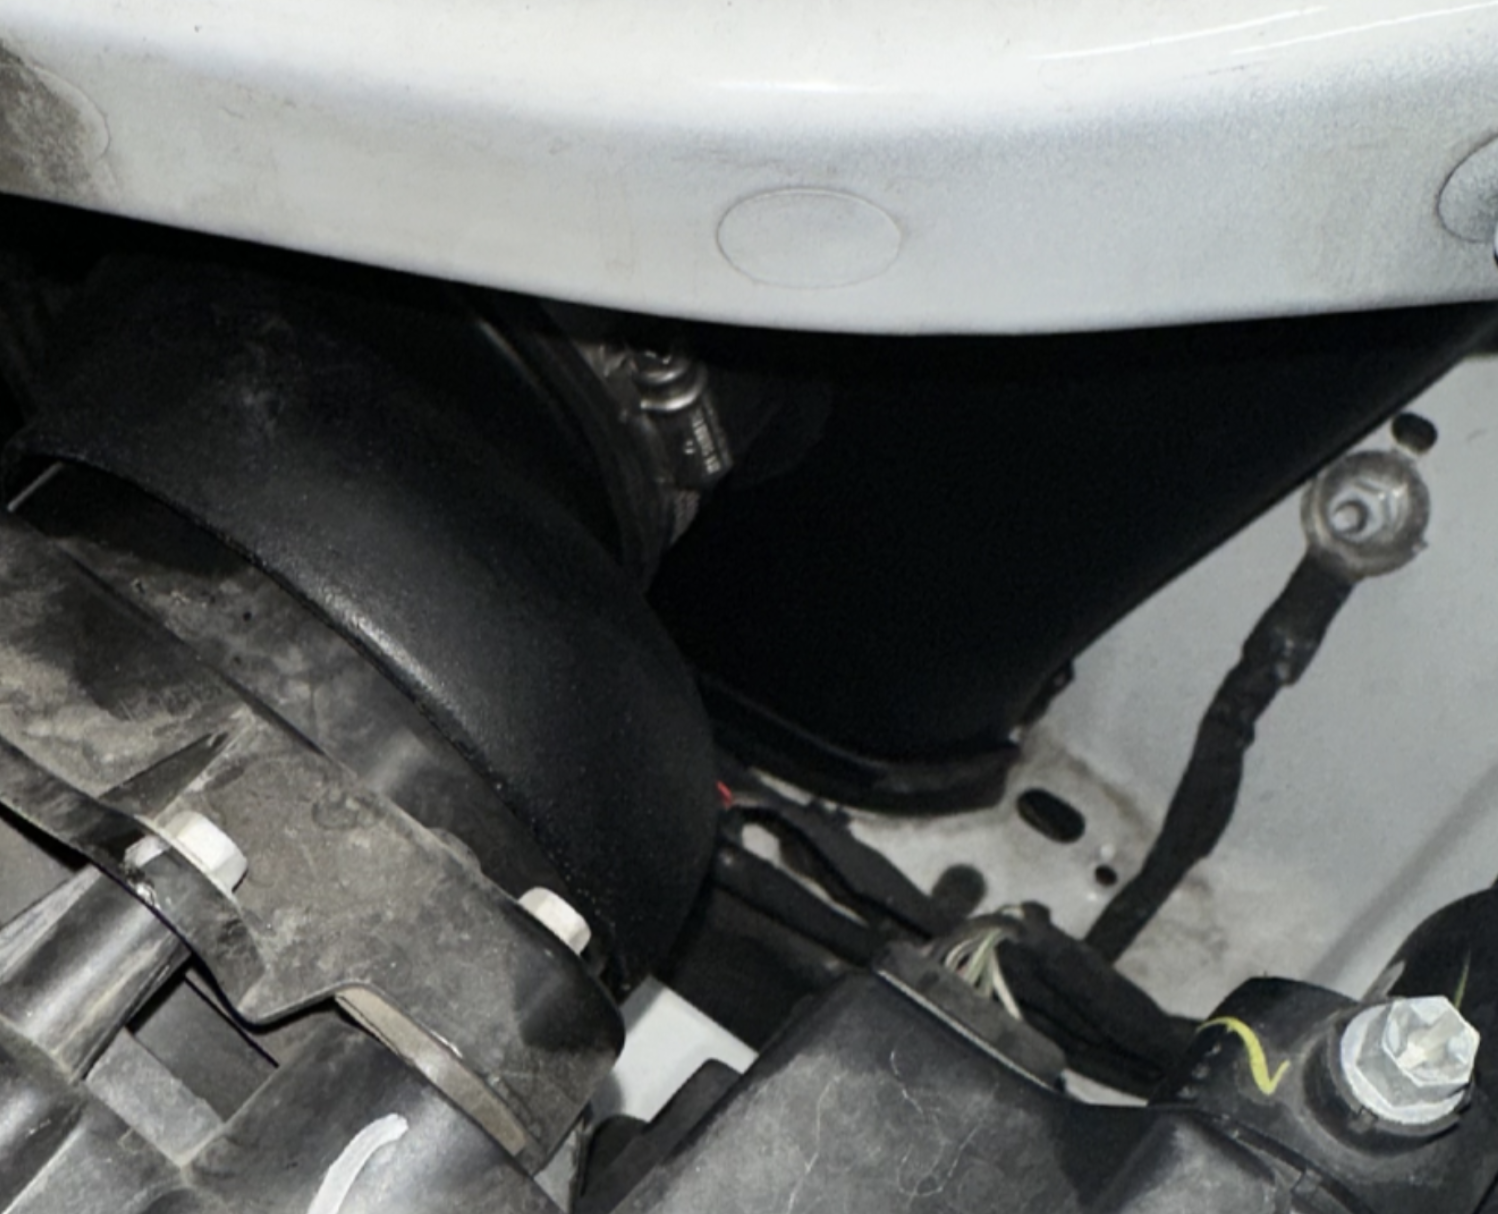
If you have a vehicle like the image to the right, cut the corrugated hose coming from the stock intake at the end connected to the vehicle, being careful to not damage the barbs on the fitting. Alternatively, you can also heat it up using a heat gun so it remains intact instead, being cautious to not heat up other components in the same area.
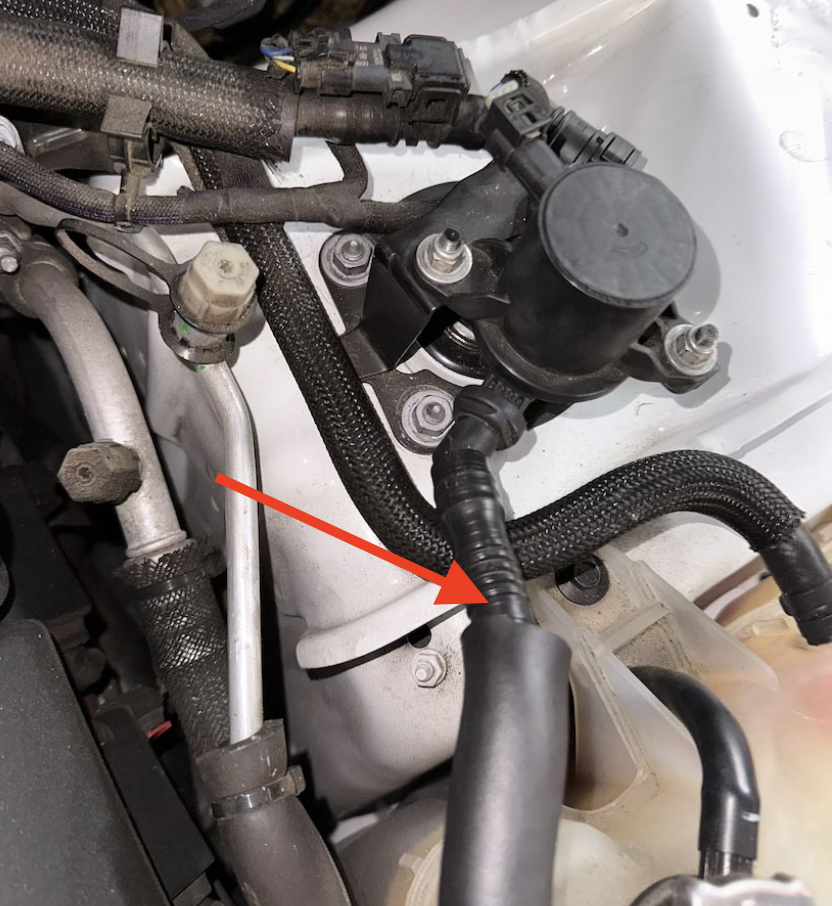
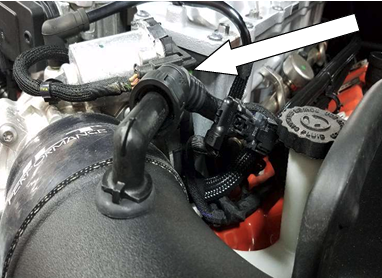
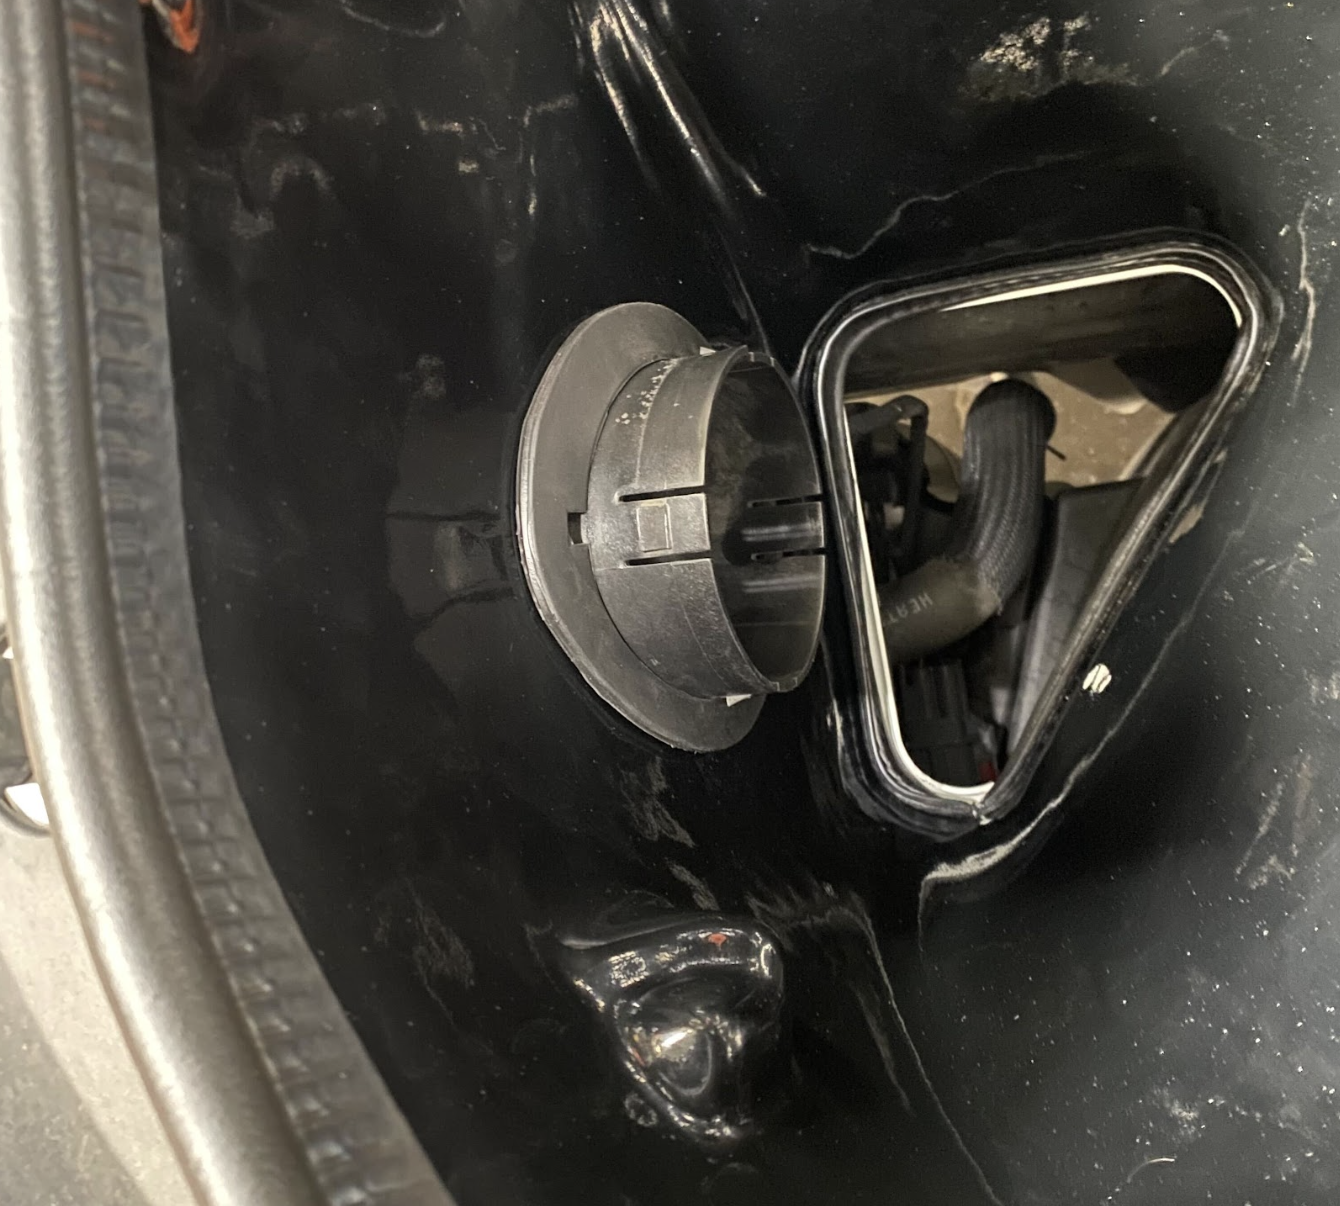
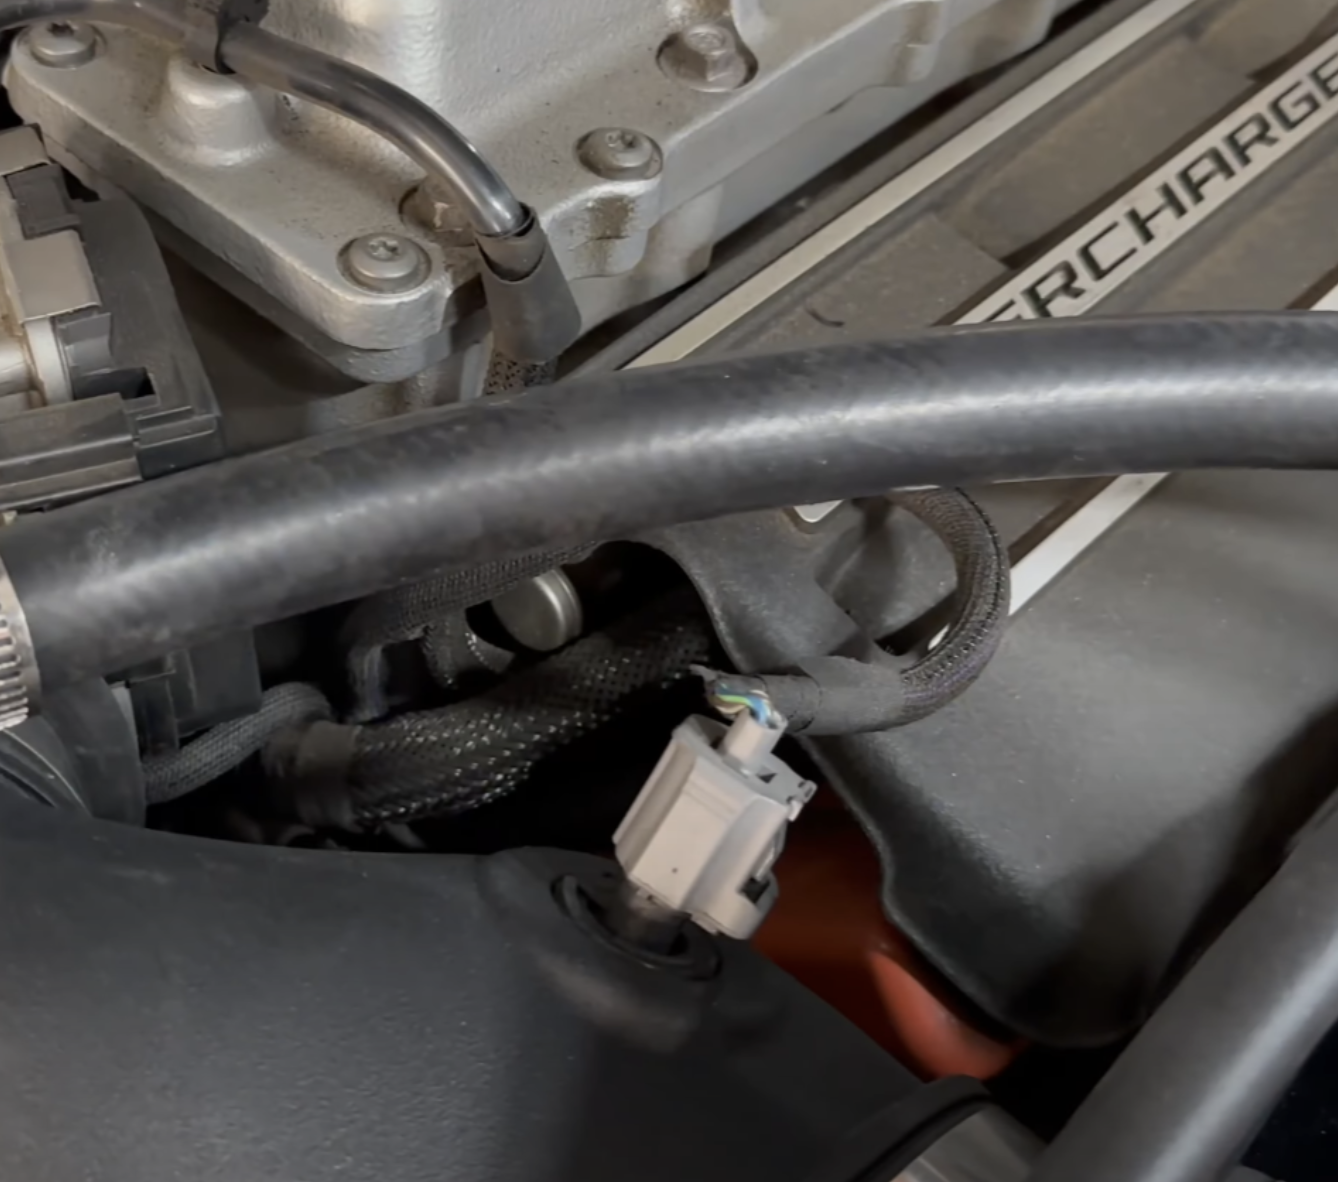
If you have a vehicle like this image with a quick connect, disconnect the factory quick connect by depressing both sides of the fitting and pulling it off. Then, pull the fitting out of the stock tube to be reused with the JLT tube.
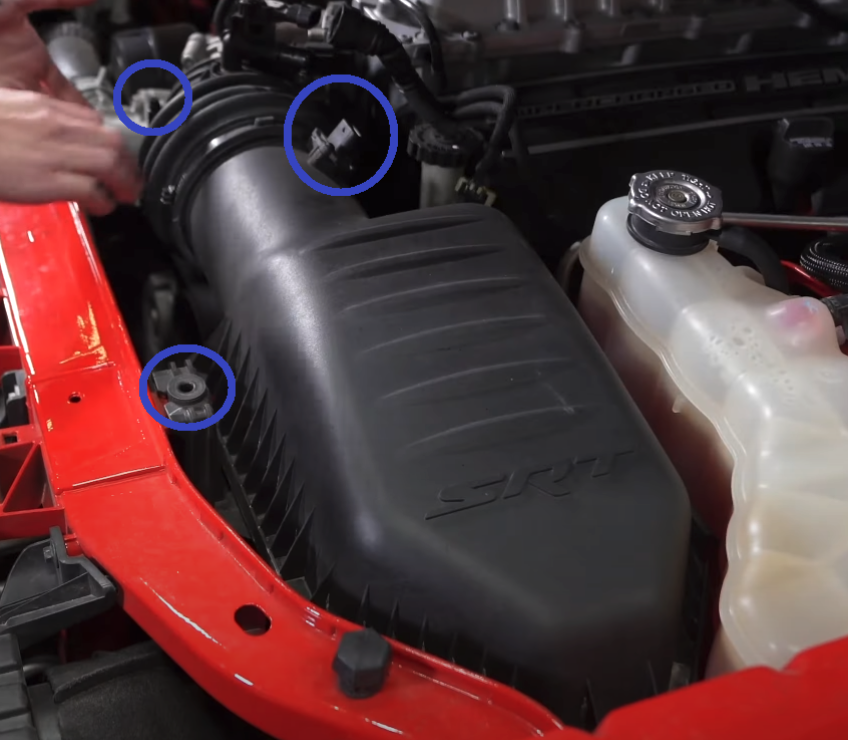
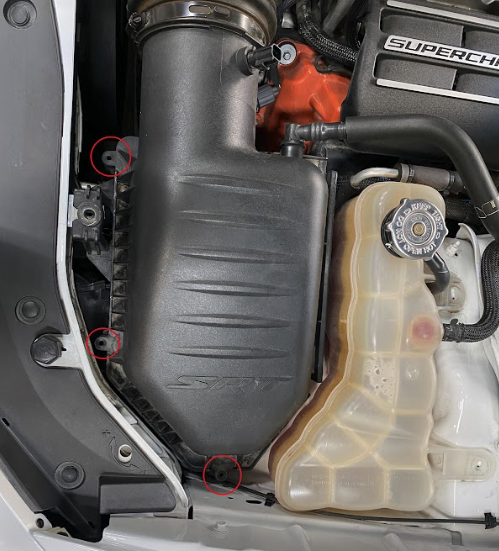
Unfasten the two screws holding the coolant tank to allow for more room when removing the stock intake and installing the JLT intake.

For Chargers only, remove the three screws securing the top of the airbox. Unfasten the hose clamp securing the tube to the airbox. Remove the top part of the airbox and by pulling towards the front of the vehicle and upwards, also removing it from the tube. Remove the panel filter.
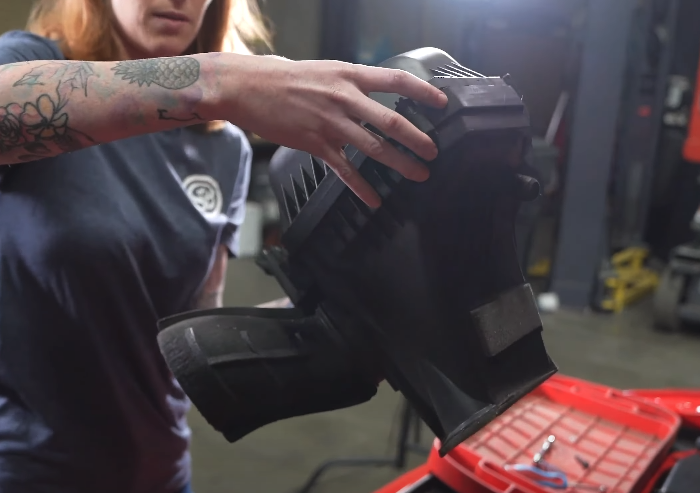
Remove the stock intake system from the vehicle. For Challengers, remove the headlight scoop connected to the air box. For Chargers, the stock headlight scoop will be reused so it can remain in place by pinching the end of the tube so it unsnaps from the box.
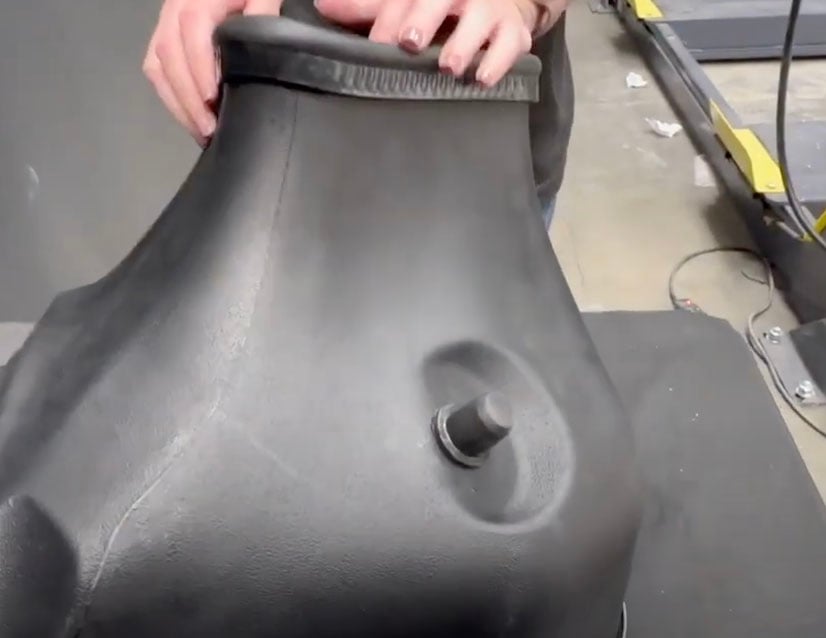
Install the edge trim on top and bottom of the airbox. Making small relief cuts at the hard bends will ease installation and prevent the edge trim from bunching up.
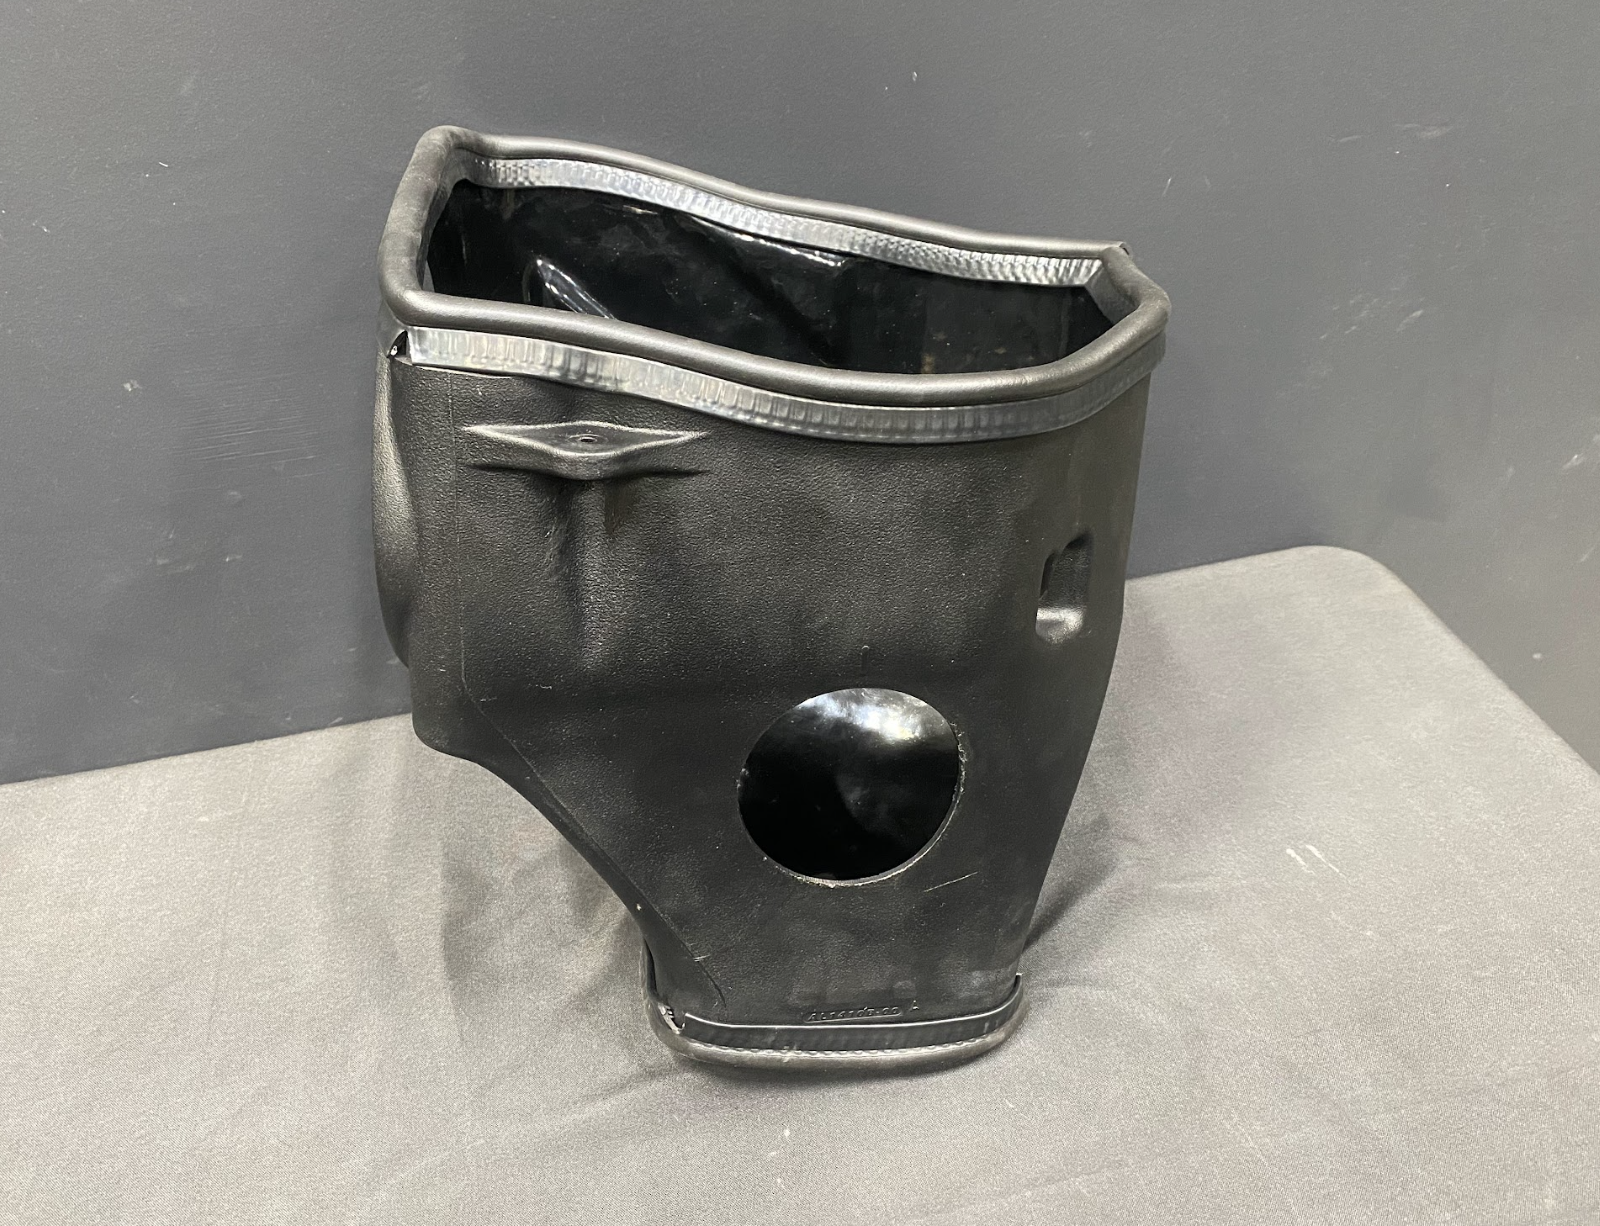
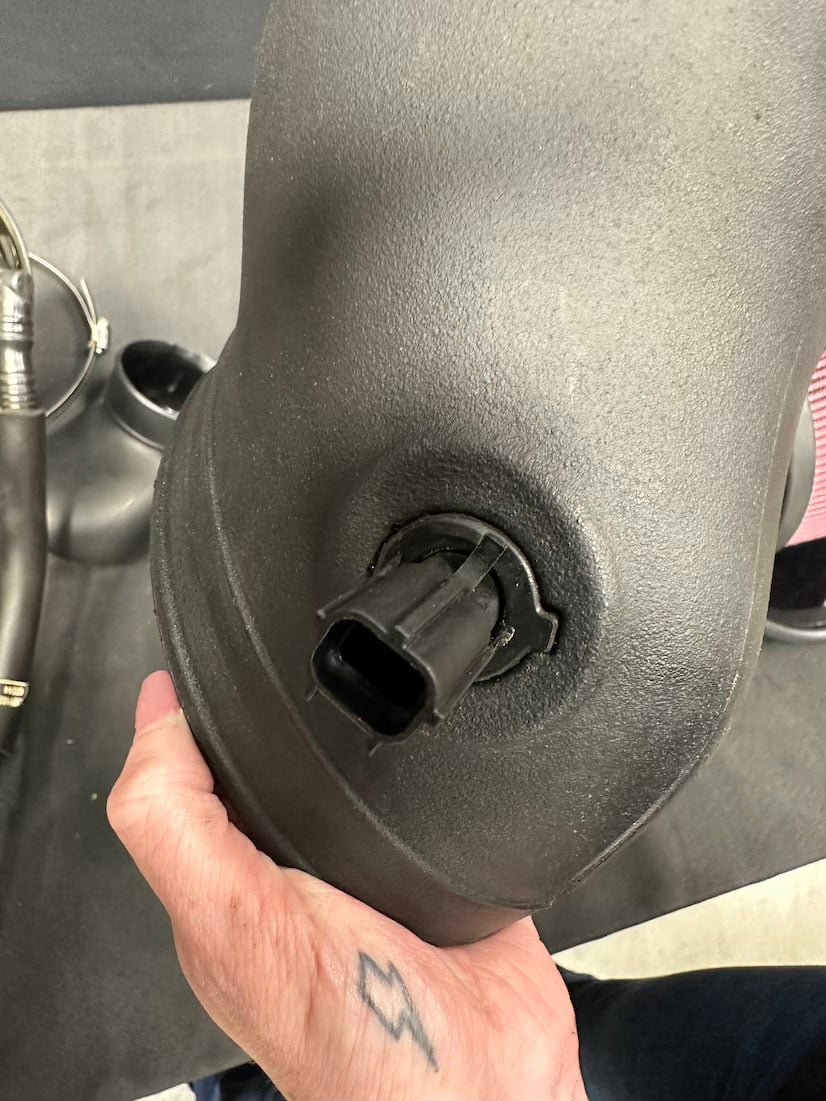
Install the mounting prong grommet on the underside of the box.
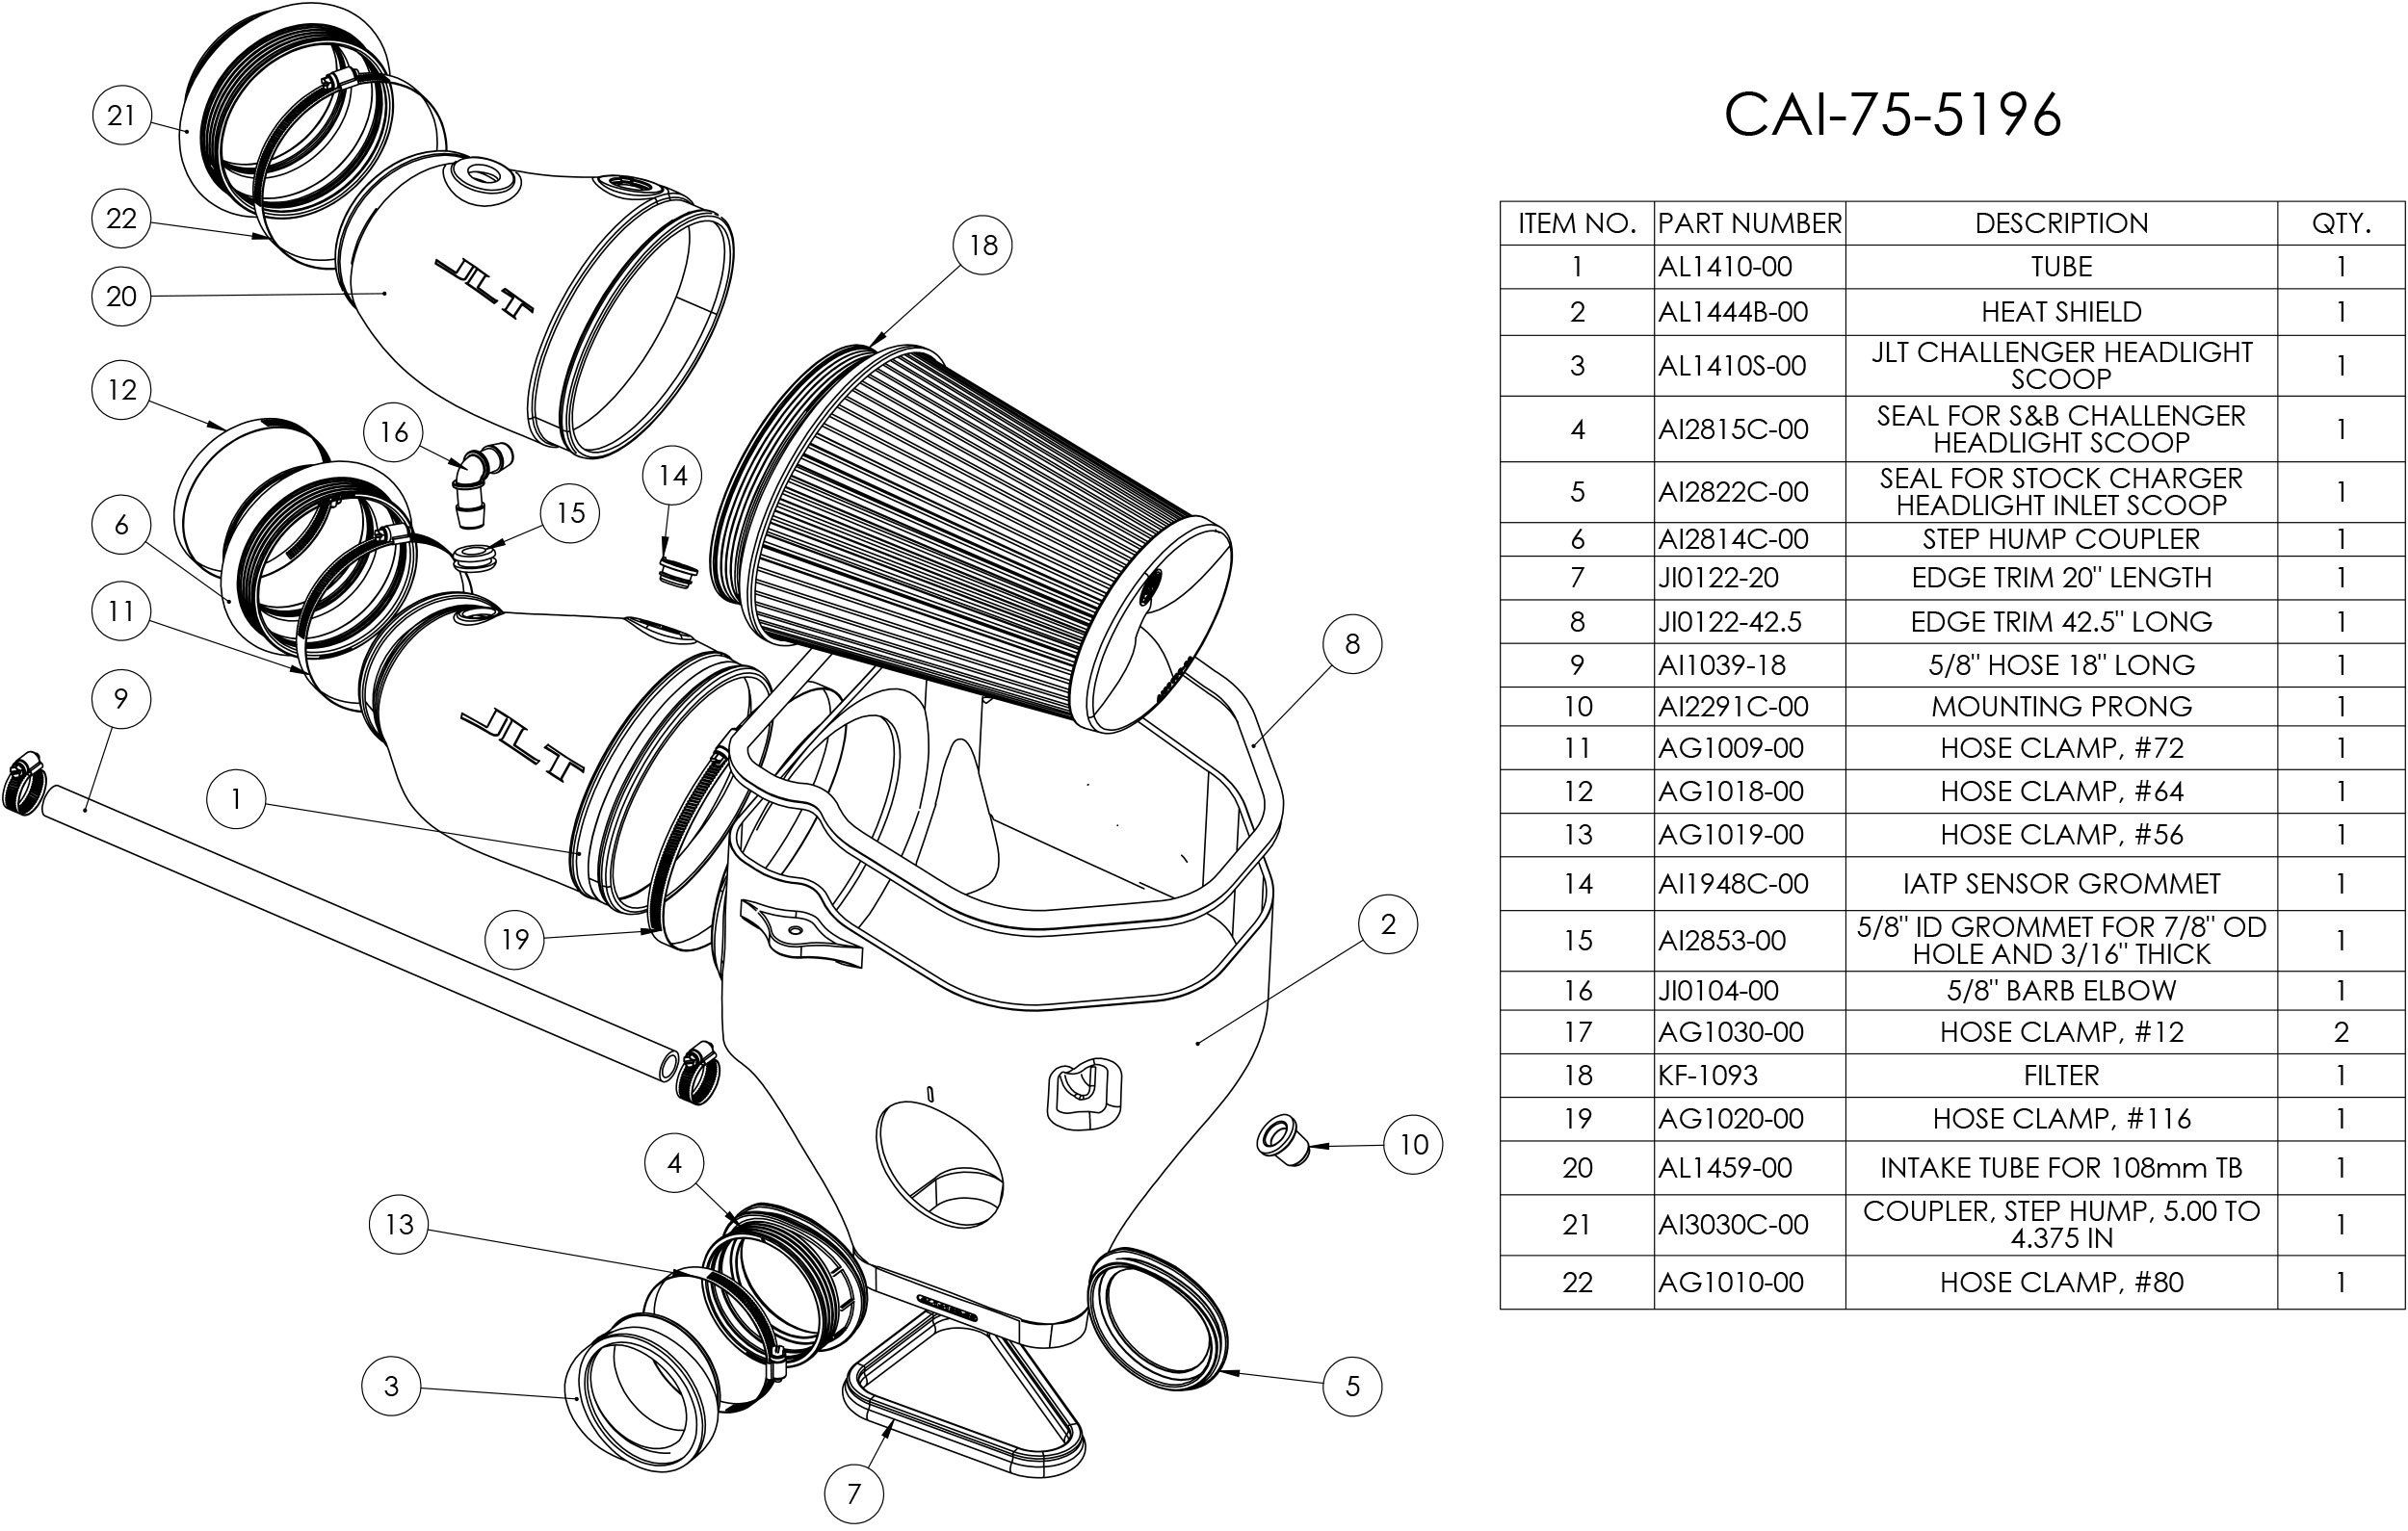
For stock throttle bodies, use the intake tube (AL1410-00) that is longer and has the smaller throttle body connection diameter. For 108mm throttle bodies, use the shorter tube (AL1459-00) with the larger diameter.
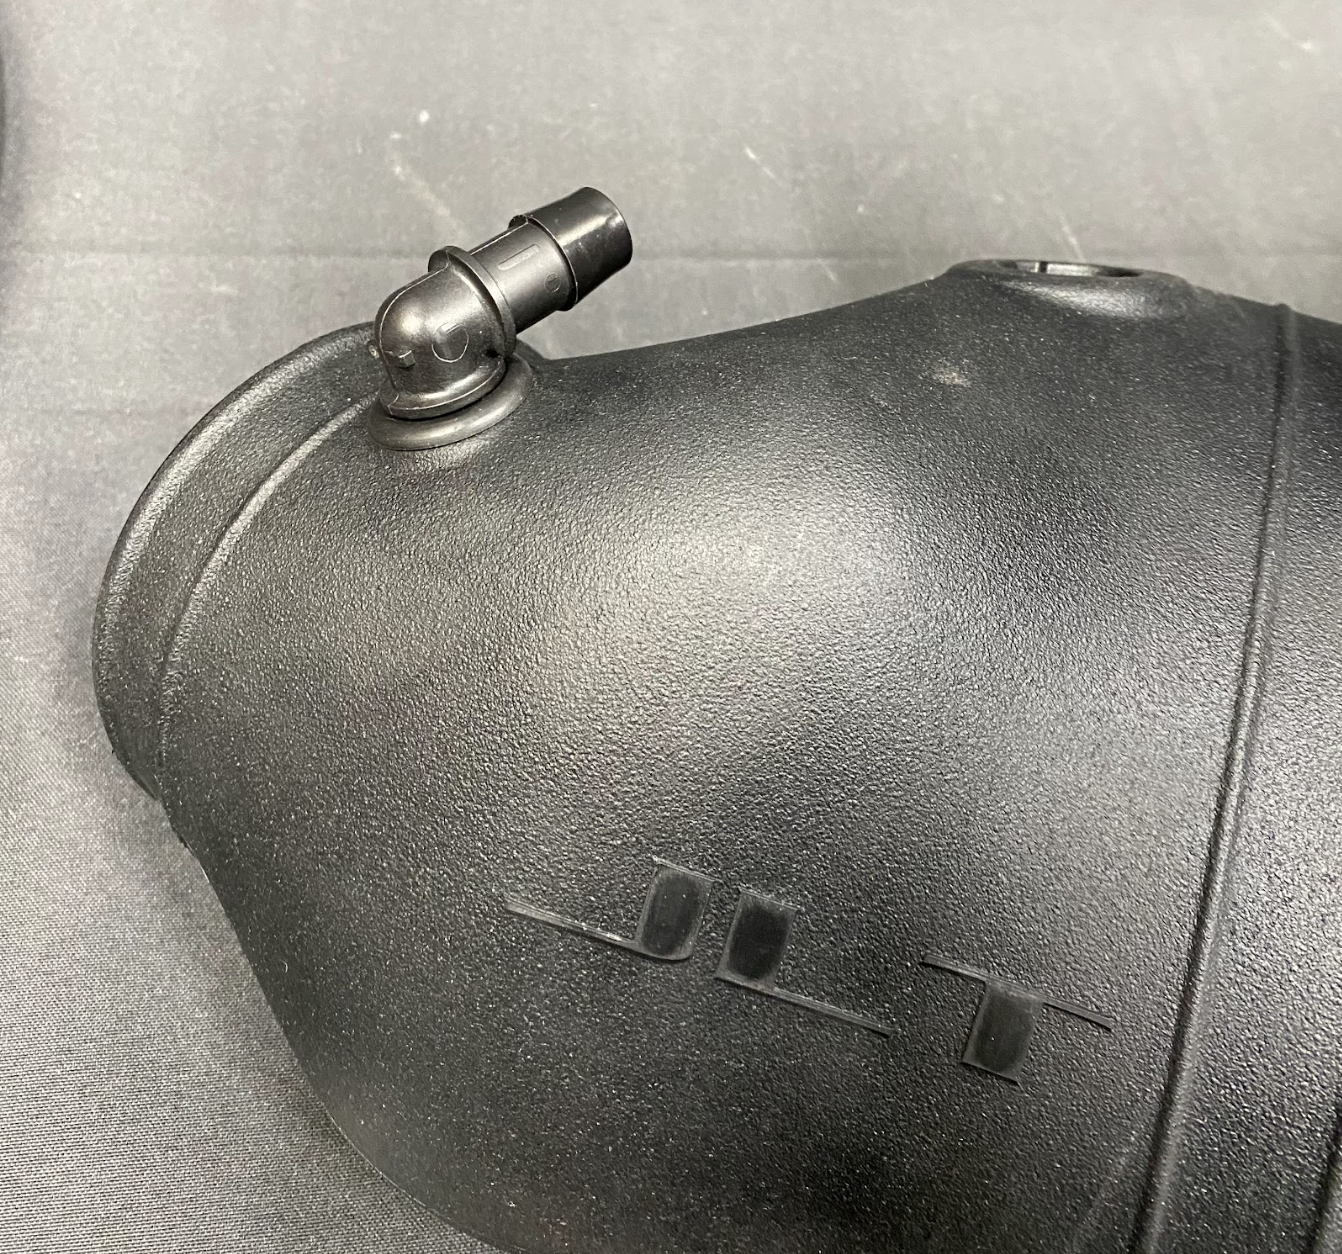
If you cut the factory line in step 2, install the 5/8” ID grommet into the tube, and then the 5/8" barbed elbow into the grommet. If you have a factory quick connection, then install the fitting removed in step 2 into the JLT tube with the 5/8" ID grommet.
Care fully remove the IAT sensor from the stock tube. Then, install the supplied IAT grommet and the previously removed IAT sensor into the JLT tube by twisting it so the tab is as shown.
For Challengers: Install the inlet scoop into the seal with the smallest hose clamp (#56).

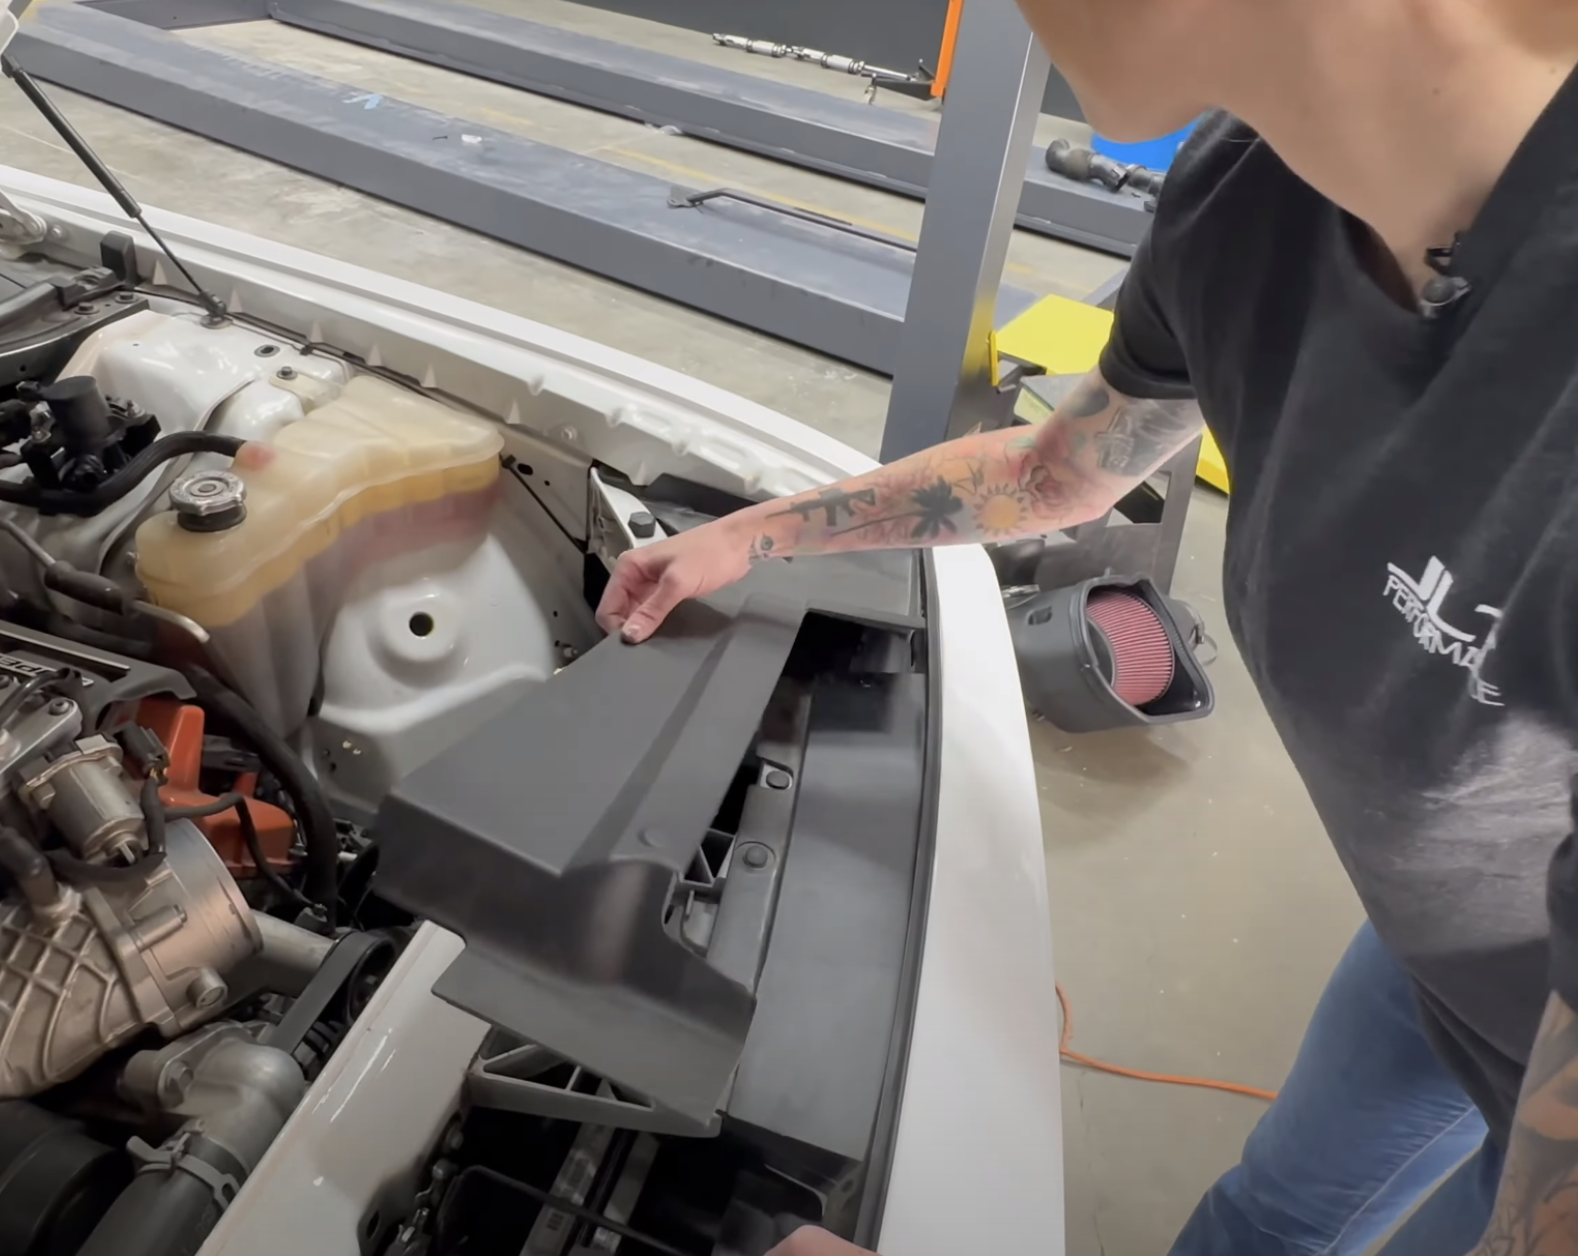
For Challengers: pull the pictured panel from the front of the vehicle in the headlight area.
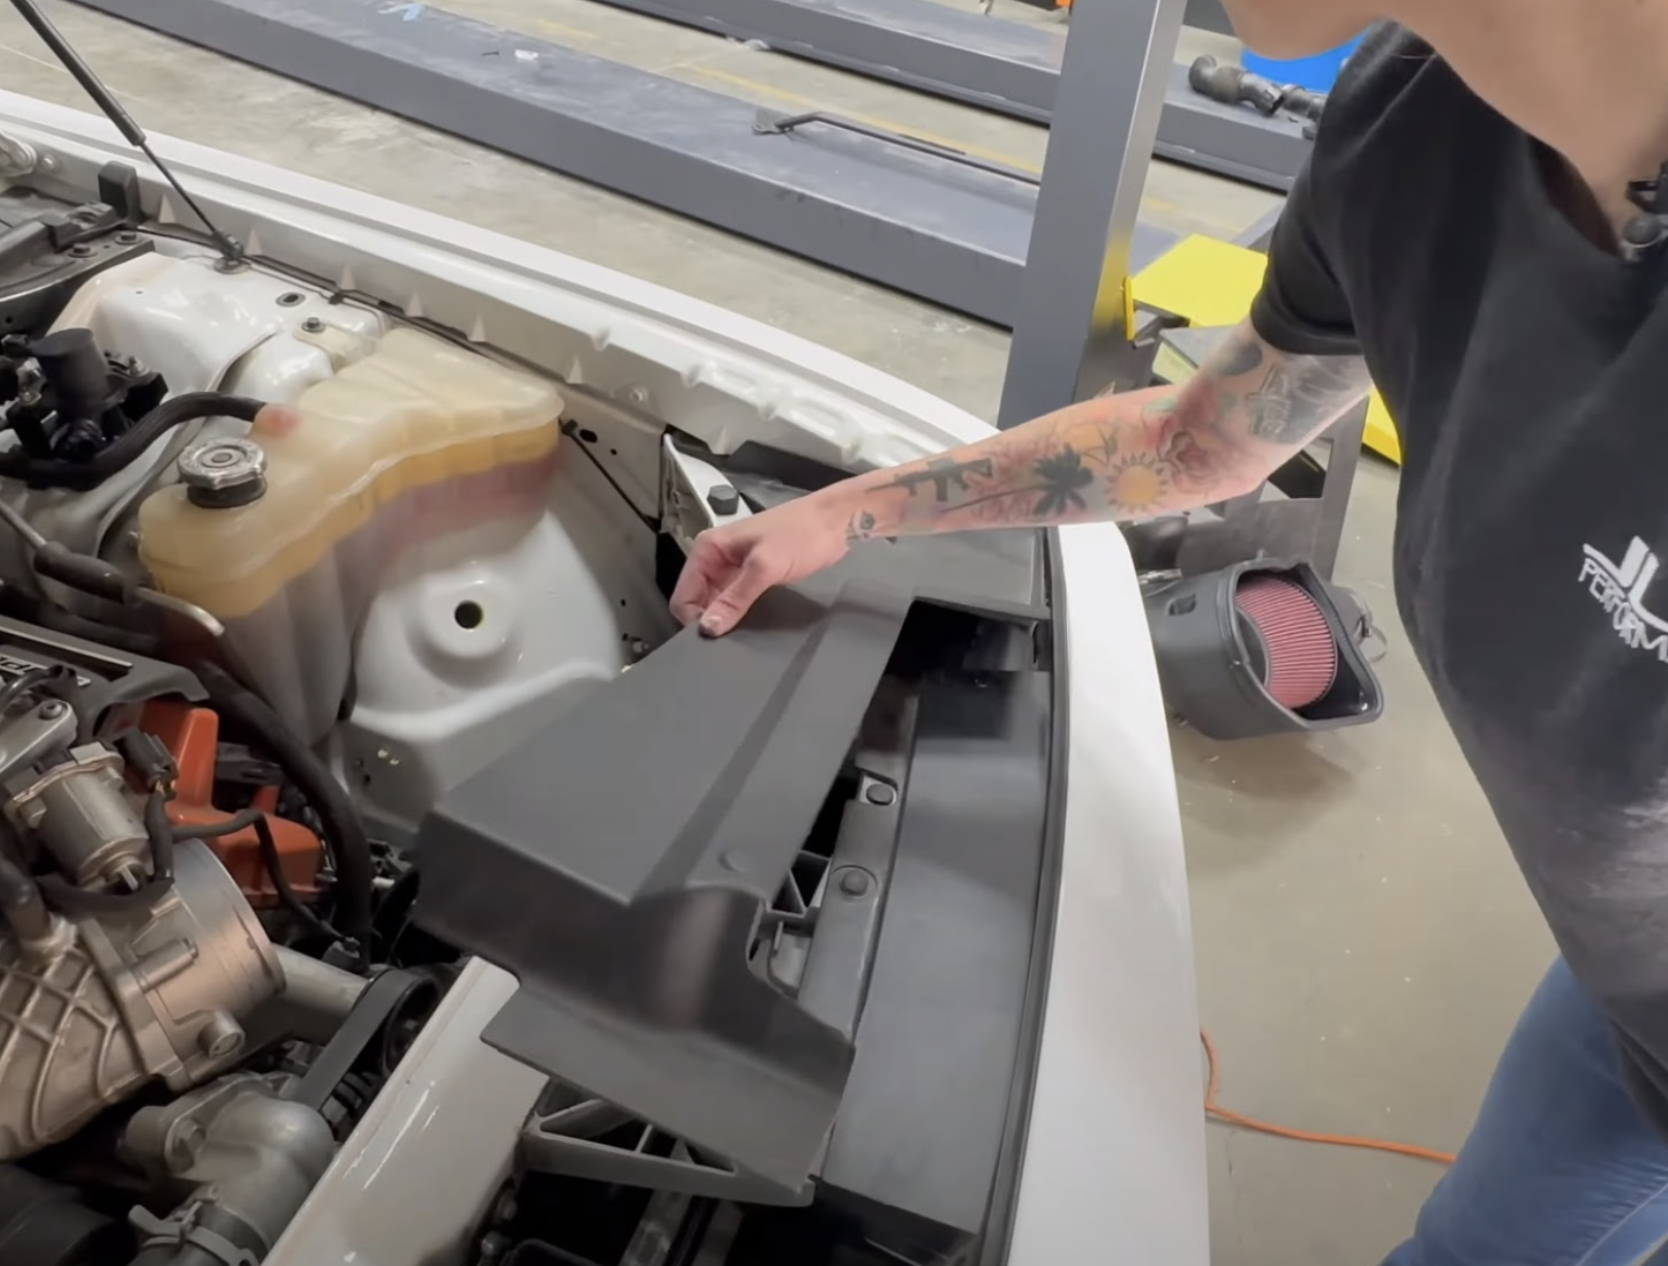
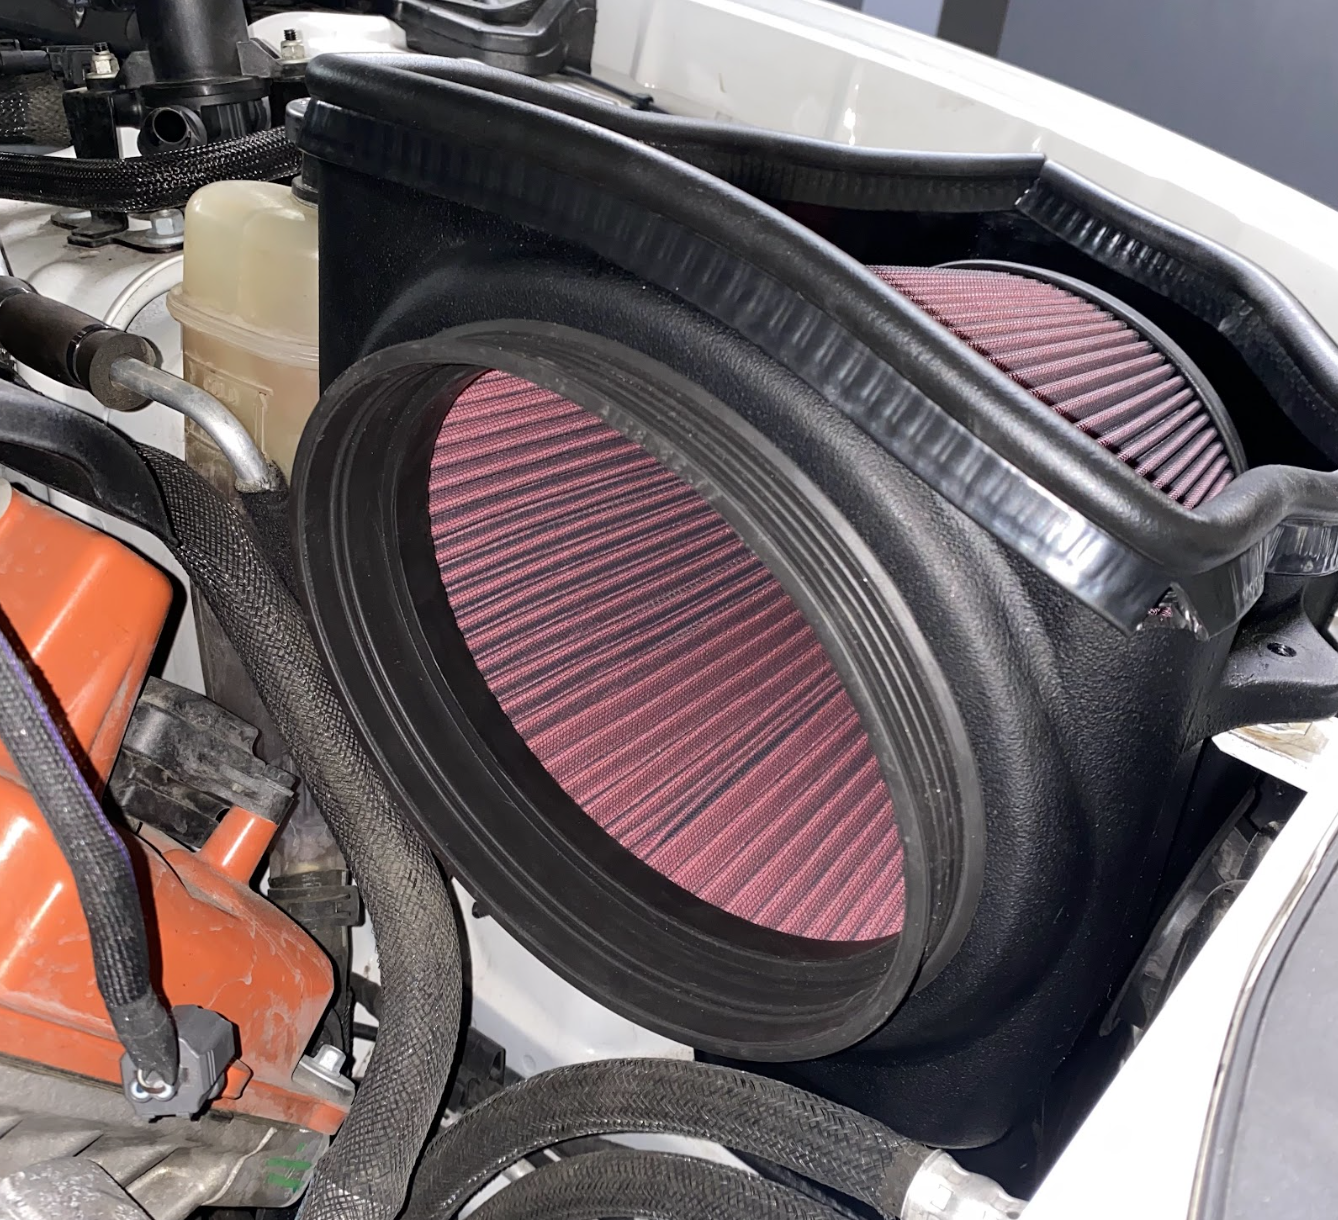
Put the JLT box into the vehicle, guiding the box to line up with the headlight inlet scoop location. You can pull the coolant tank away to give you more room to position the box.
Once the box is installed, adjust the headlight scoop if necessary and fully tighten the hose clamp, shown in the first image. For Chargers, install the supplied headlight scoop seal with the notch facing upwards, shown in the second image.
For Chargers, install the supplied headlight scoop seal with the notch facing upwards, shown in the image.
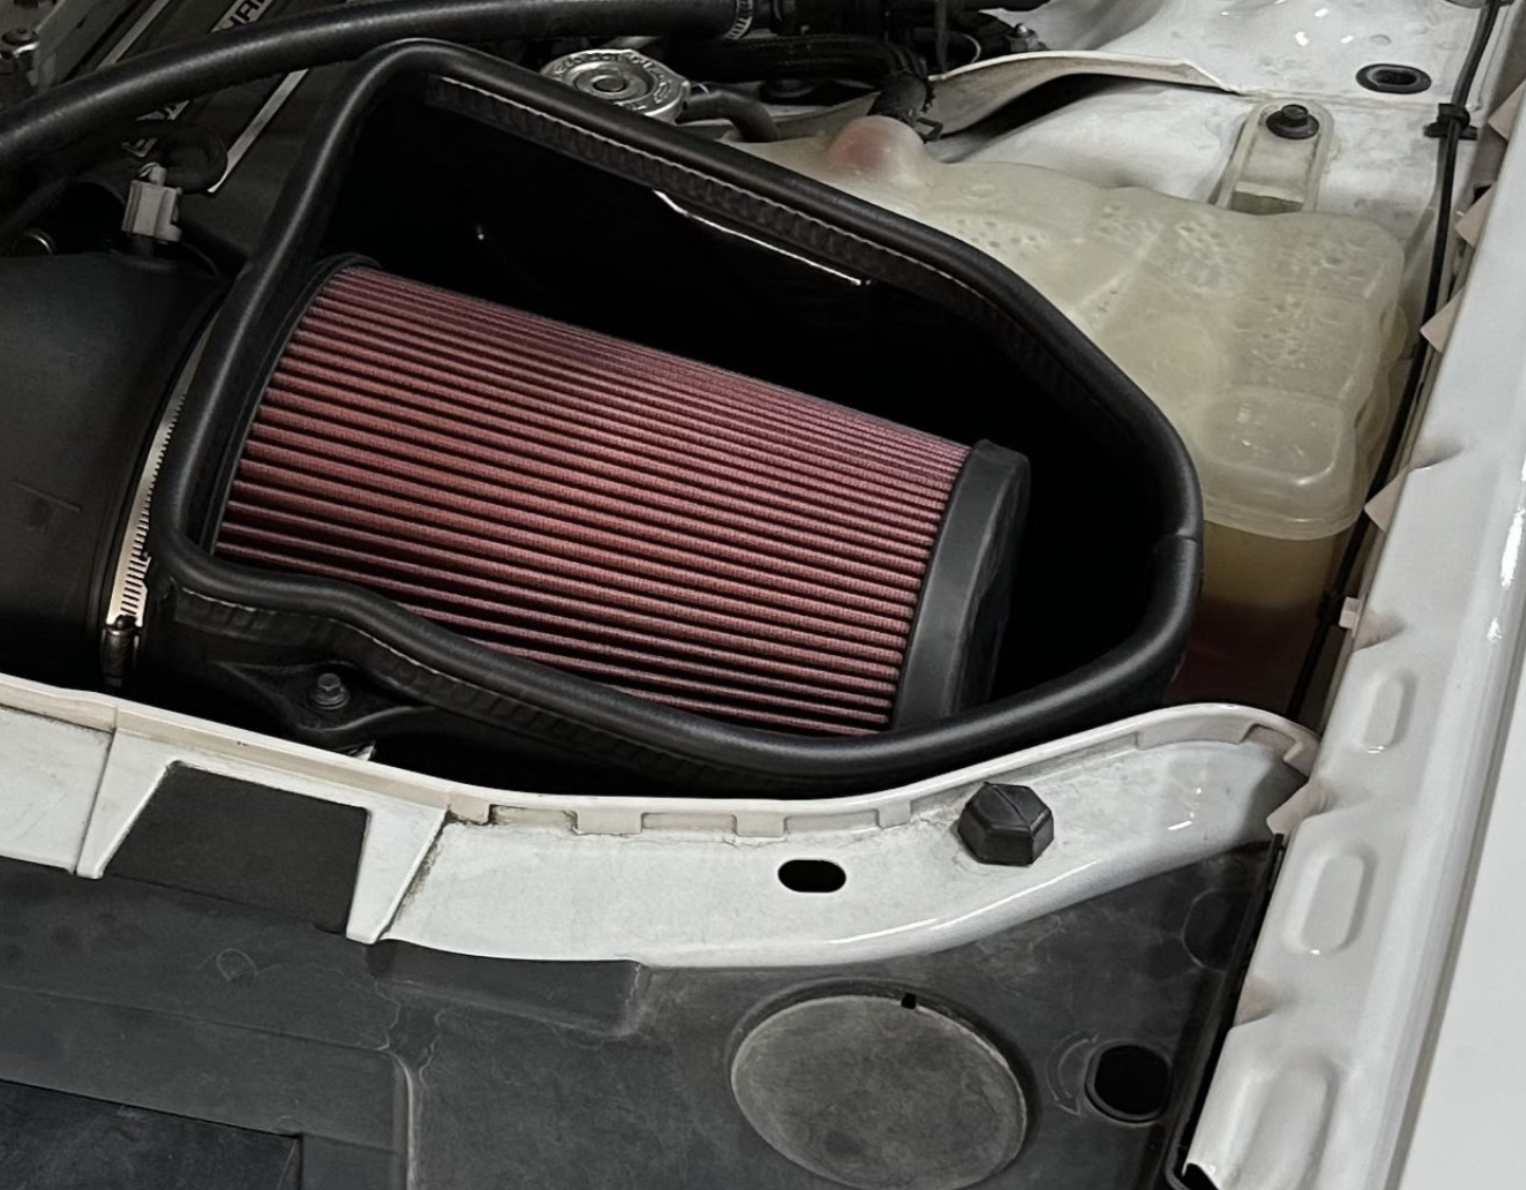
Put the filter into the box through the hole. It is recommended to fold the bottom of the flange up when inserting it, and then work around the rest of the flange to snap it in.
To prepare the tube to install it, put the filter hose clamp (#114) onto the tube and the smaller coupler onto the tube with the #72 hose clamp loose. If you are using the tube for the 108mm throttle body, use the larger coupler with the #80 hose clamp put loosely on the tube.
You may find it easier to not put the last hose clamp for the throttle body yet, instead putting it on after the tube is installed by fully disconnecting it then reconnecting it over the coupler on the throttle body. Stock throttle bodies use the #64 hose clamp, and after market throttle bodies use the #72 hose clamp.
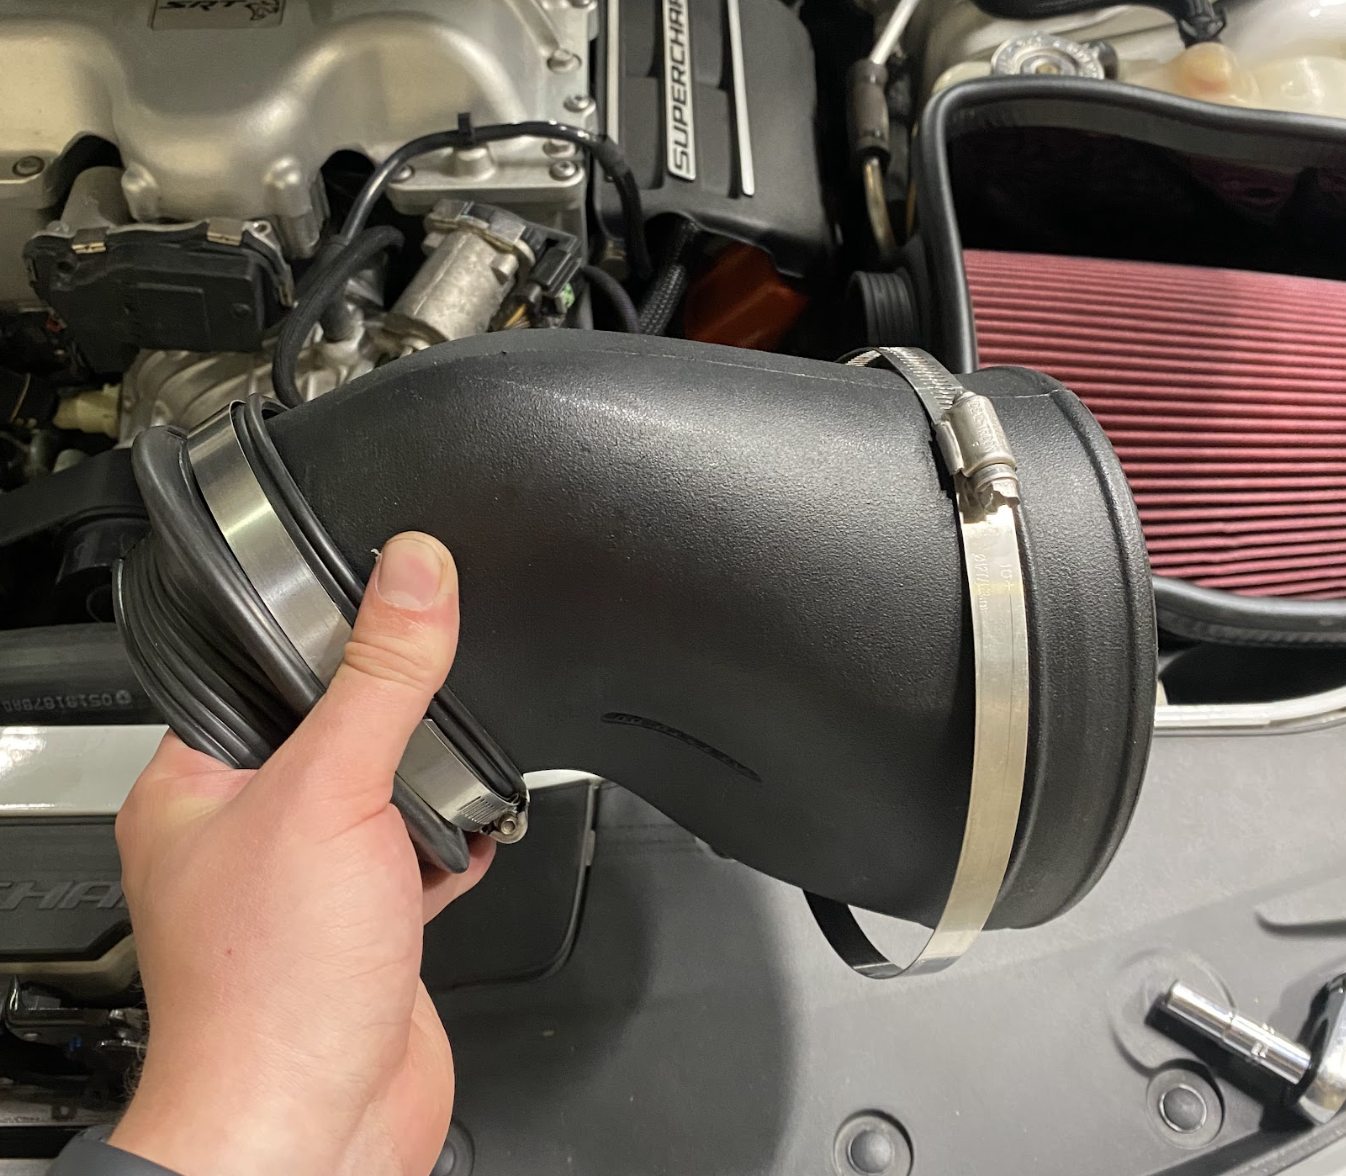
Push the coupler as far as you can onto the tube. Install the tube into the filter flange first, then the coupler on the throttle body, trying to avoid unsnapping the filter base. Adjust the filter snap if necessary.
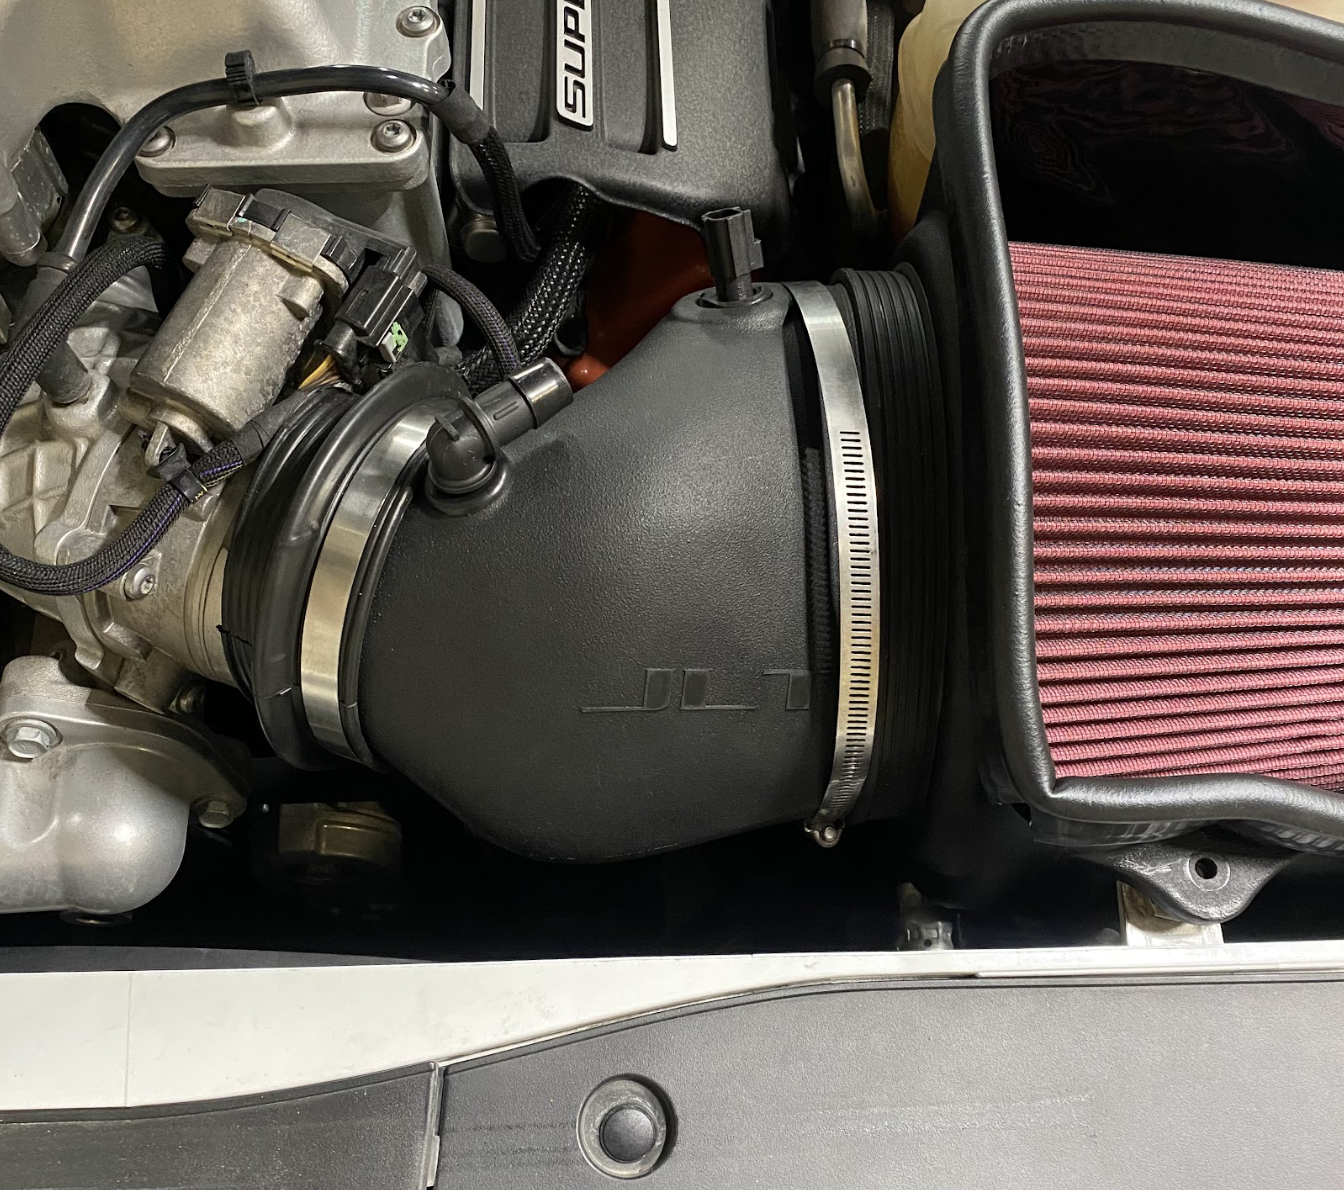
Adjust and tighten all 3 of the hose clamps on the tube, feeling to make sure the filter and the bead on the tube line up on the bottom.
Reinstall the stock screw at the front of the vehicle.
If you cut your factory line, install the supplied 5/8" PCV Hose onto the open barb on the vehicle, making sure the hose is the correct length to the barb on the tube (cut if necessary). Put both small hose clamps onto the hose, afterwards connecting the 90 degree barb fitting to the other end of the hose. Fully tighten the hose clamps.
If you did not cut the factory line and reused the stock fitting in step 2, snap the male end of the fitting onto the female end of the fitting. It should lock.
Reconnect the IAT Sensor to the JLT Tube.
Reinstall the trim piece by putting the end on the outside of the vehicle in with the prongs going into their respective holes first, then putting the end at the middle of the vehicle in.
Inspect your installation. Make sure the kit is properly positioned and all fasteners and hose clamps are secured. Keep all stock parts in the event you would ever need to reinstall the stock intake assembly. If you are an installer, give the owner the QR code for the Installation Instructions so that he/she is aware of the Maintenance and Operation procedures are given at the beginning of the Instructions. The installation is now complete.