Step 1:
Start by disconnecting the negative terminal from your battery.
Kit may not fit with the following Aftermarket Parts installed:
Body Lift or Lowering Kit
Custom Hood
Aftermarket Turbocharger and/or Throttle Body Spacer
.png?v=1757091155861)
Start by disconnecting the negative terminal from your battery.
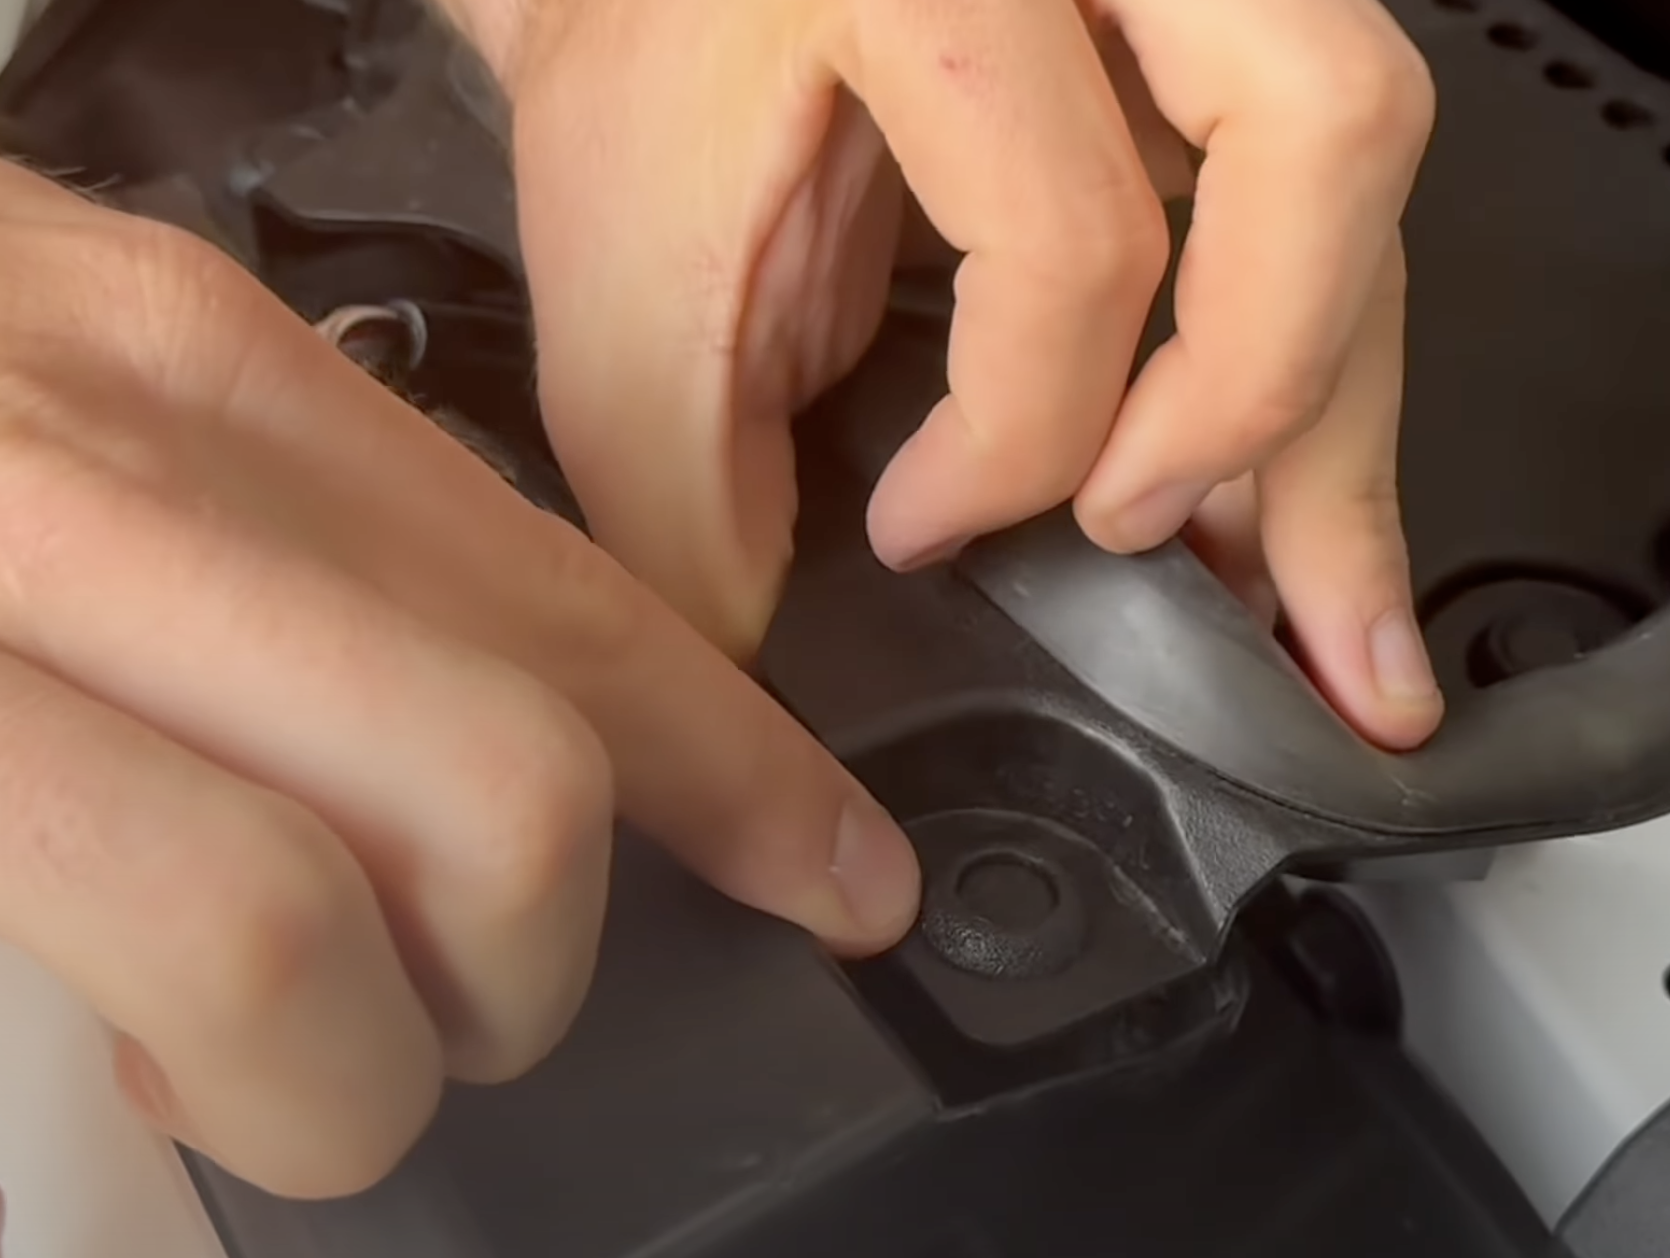
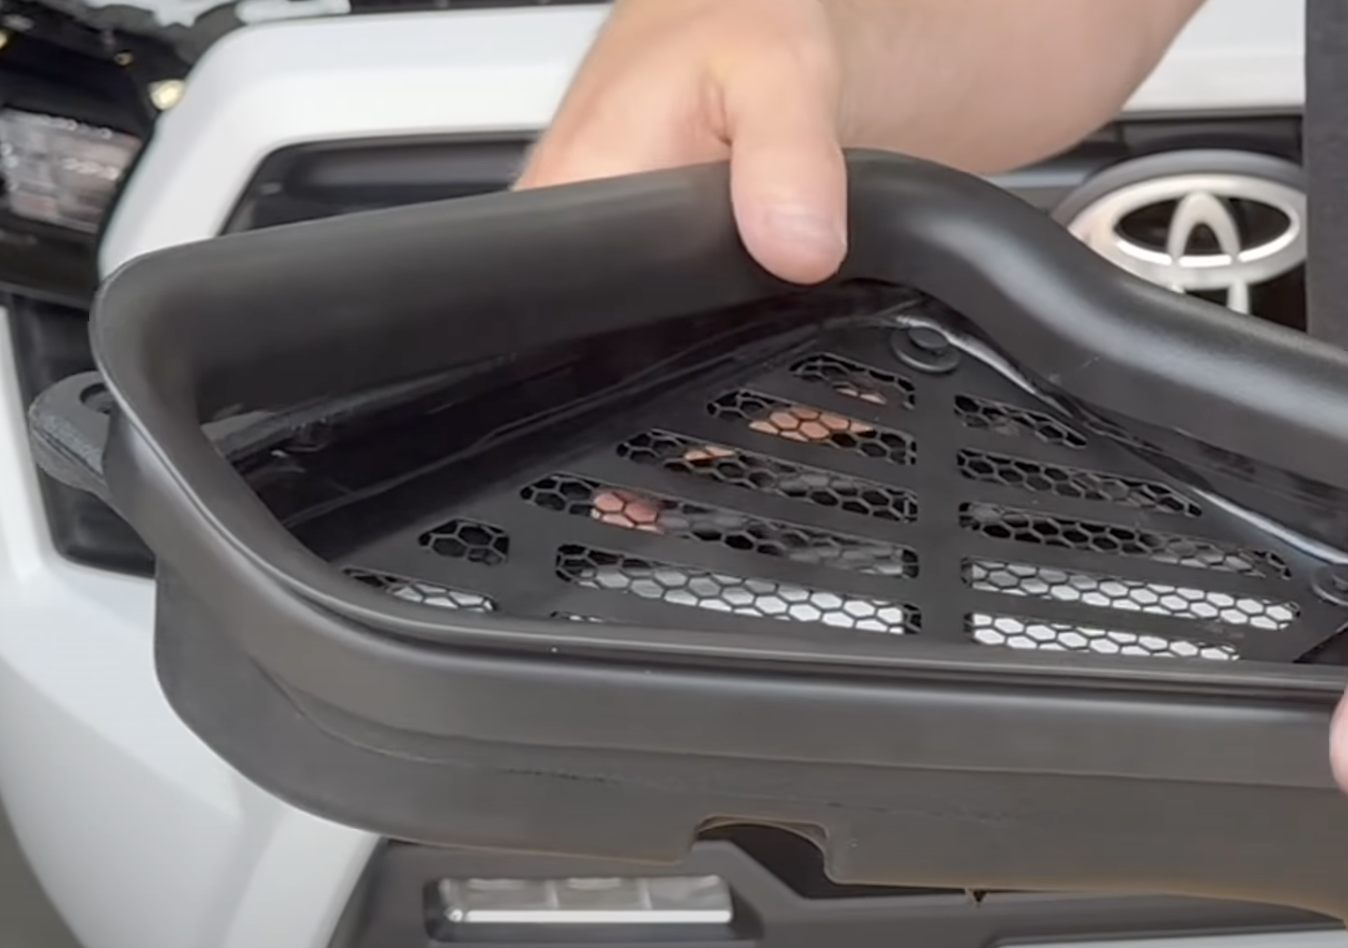
Remove the 4 grommets holding the front air scoop. Simply push down on the grommets for them to unclip.
Once done, go ahead and remove the scoop.
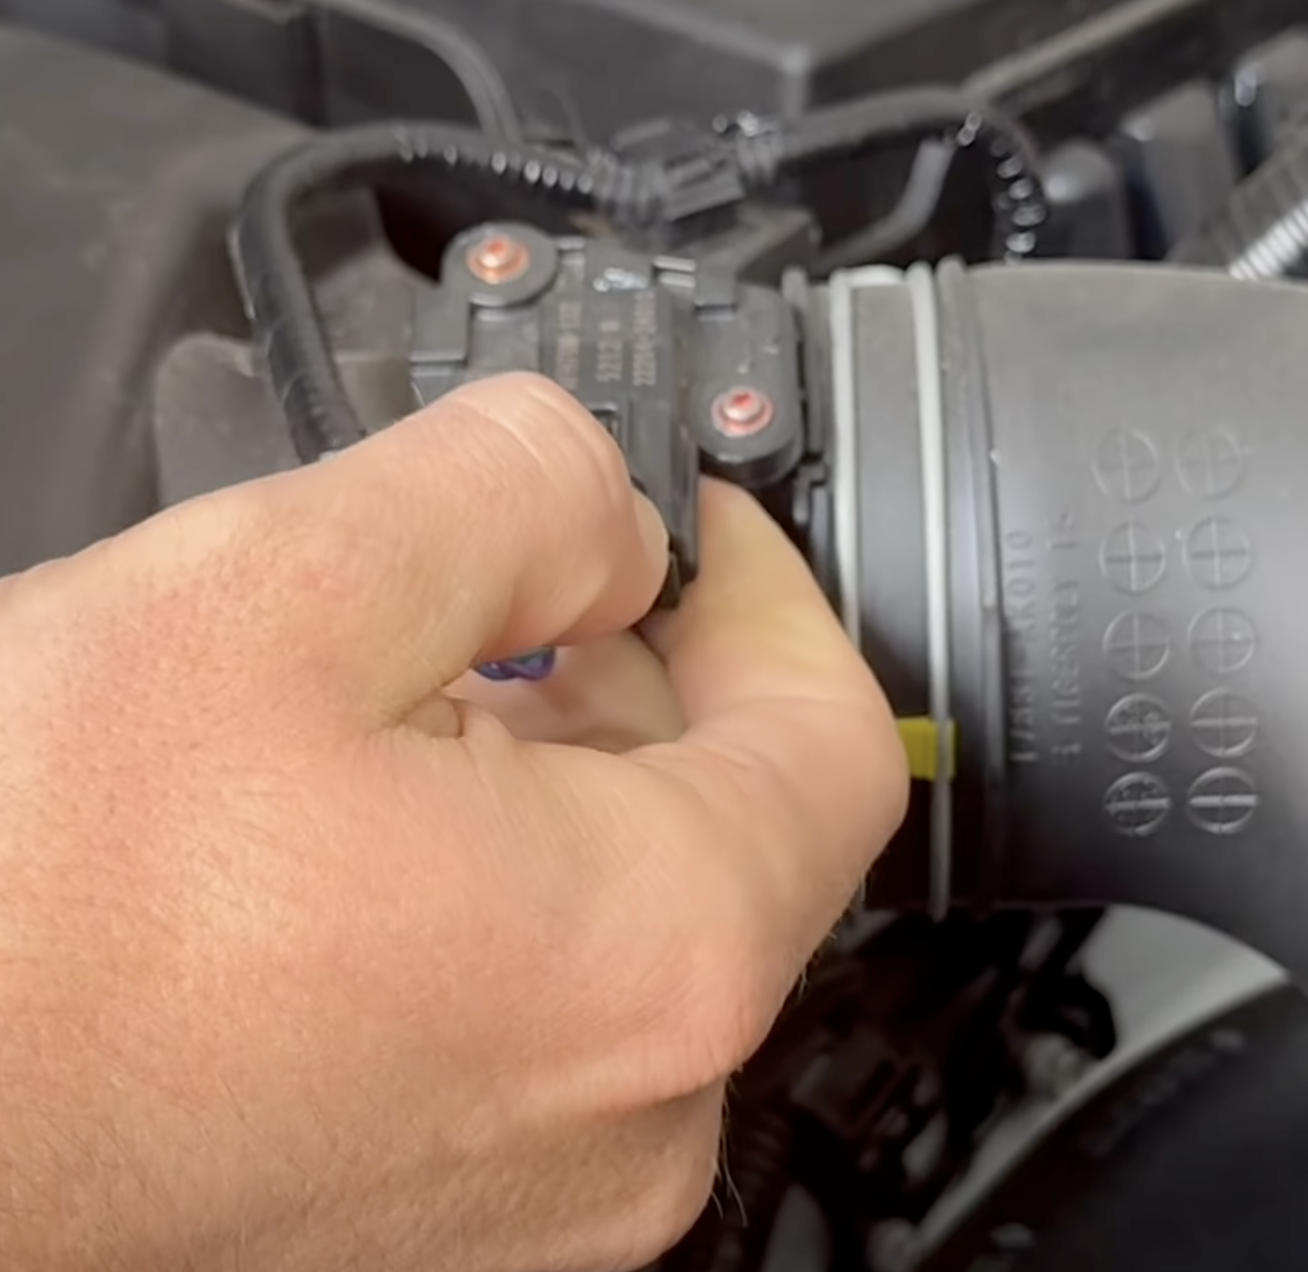
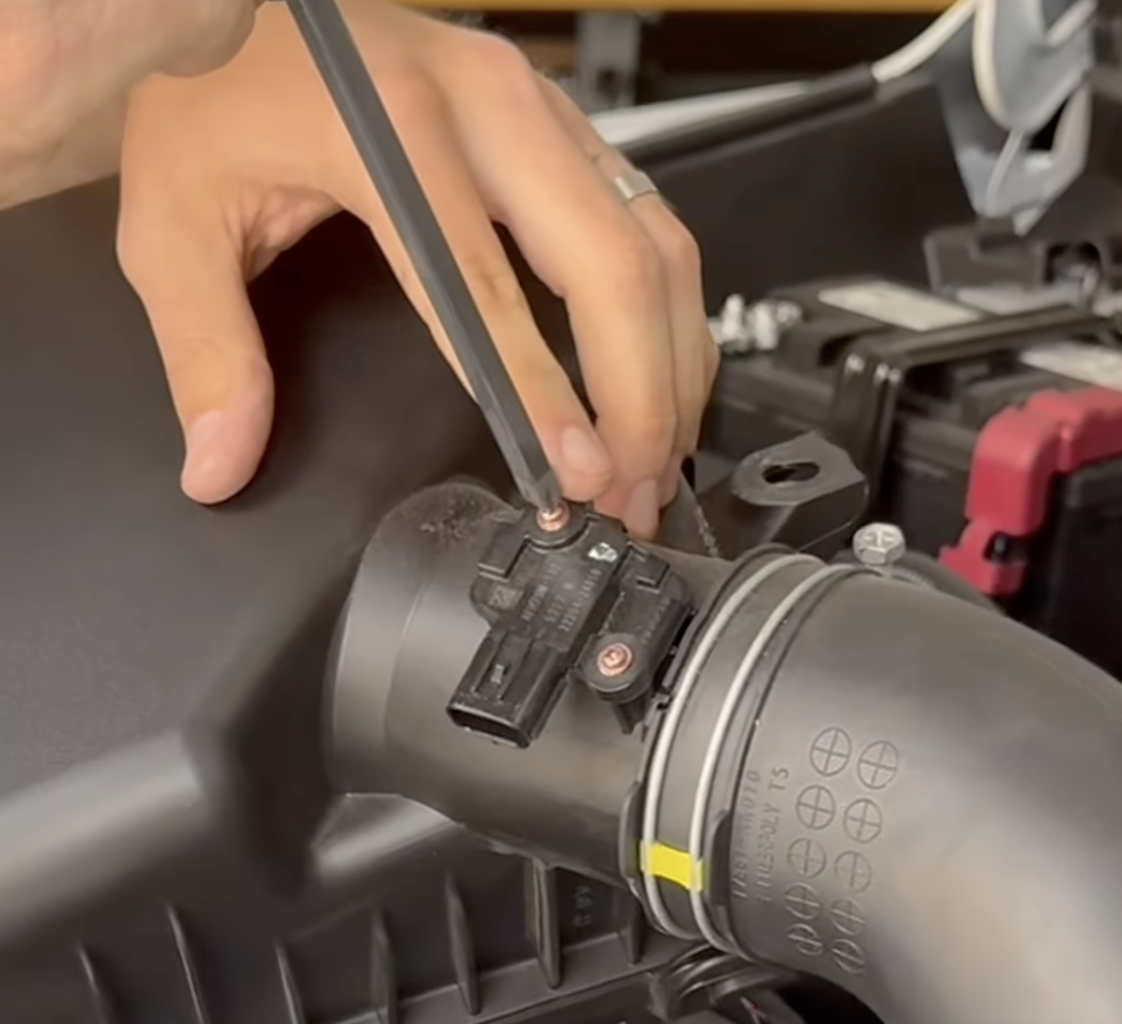
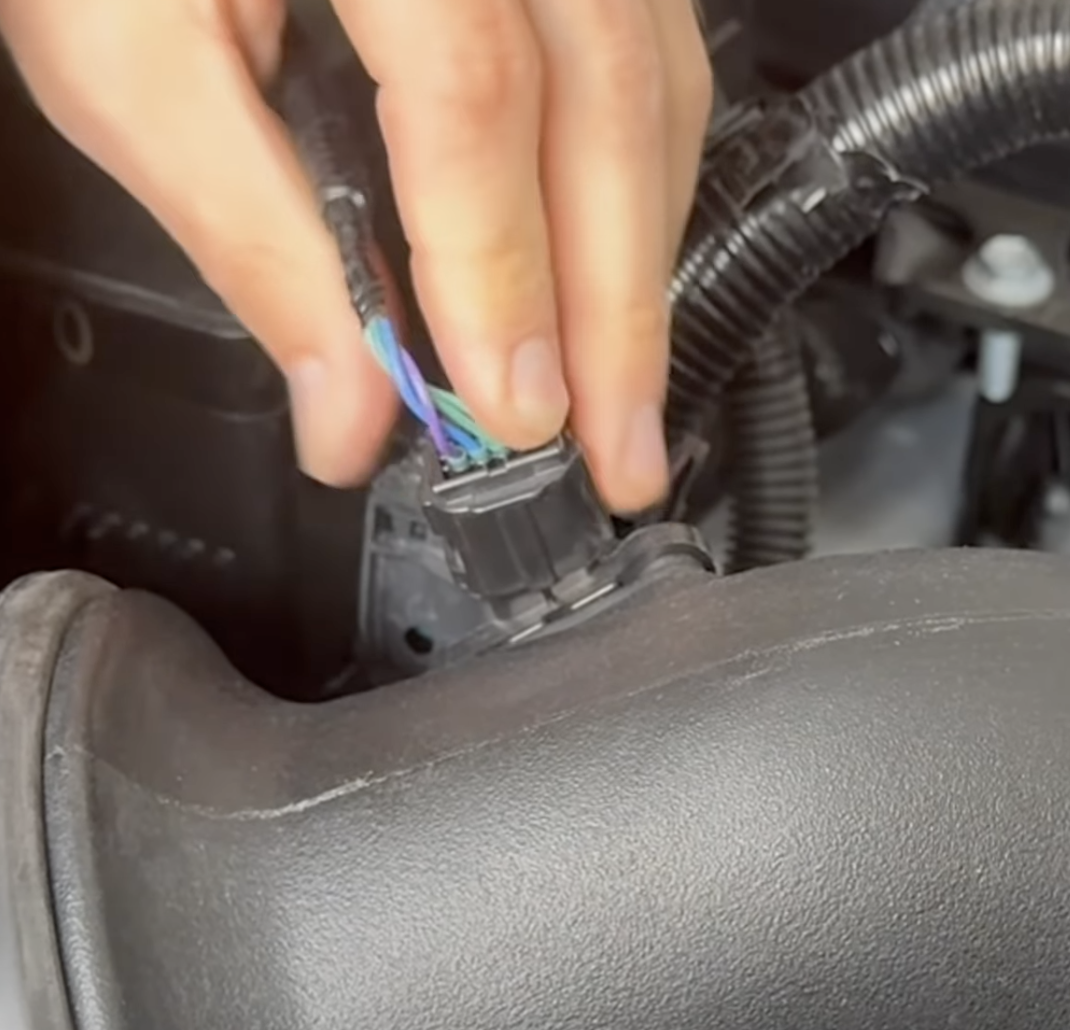
Disconnect the MAF Sensor.
Remove the clip holding the MAF Sensor harness to the air box.
We recommend using a Body Panel Removal Tool to do this.
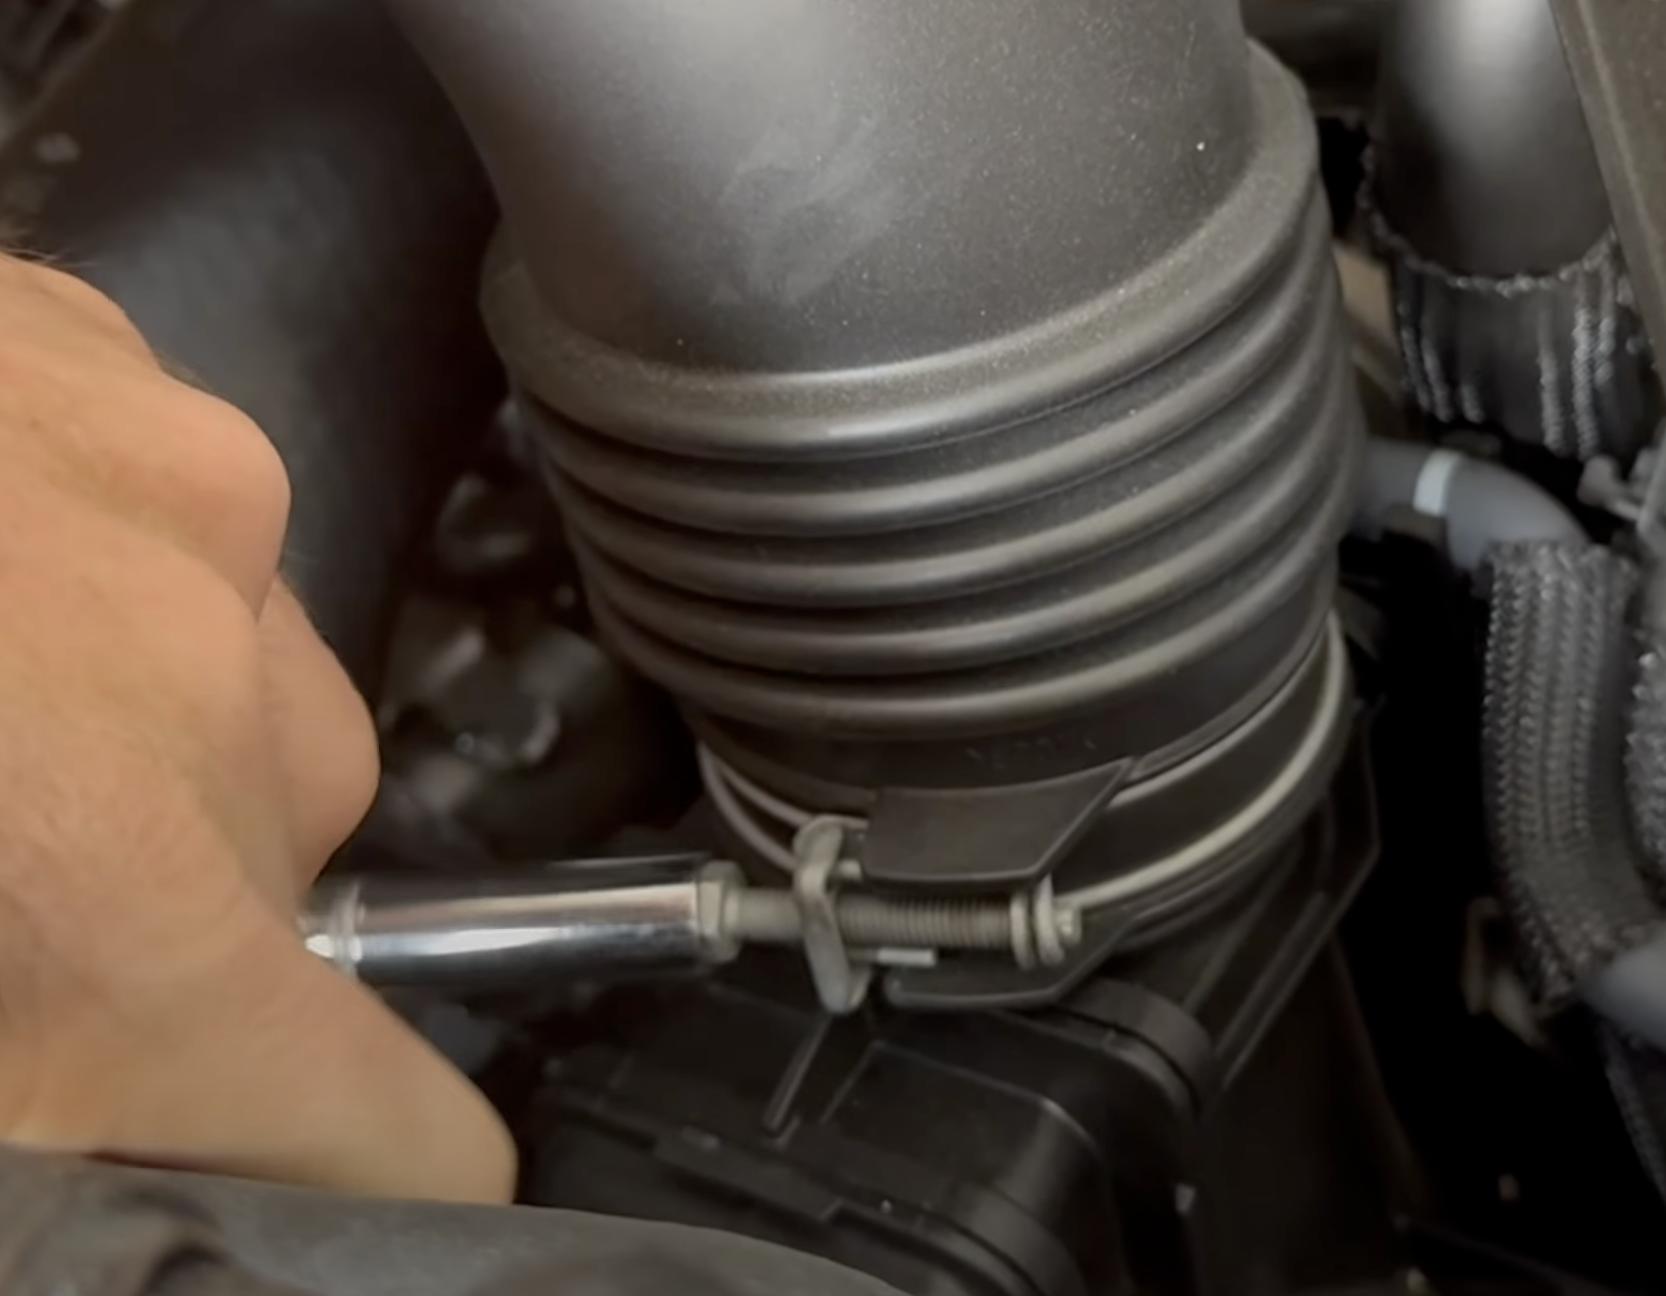
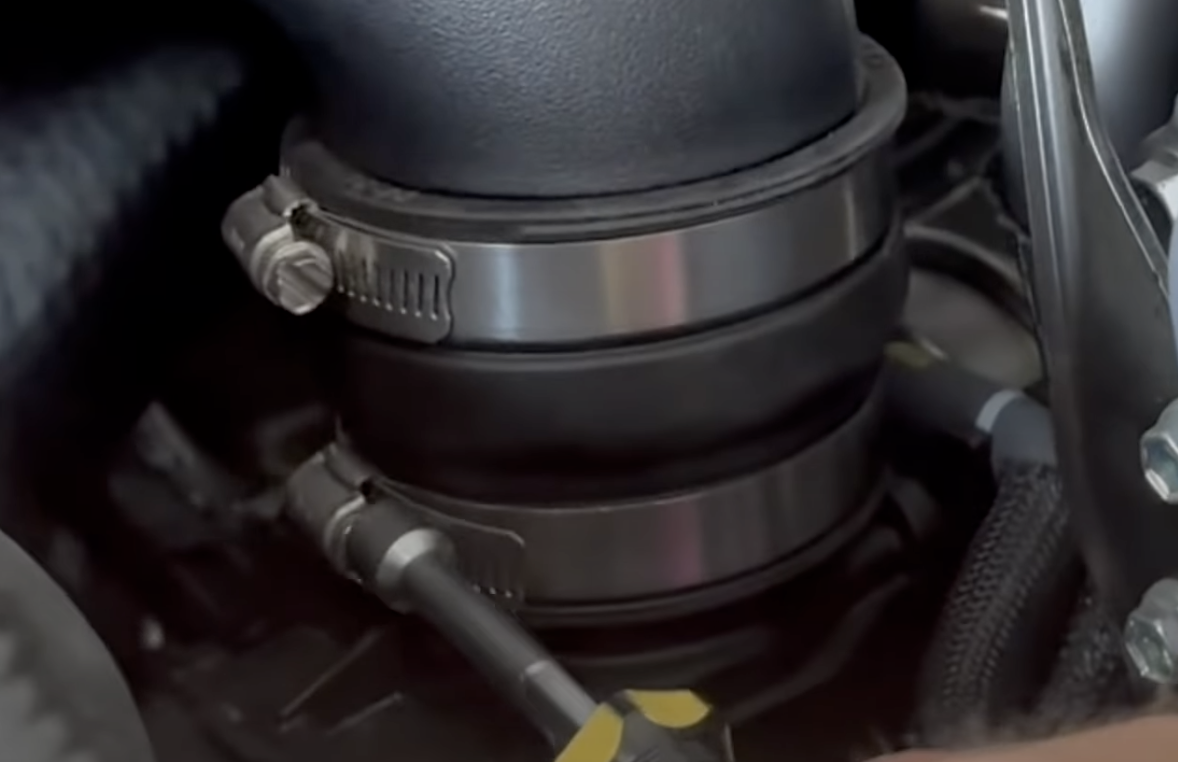
Loosen the lower hose clamp on the stock intake tube. You will need a 10mm socket to do this.
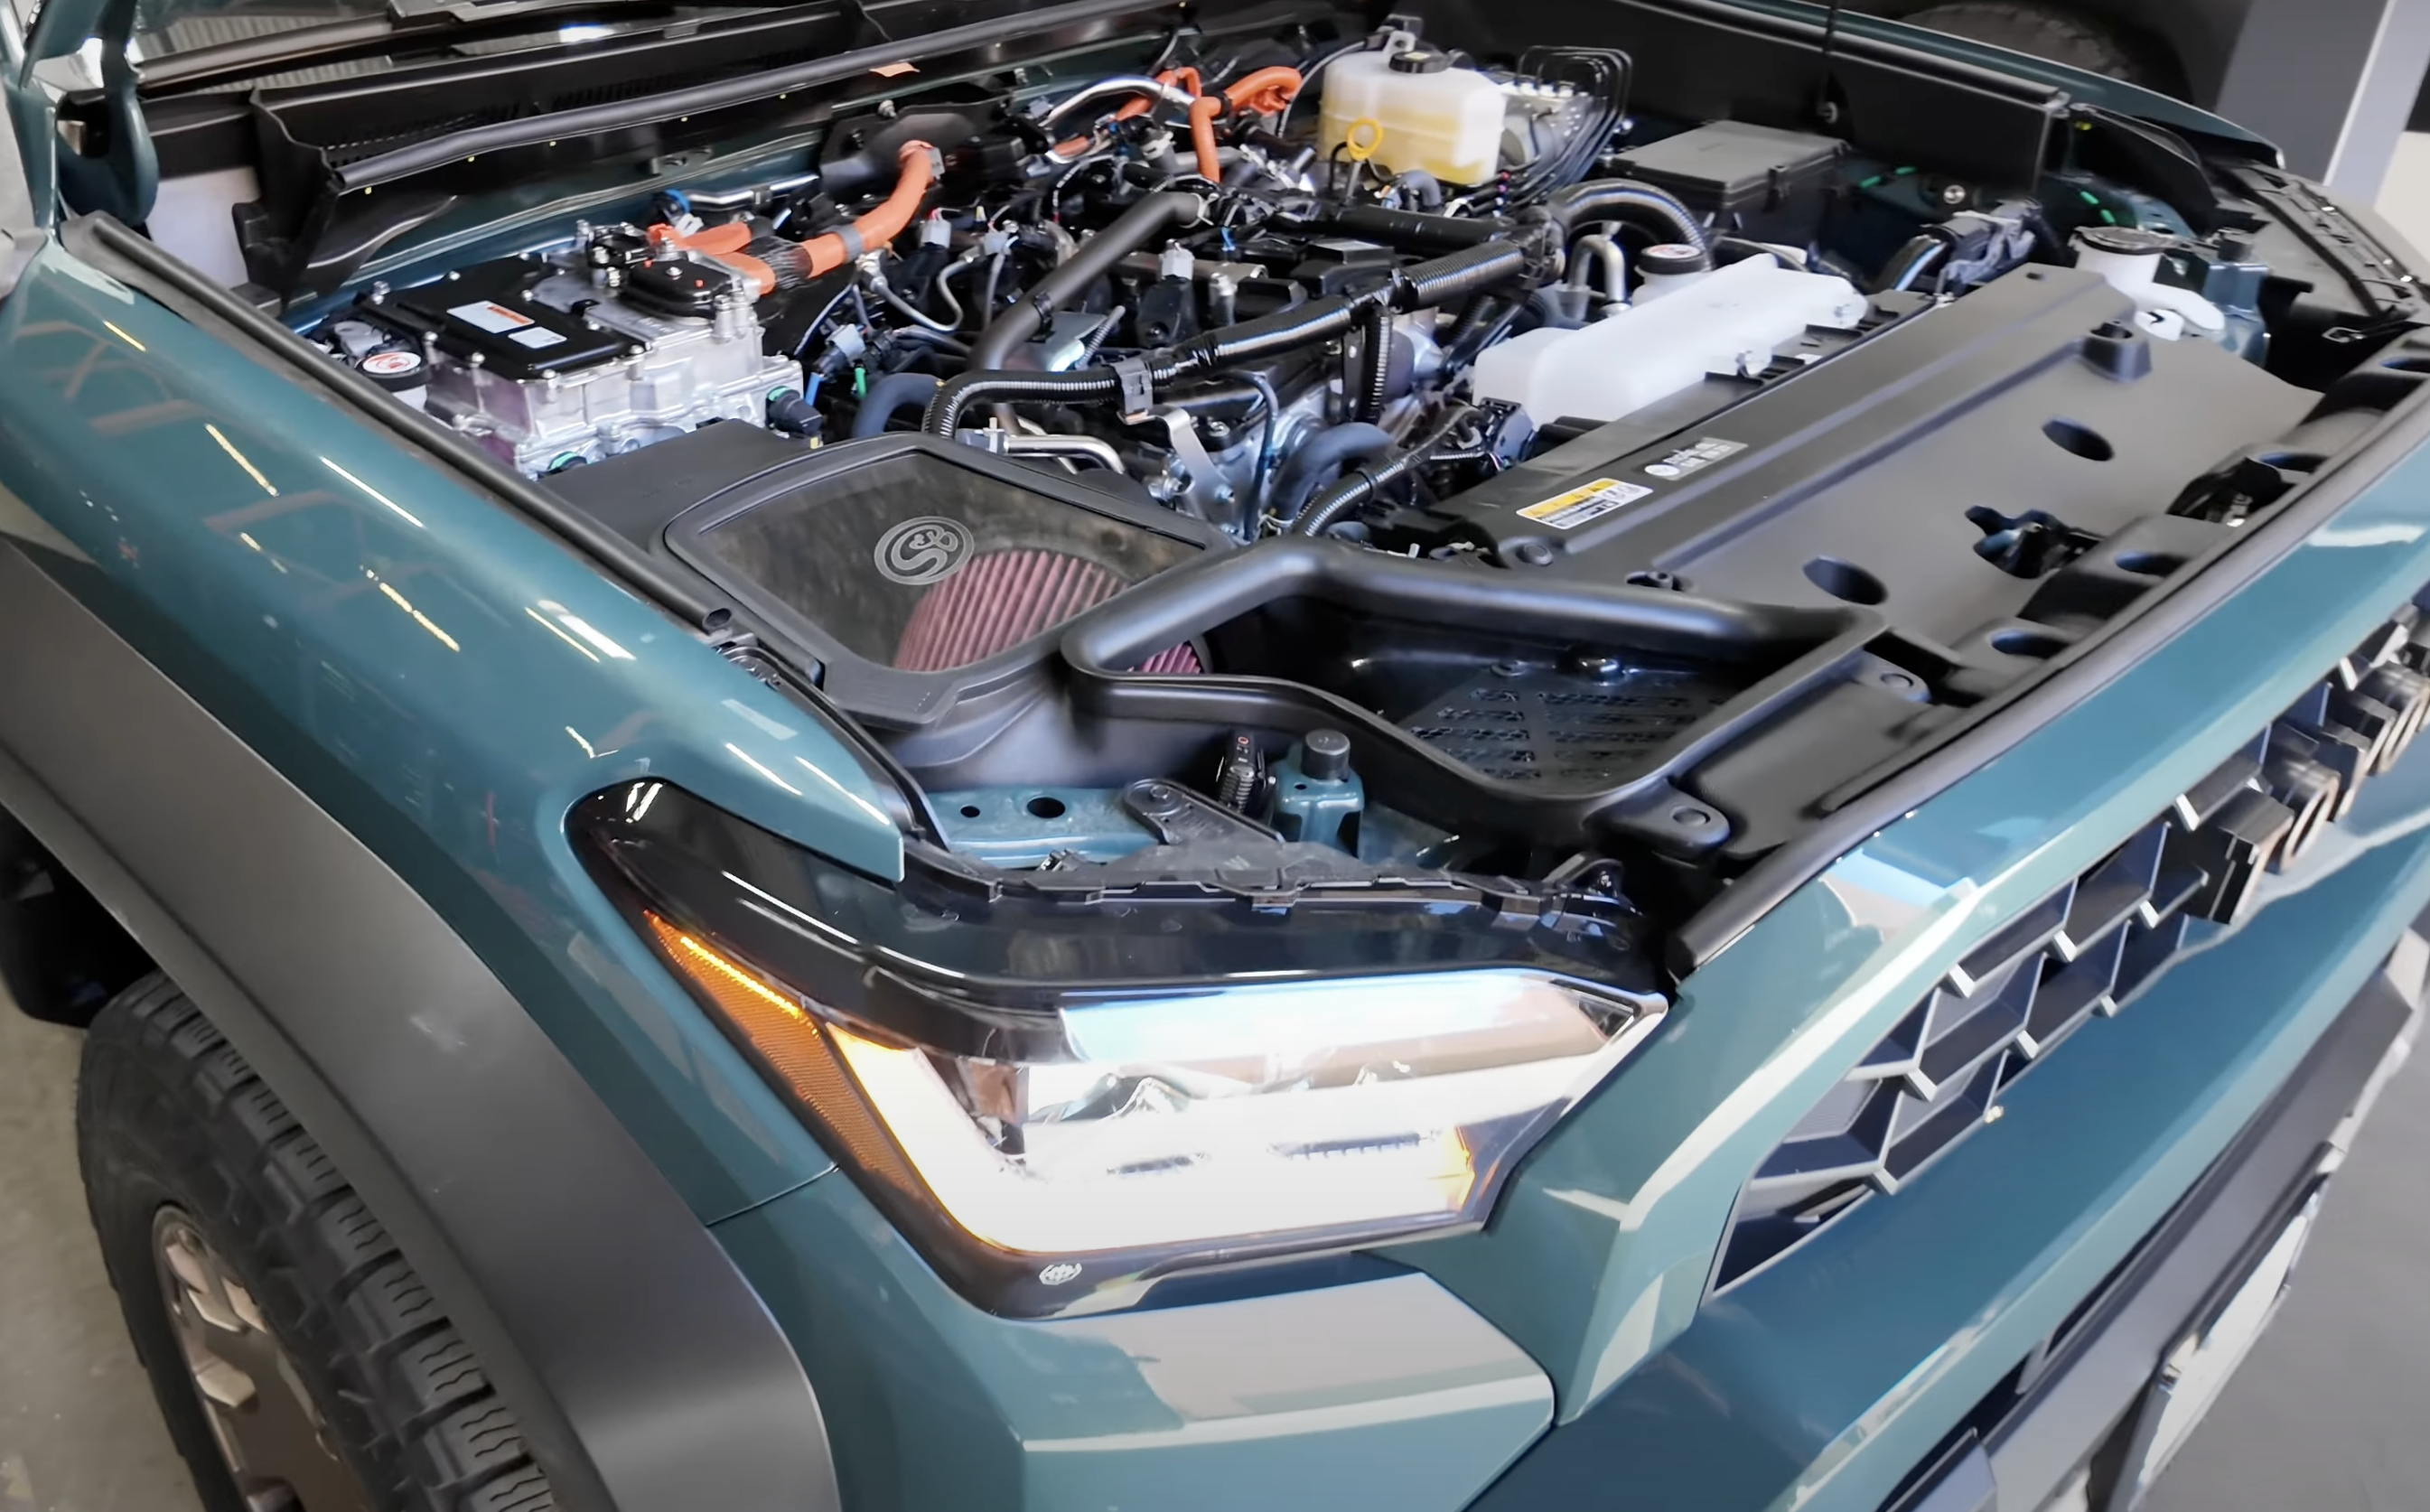
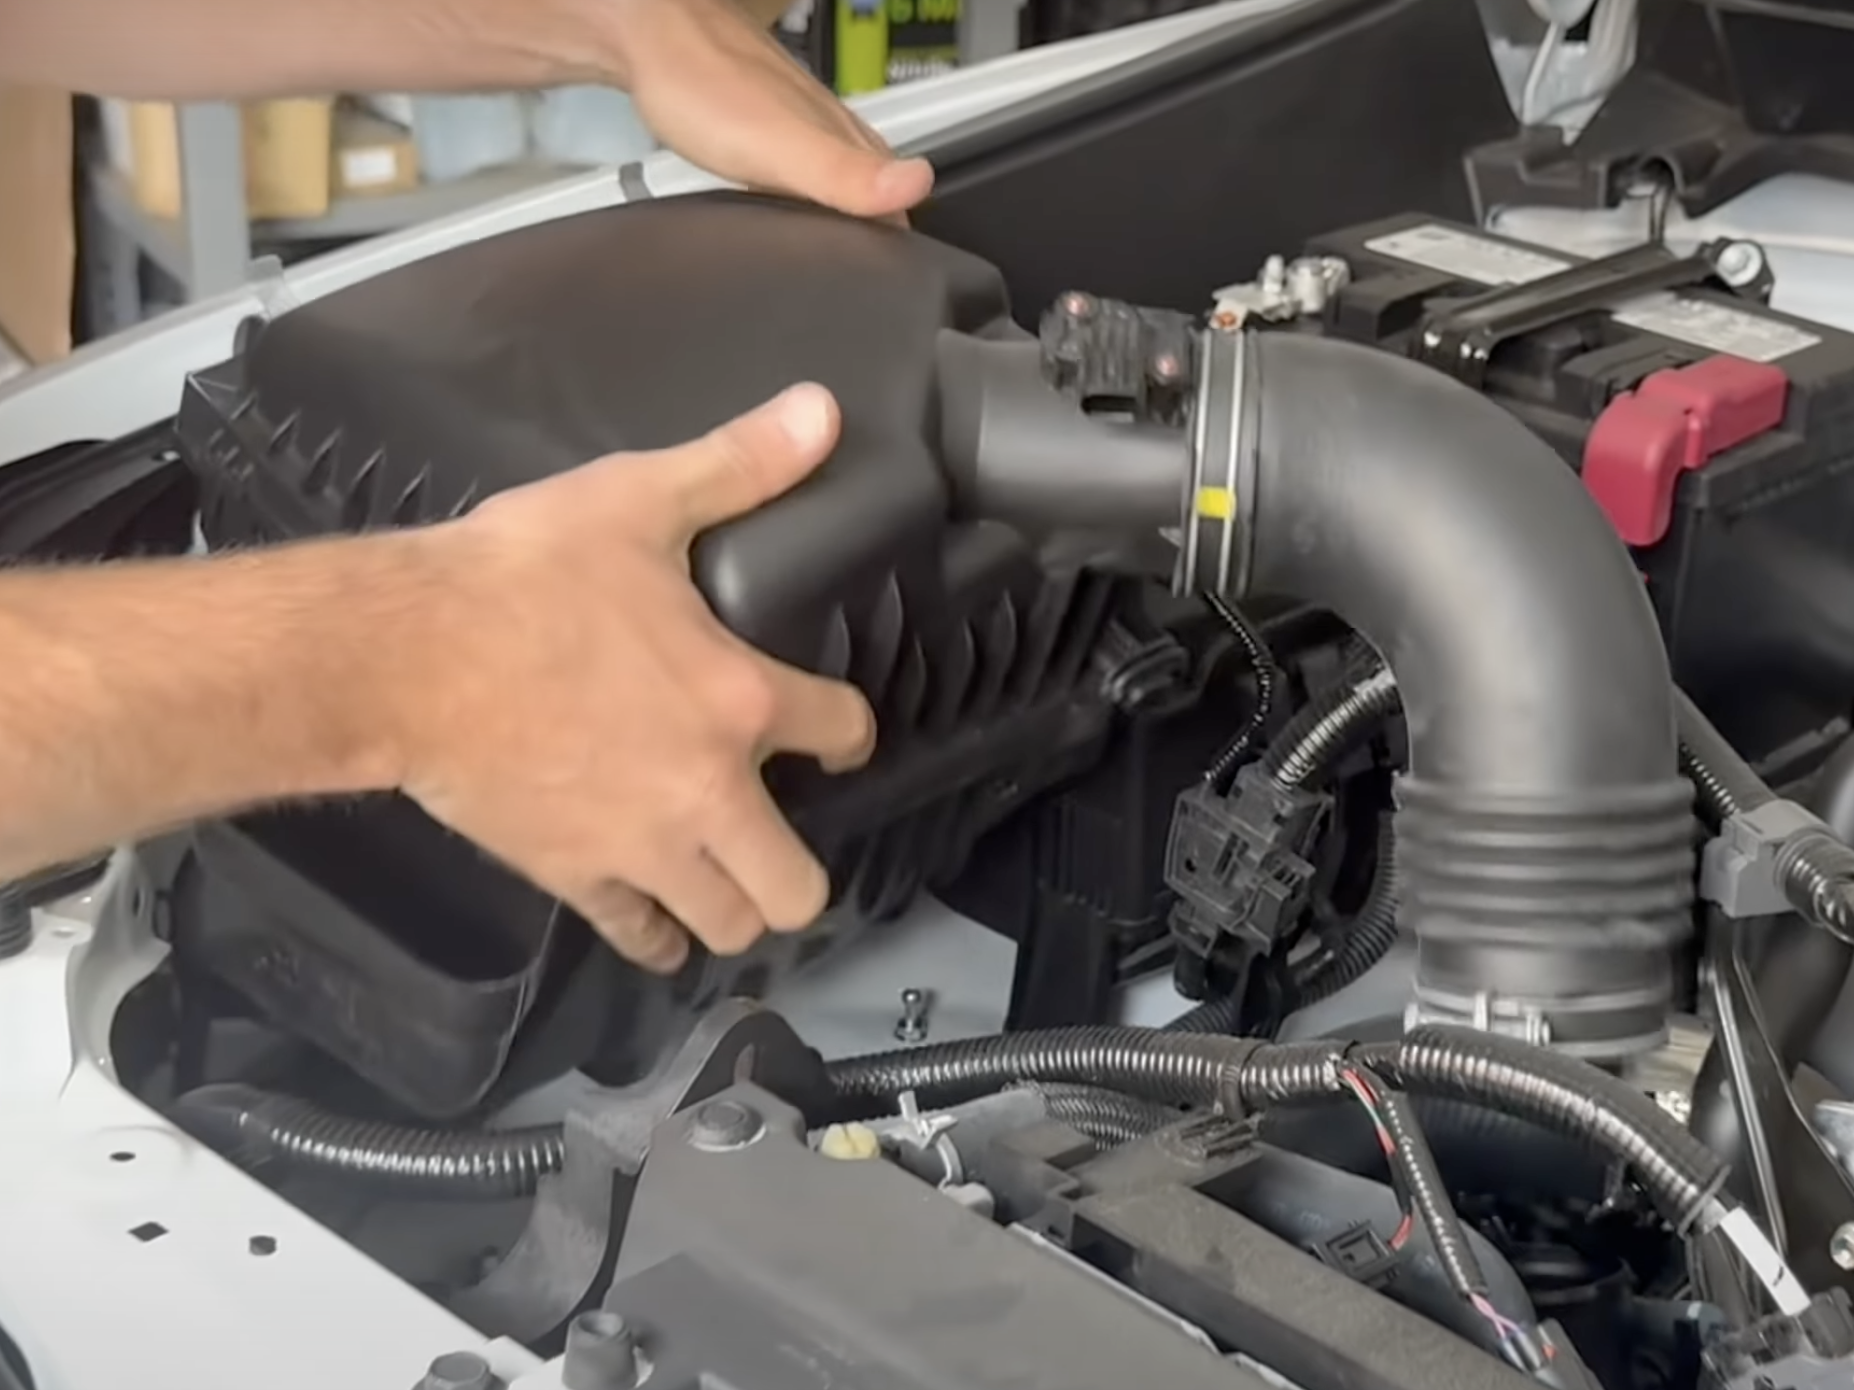
Remove the stock air intake assembly from the vehicle.
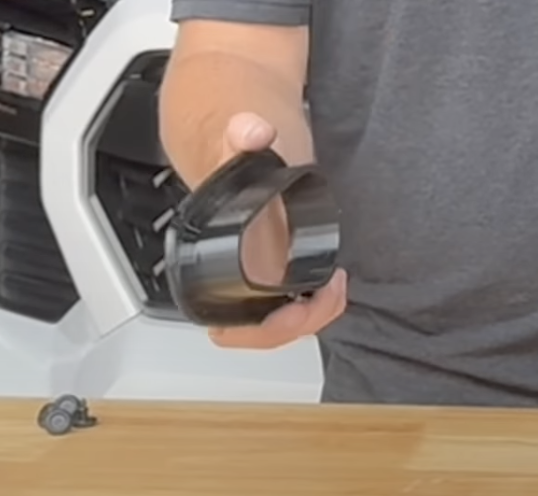
Remove the MAF Sensor from the stock air intake.
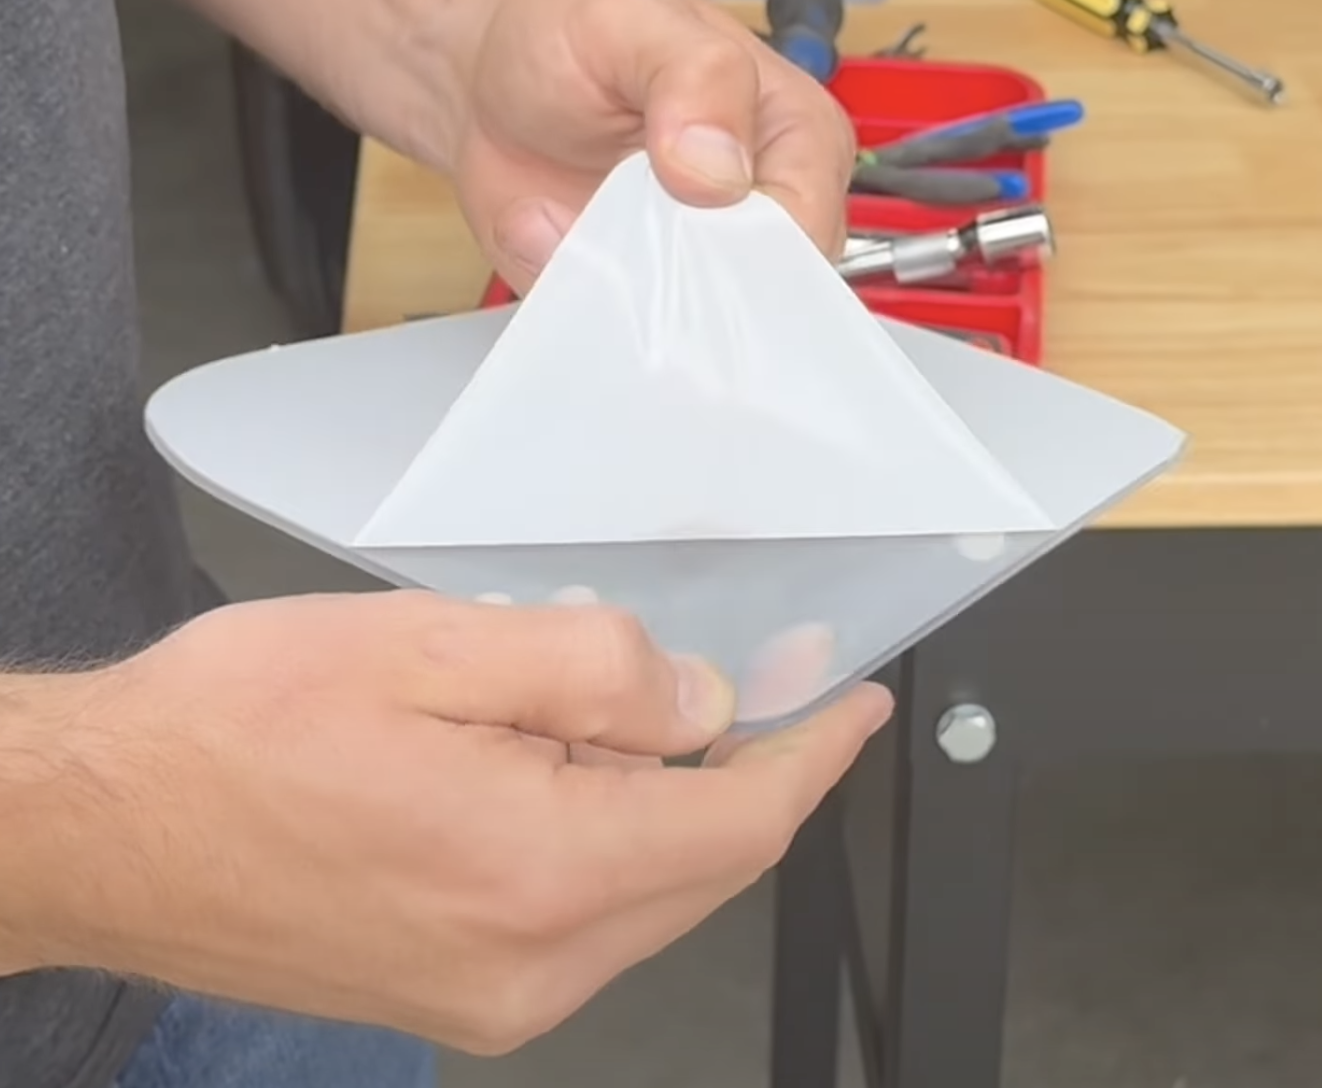
Begin putting together your S&B Air Intake by installing the Front Scoop screen.

Install the S&B Air Filter into the air box. Once in, go ahead and pull the filter through to where the filter flange is showing (as seen in the picture).

Install the front scoop molding onto the air box assembly.
Flip the box over and install the three grommets on to the bottom of the air box.

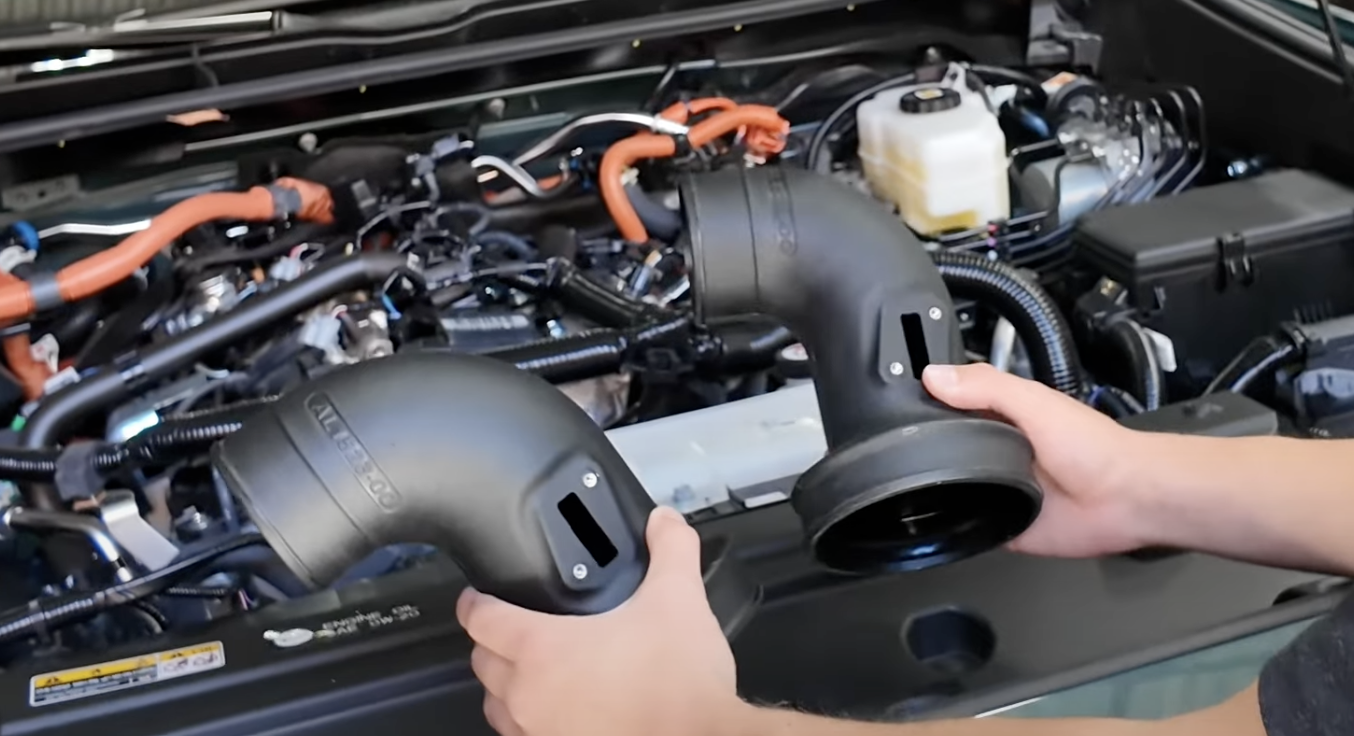
This Specific Cold Air Intake Kit comes with (2) Intake Tubes based on specific vehicle trims.
AL1523-00
TRD Pro or TrailHunter
AL1524-00
SR, SR5, TRD PreRunner, TRD Sport, TRD Off-Road, Limited
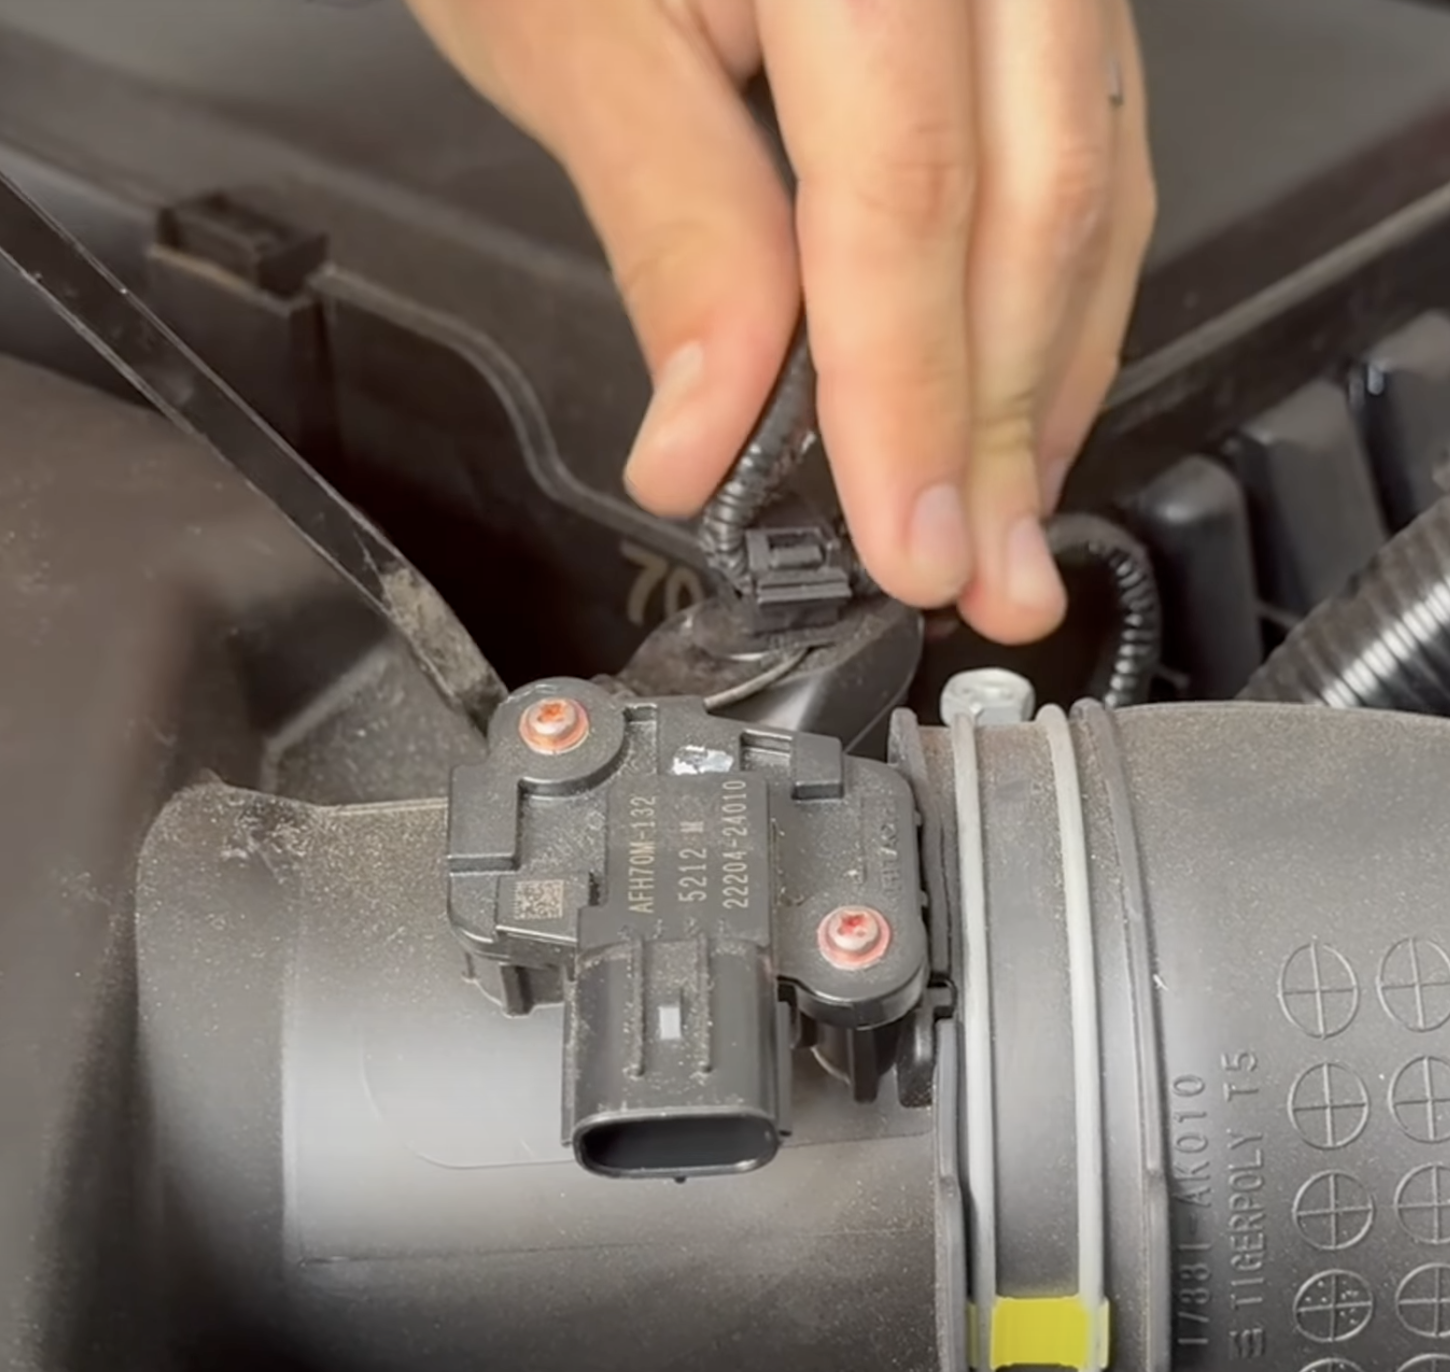
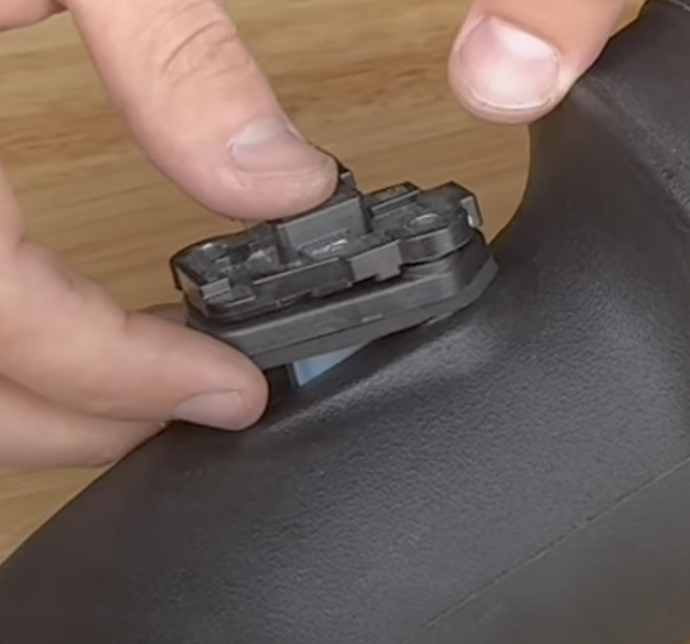
Re-install the MAF Sensor using the included spacer and gasket.
*In terms of order, its MAF Sensor, Spacer, then the Gasket.
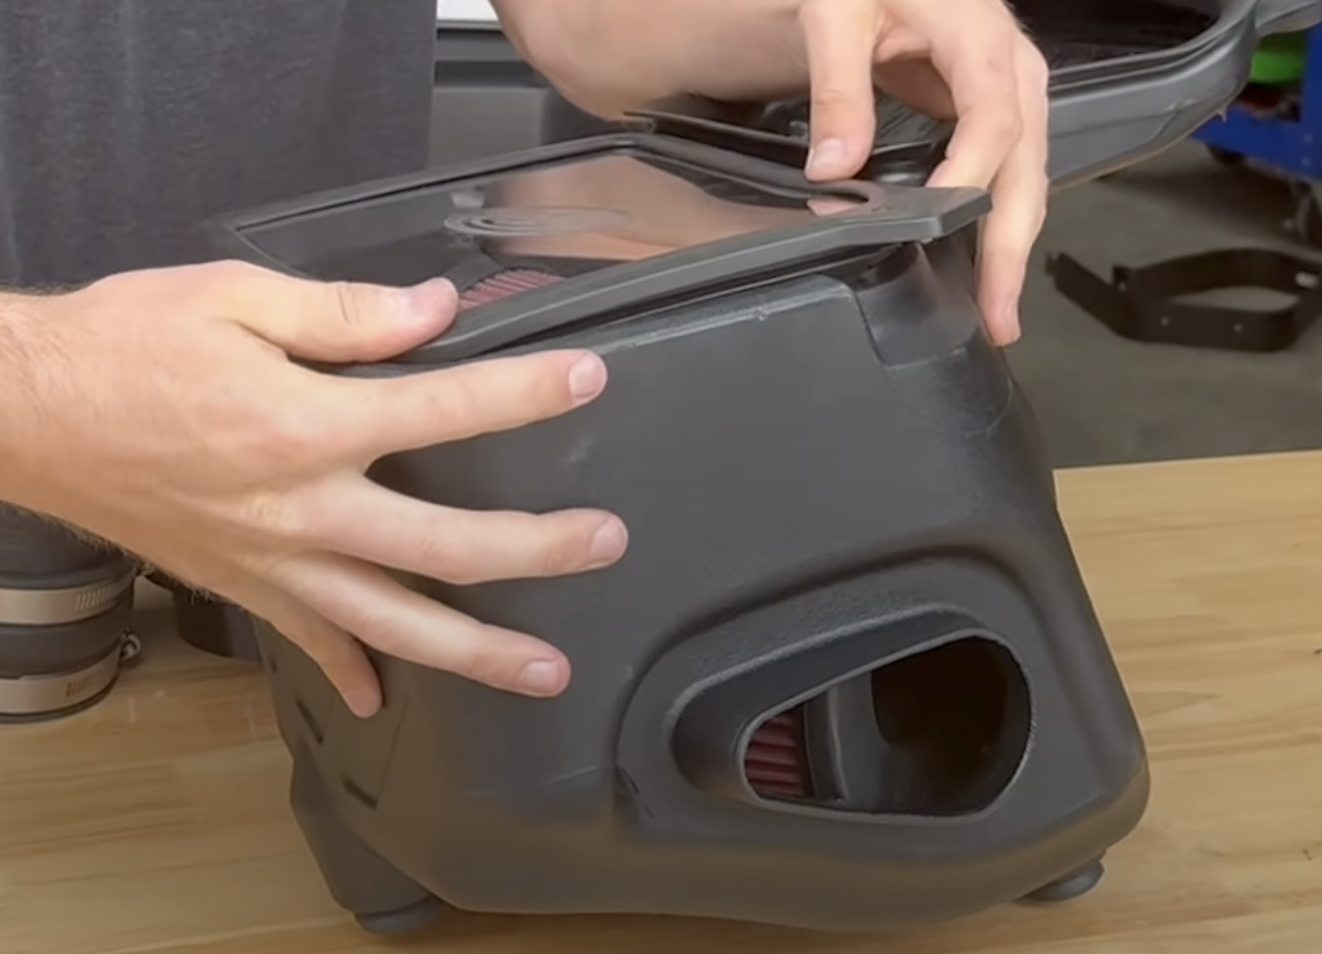
Remove the protective cover from the S&B Clear Lid.
Install the Clear Lid into the Snap-In air box molding.
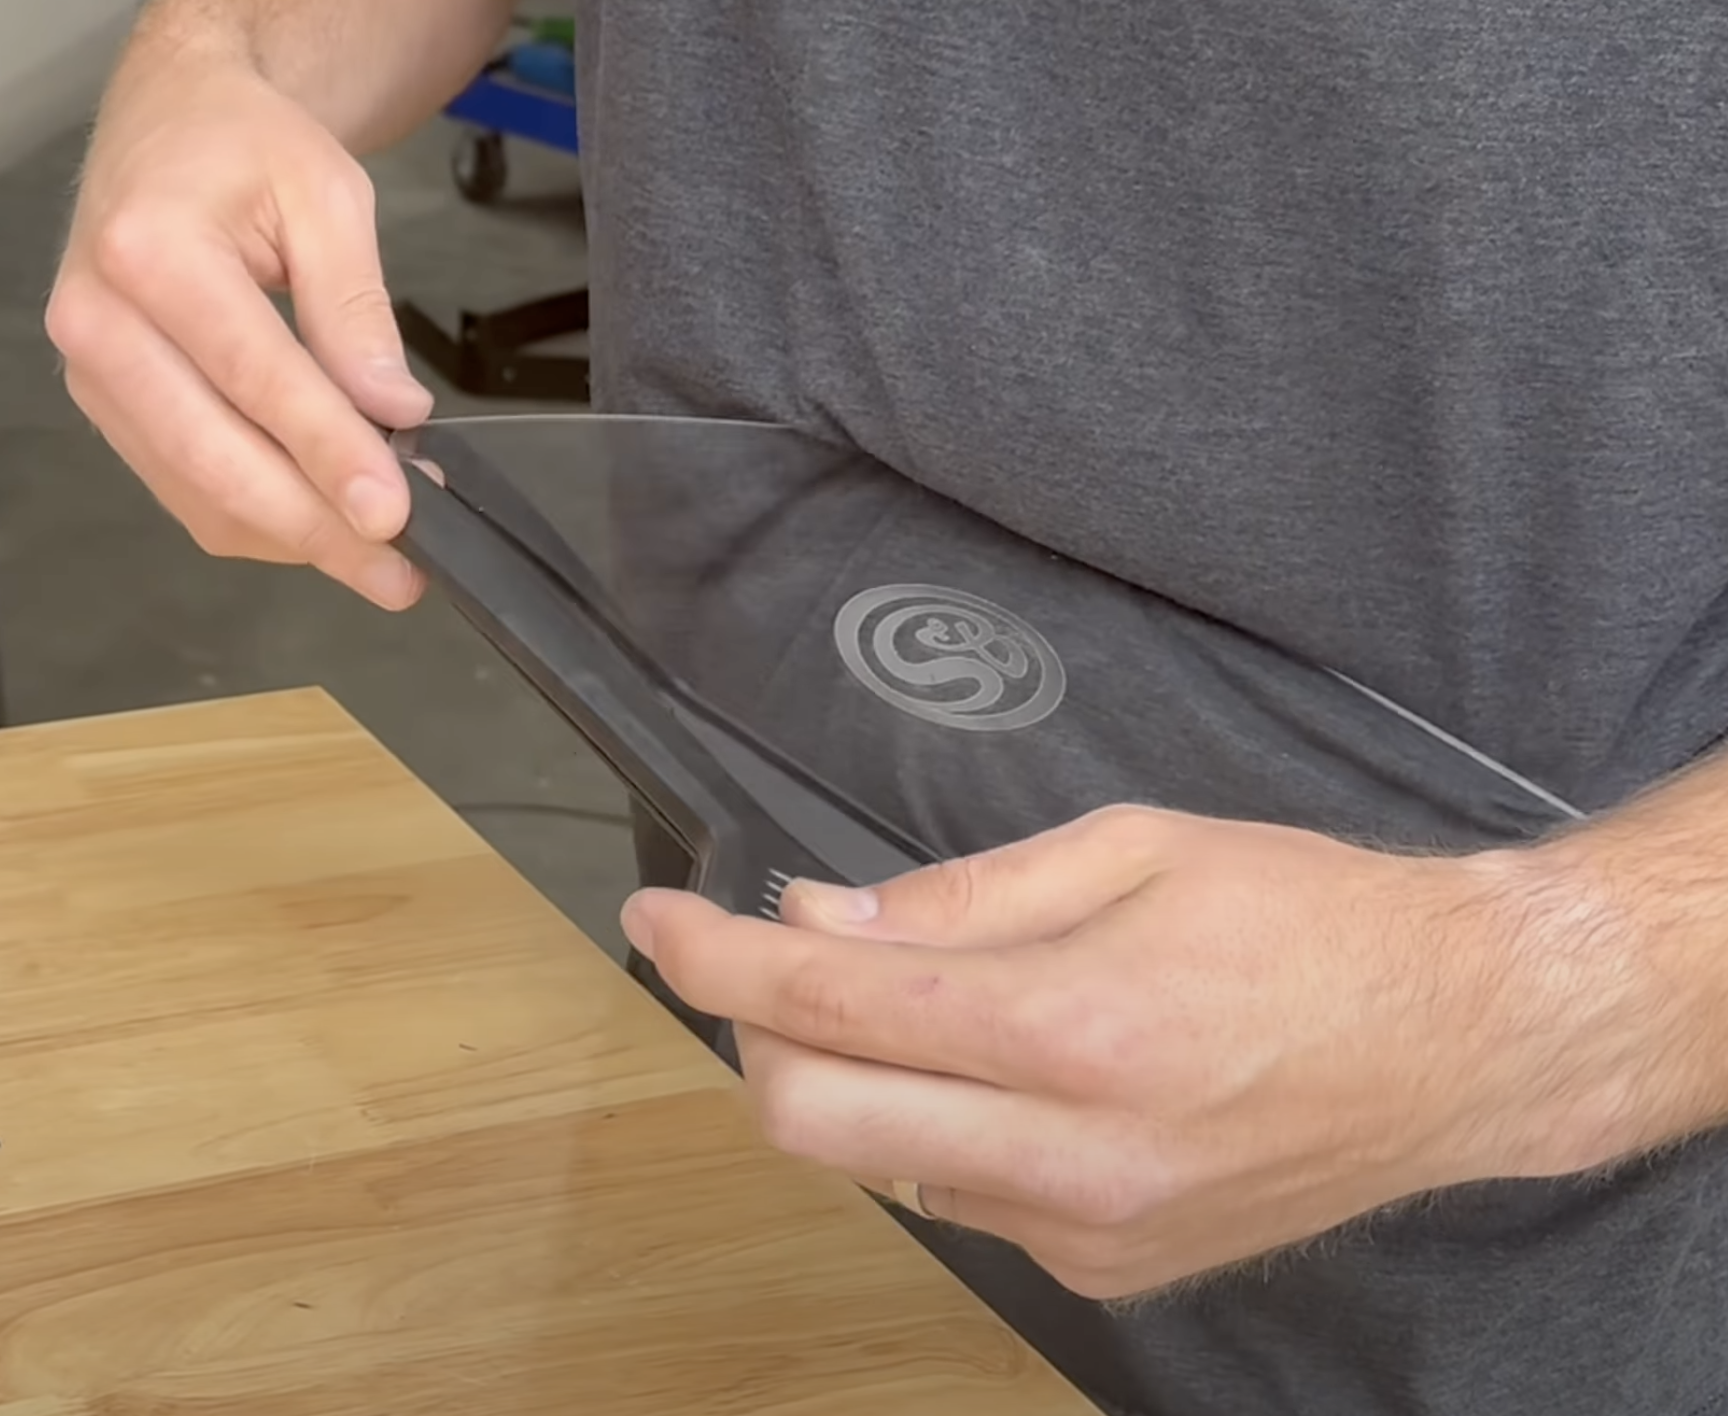
Install the Clear Lid assembly onto the S&B air box.
This intake kit comes with two box plug options.
Side Inlet (Shown): Allows for more air through fender opening, slightly louder. The side inlet of the air box also works with OEM snorkels.
Side Plug: Reduces noise, but at the cost of reduced airflow.
Install the S&B Air Box into the engine bay. Ensure that all the grommets are lined up and the intake tube is seated properly.
Tip: To make sure the air box is fully seated, you can feel the grommets popping through the floor of the air box.
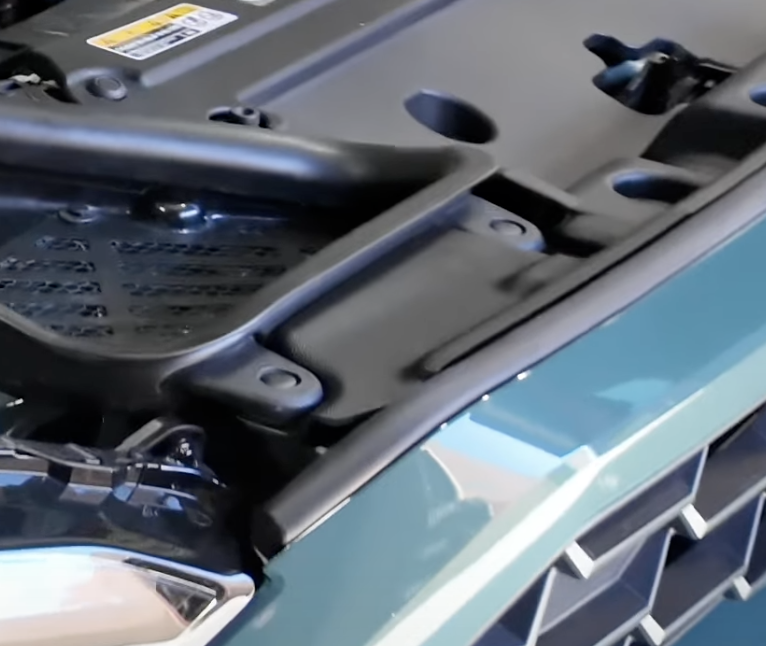
Install the front scoop extension
4Runner Owners: There is an included front scoop extension in order for you to securely attach the scoop to the core support.
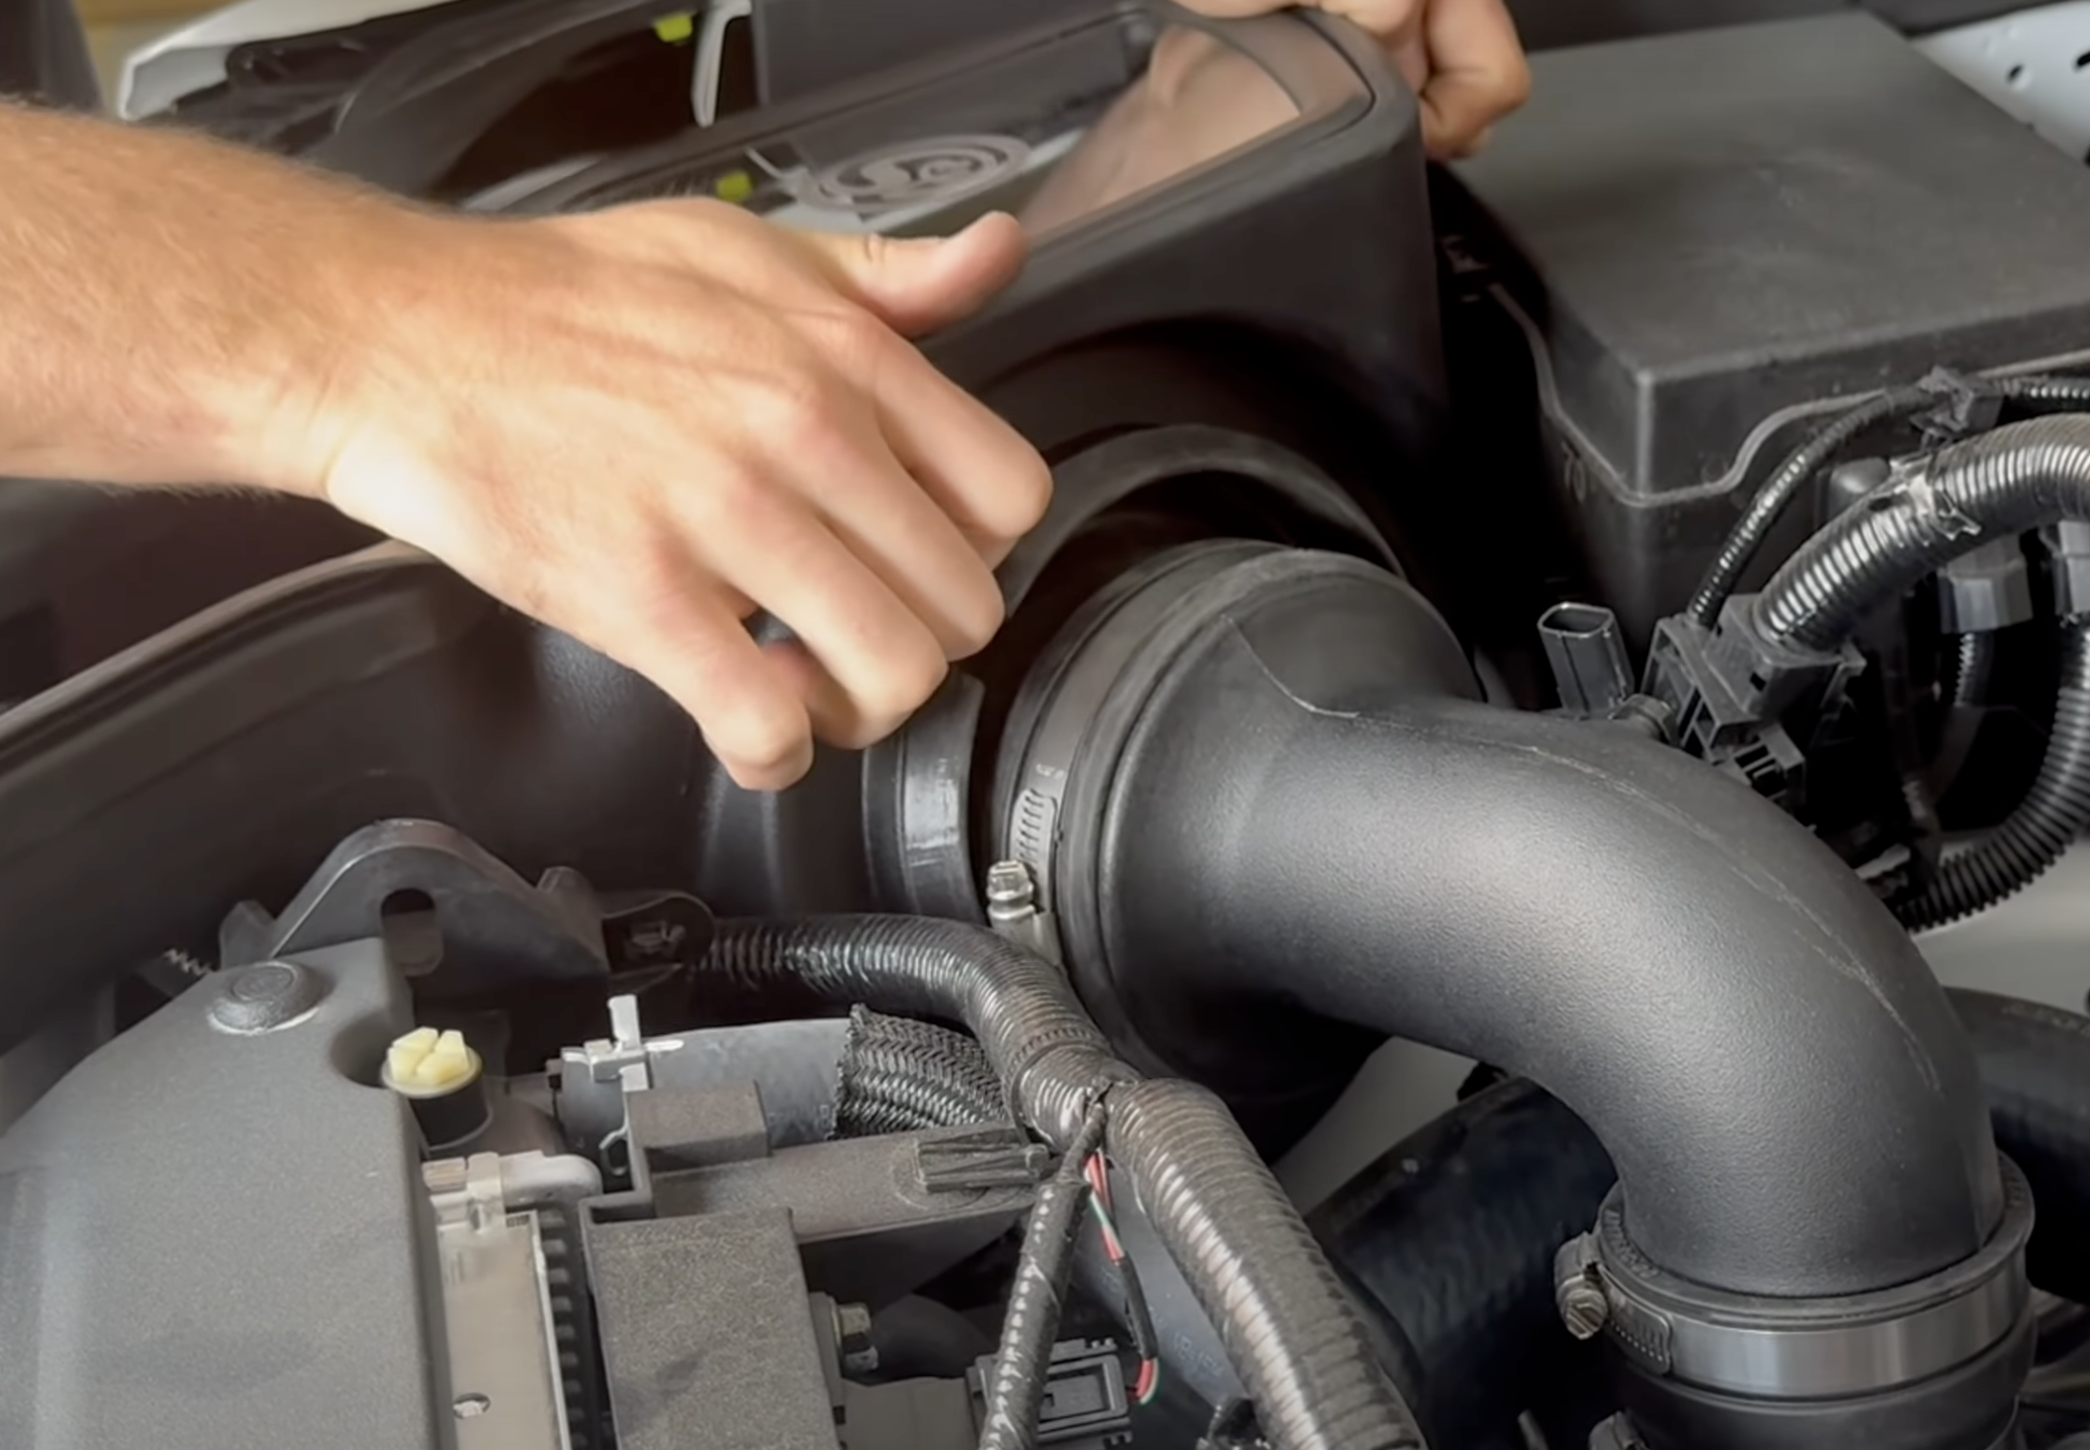
Connect the MAF Sensor to the S&B Intake Tube.
Using an 8mm socket, please tighten the hose clamps holding the intake tube to the turbo.
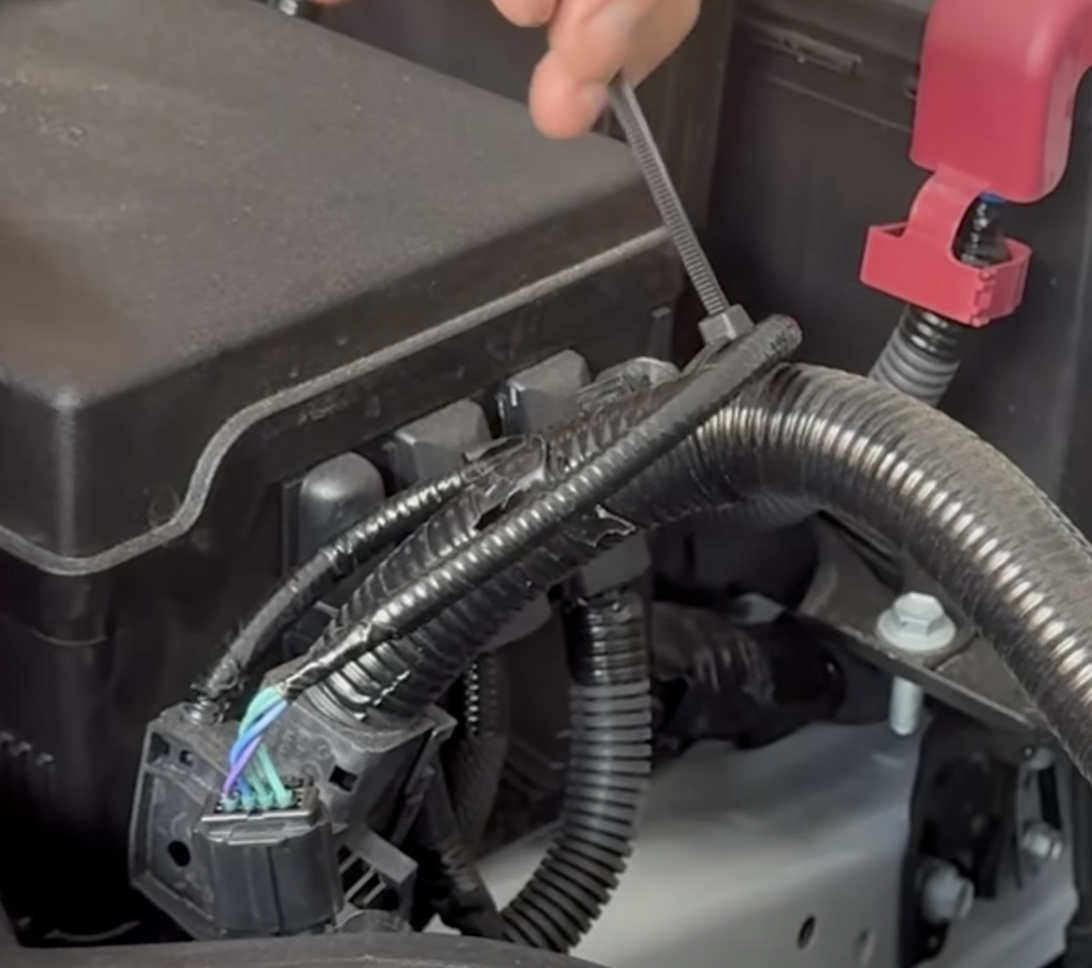
Use a zip-tie to keep the MAF Sensor harness out of the way.
Please verify that everything is tight and secure
Reconnect the negative battery cable to the negative battery terminal.
Your install is now complete.