STEP 1
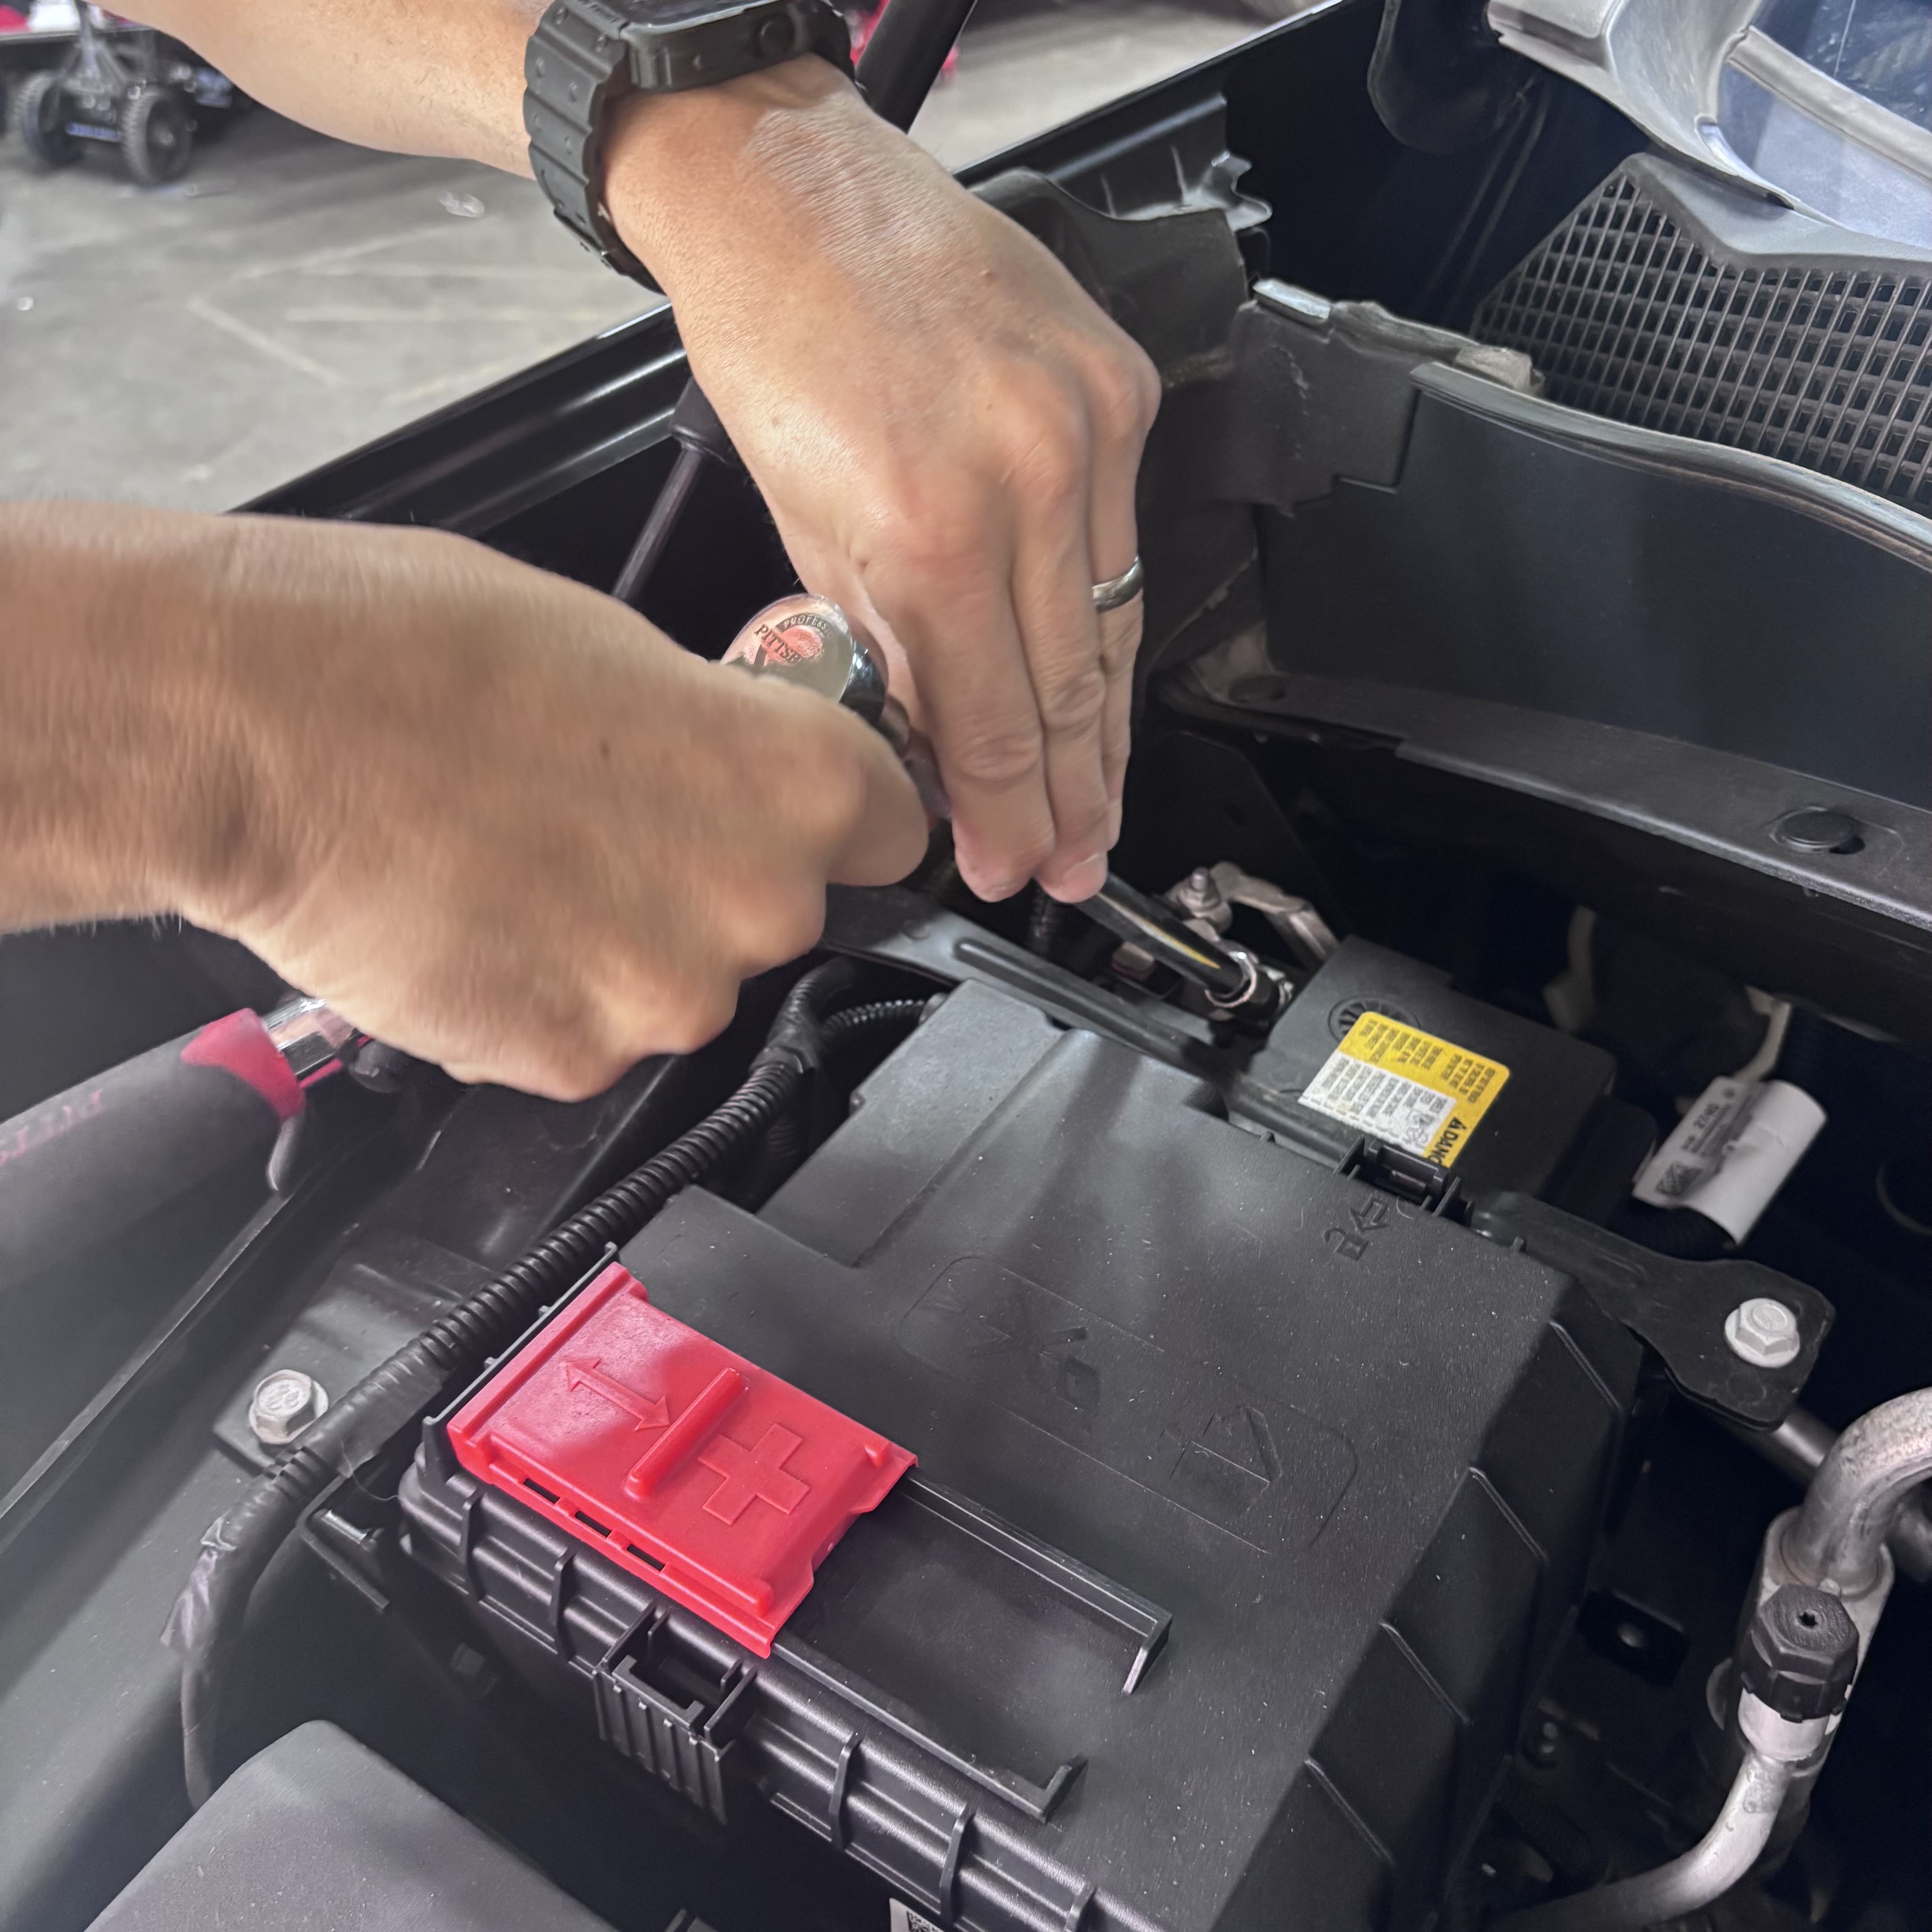
Disconnect the negative battery cable by loosening the negative terminal and removing it from the battery post.
Tip: You will need a 10mm Wrench or Socket.
DO NOT SKIP THIS STEP!
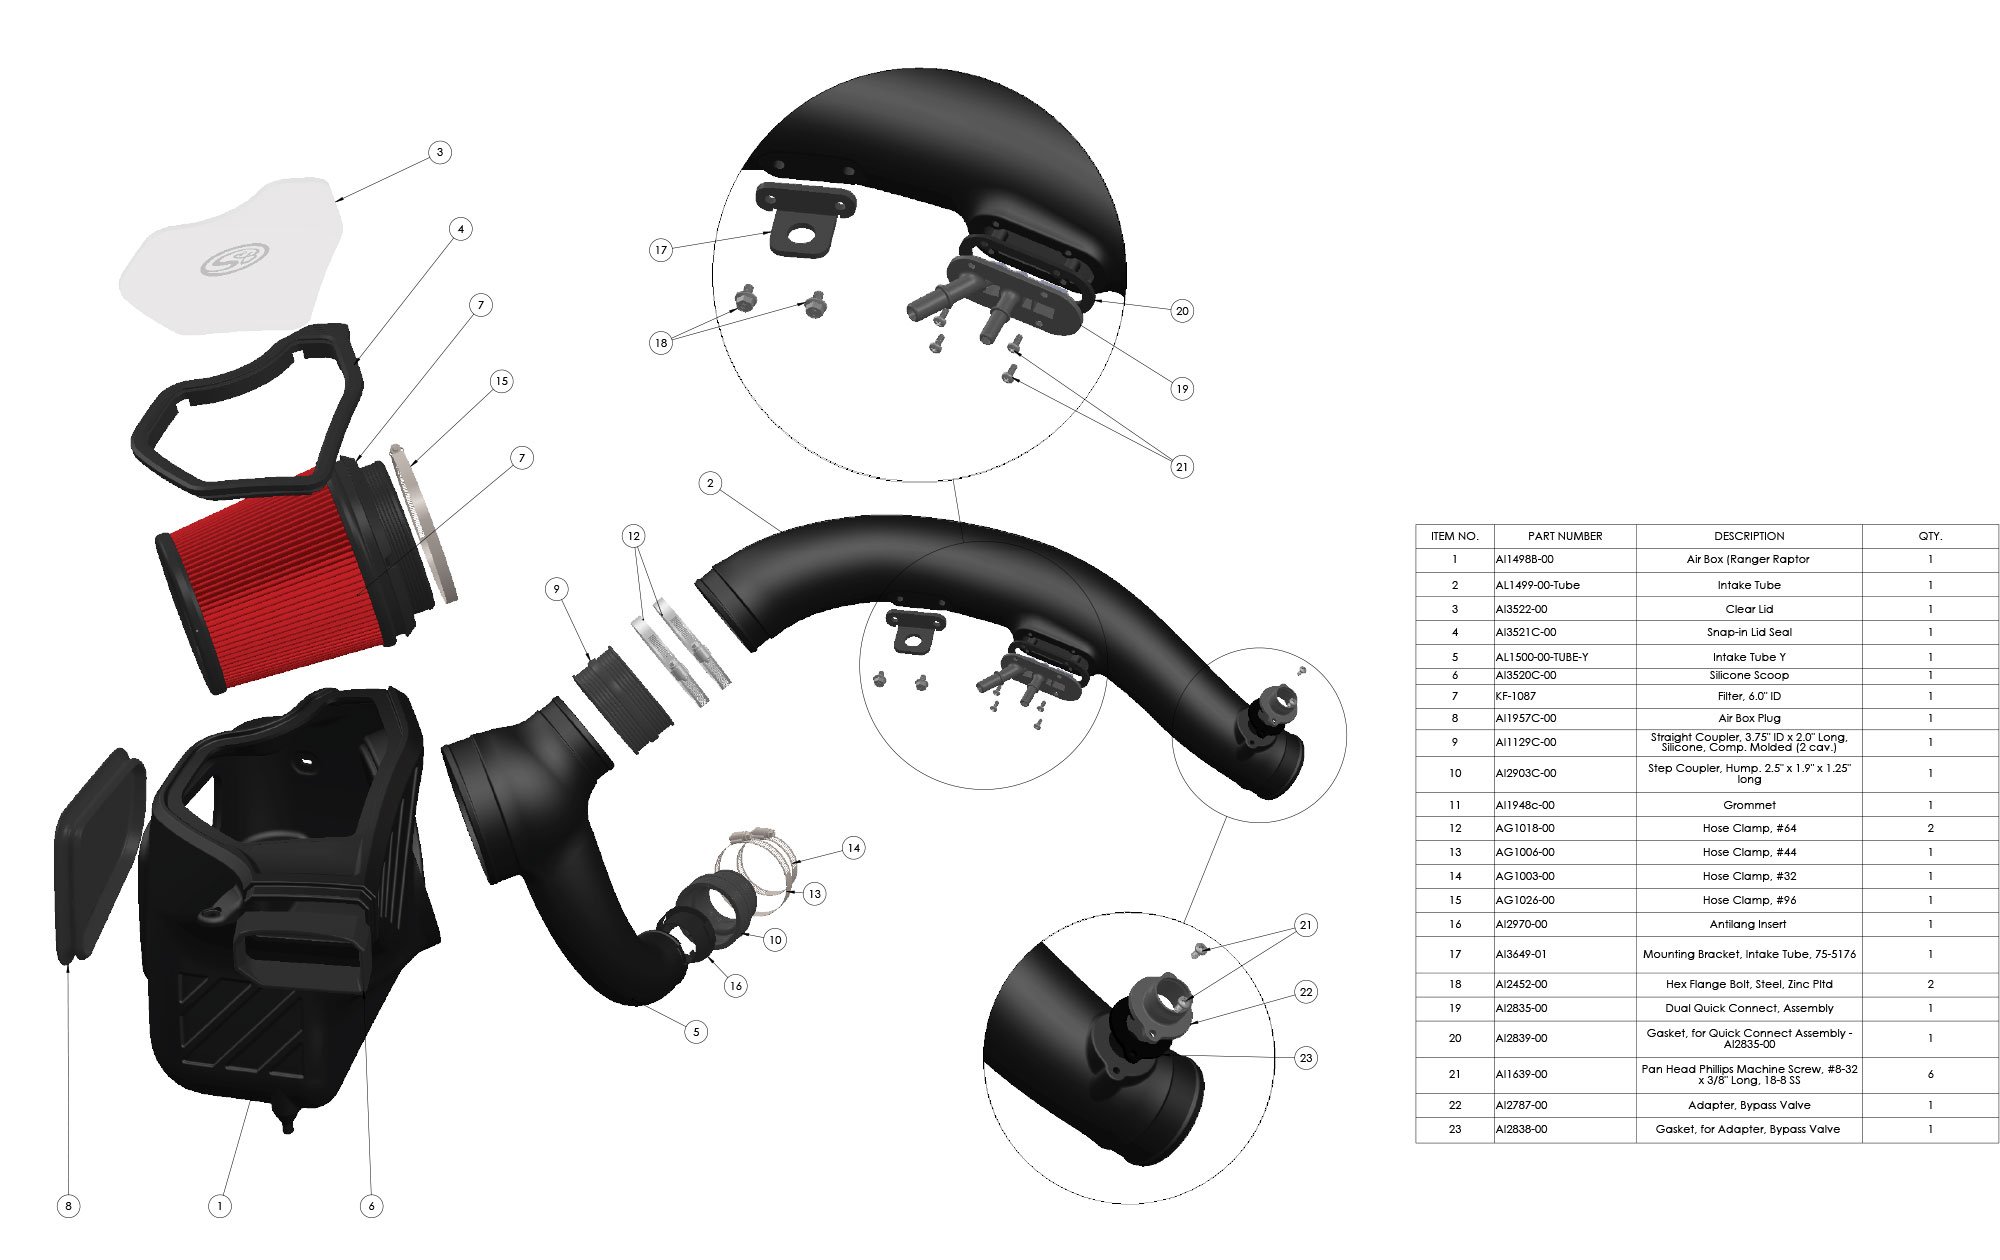
VEHICLE FITMENT: 2024+ Ford Ranger Raptor 3.0L V6
DEVICE NAME: COLD AIR INTAKE
This intake kit may not fit with the following aftermarket parts installed: Body Lift or Lowering Kit, Custom Hood.
10mm, T30 Torx Bit, Panel Clip Removal Tool or Flat Head Screwdriver, 8mm or 5/16” Nut Driver, Phillips Screwdriver, 1 Pair of Pliers or Vice Grip.
Note: Approximate Install Time: 1 hour
Disconnect the negative battery cable by loosening the negative terminal and removing it from the battery post.
Tip: You will need a 10mm Wrench or Socket.
DO NOT SKIP THIS STEP!
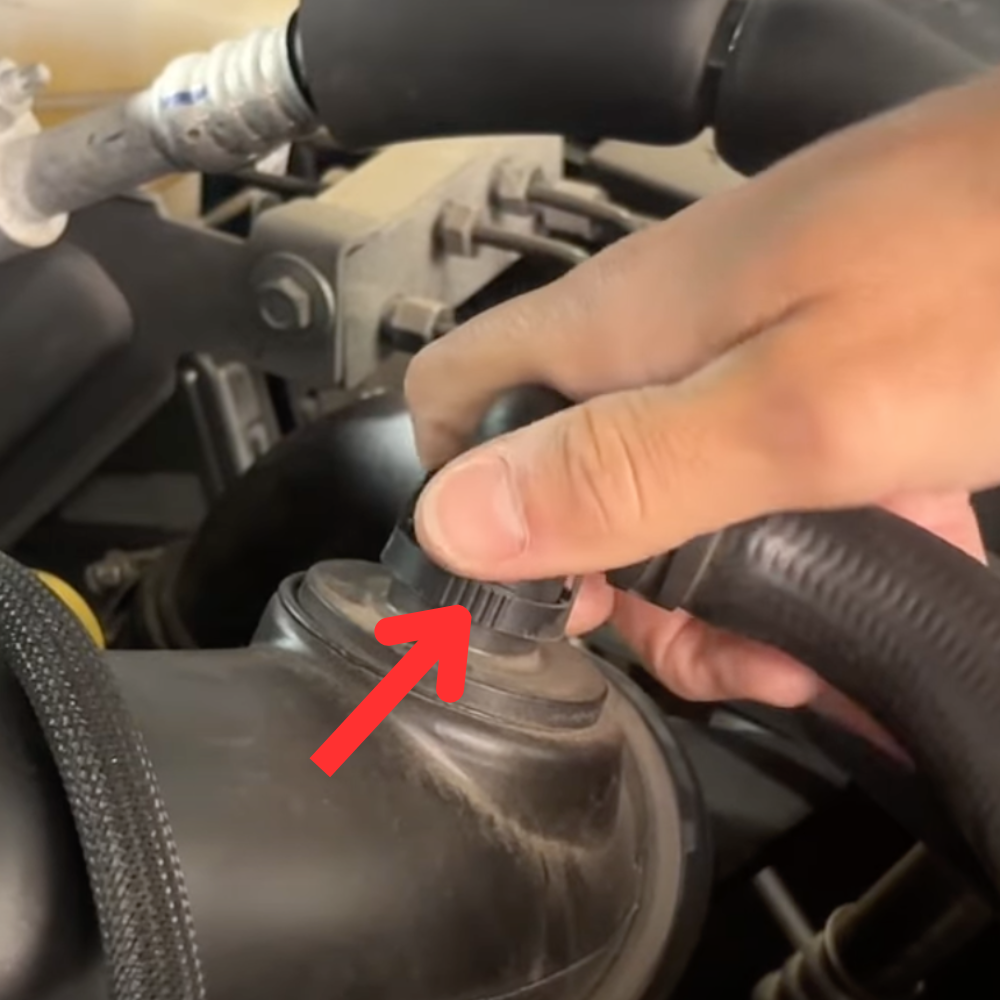
Disconnect the blowoff hose from the intake tube by squeezing the tabs at the bottom of the connector.
Disconnect the 2 PCV hoses from the intake tube.
For the yellow tab connector, press on the button located on the bottom, then pull.
For the orange tab connector, pull down on the orange safety clip then press down on the grey tab. Once done, pull the connector off.

Disconnect the temp sensor from the intake tube.

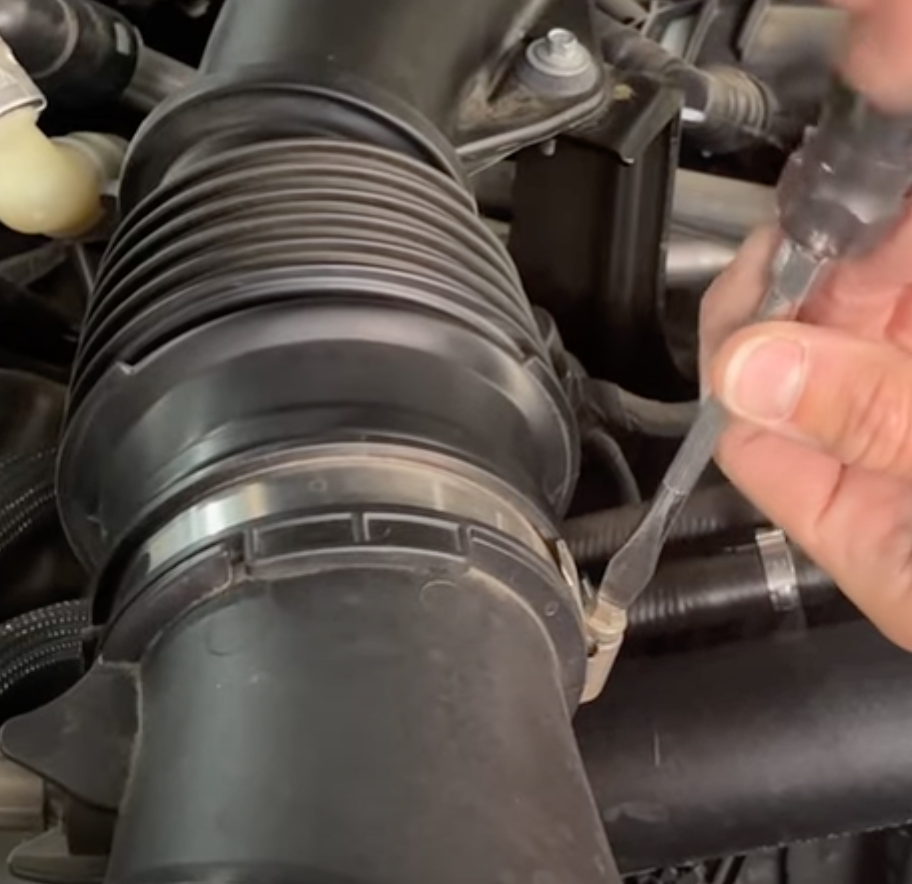
Loosen the two hose clamps on the intake tube. One located on the drivers side and the other (Step 5b) next to the air box.
Tip: Use a flat head screwdriver or a 7mm socket.

Remove the bolt holding the intake tube down.
Tip: You'll need an 8mm or 5/16 socket.

Now you can remove the stock intake tube.

Remove the screw holding the air scoop.
Tip: You will need a flat head screwdriver or a T30 Torx bit.

Remove the 2x clips holding the Temp Sensor wiring harness to the air box.
Tip: You'll need a body panel clip removal tool or a flat head screwdriver.

Loosen the hose clamps from the air box end of the turbo intake tube.
Tip: You will need an 8mm or 5/16 socket.

Remove the air box and air scoop assembly.

Remove the tube from the Turbo inlet side by using a set of needle nose pliers or vice grips to expand the ring holding the tube.

Install the vortex tube insert into the smaller Y-intake tube.

Install the temp sensor grommet into the small y-intake tube.

Remove the hat washer and grommet from the stock intake tube.

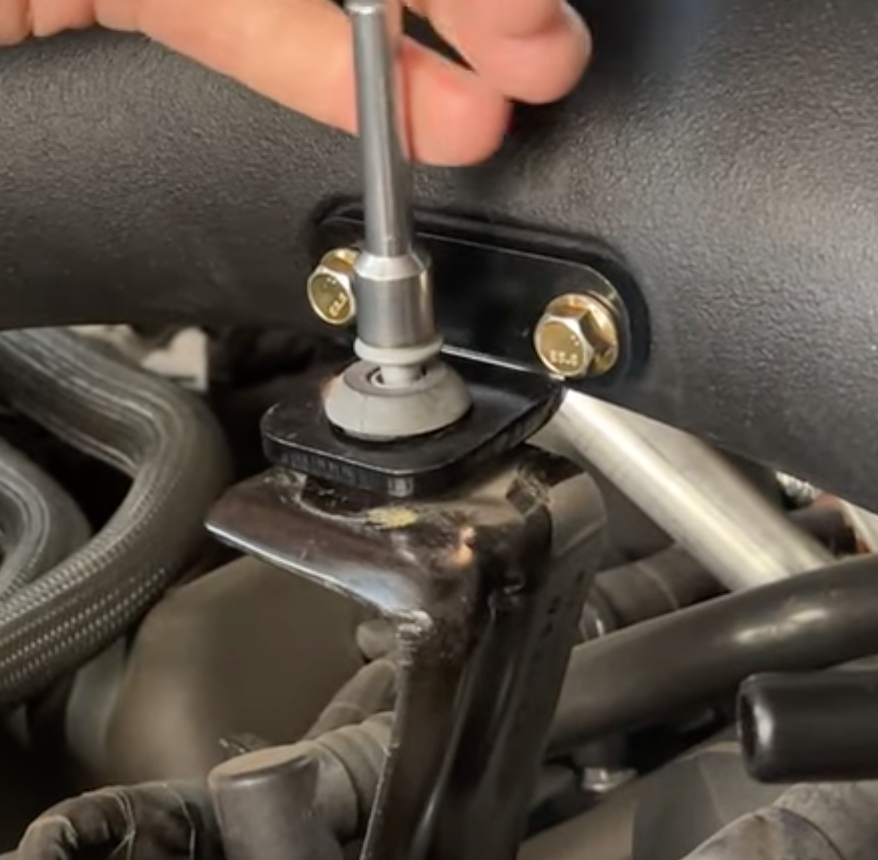
Install the stock grommet and hat washer (from the stock intake tube) on the Mounting Bracket (17).
Tip: Install the hat washer from the bottom of the bracket.

Next, mount the bracket from the previous step onto the large intake tube and tighten bolts till they are snug.
Tip: Use the 10mm screws provided.

Here is the bracket orientation when installed.
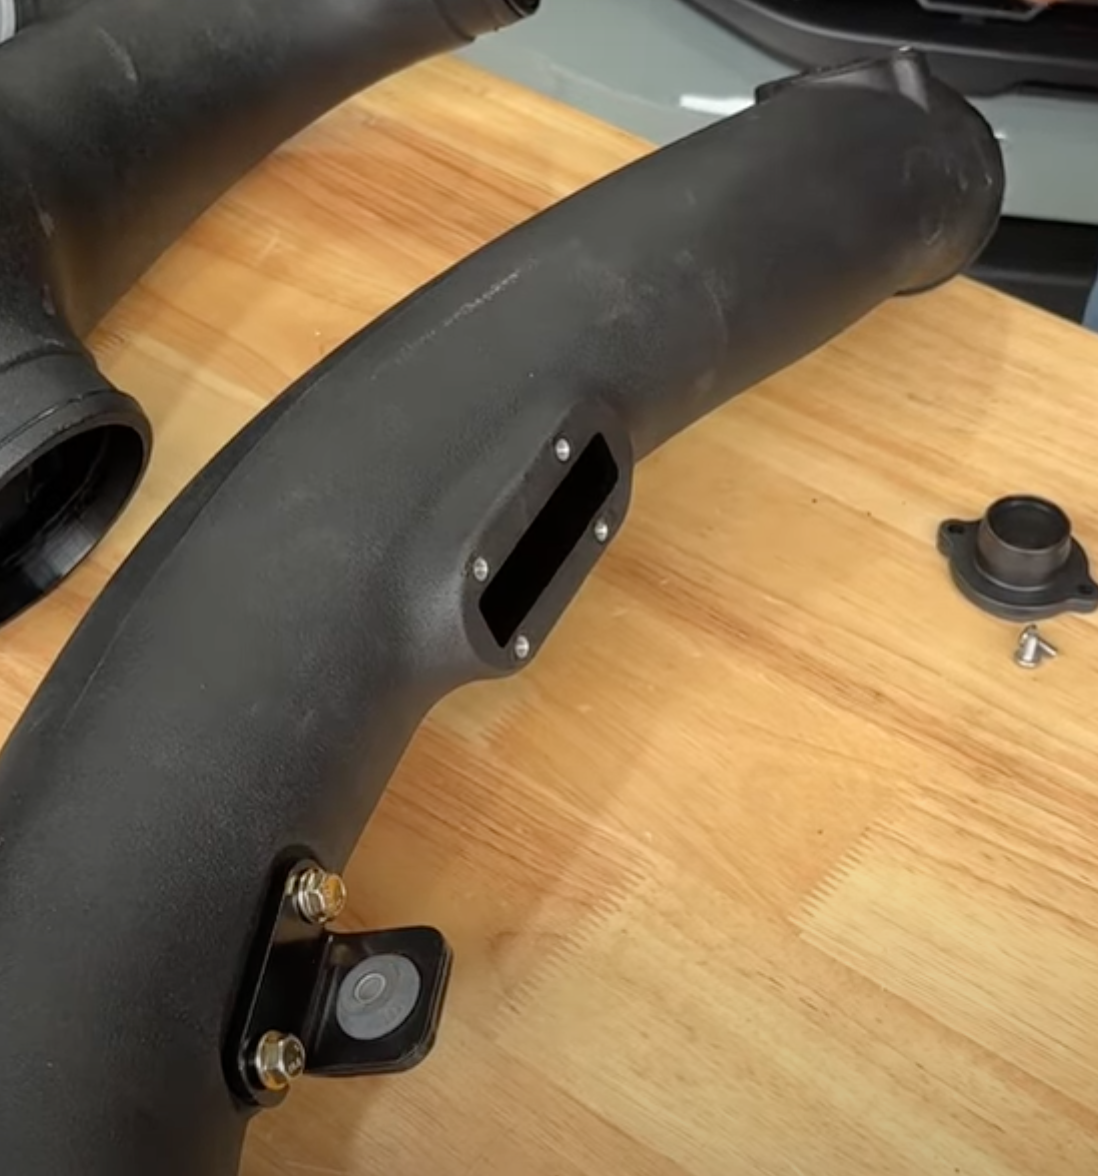
Install the blowoff valve connector to the longer intake tube.
Tip: The placement order goes connector, gasket, tube as seen in the image to the right. Once done, tighten down with the provided longer screws.

Install the PCV hose connector with corresponding gasket to the long intake tube.

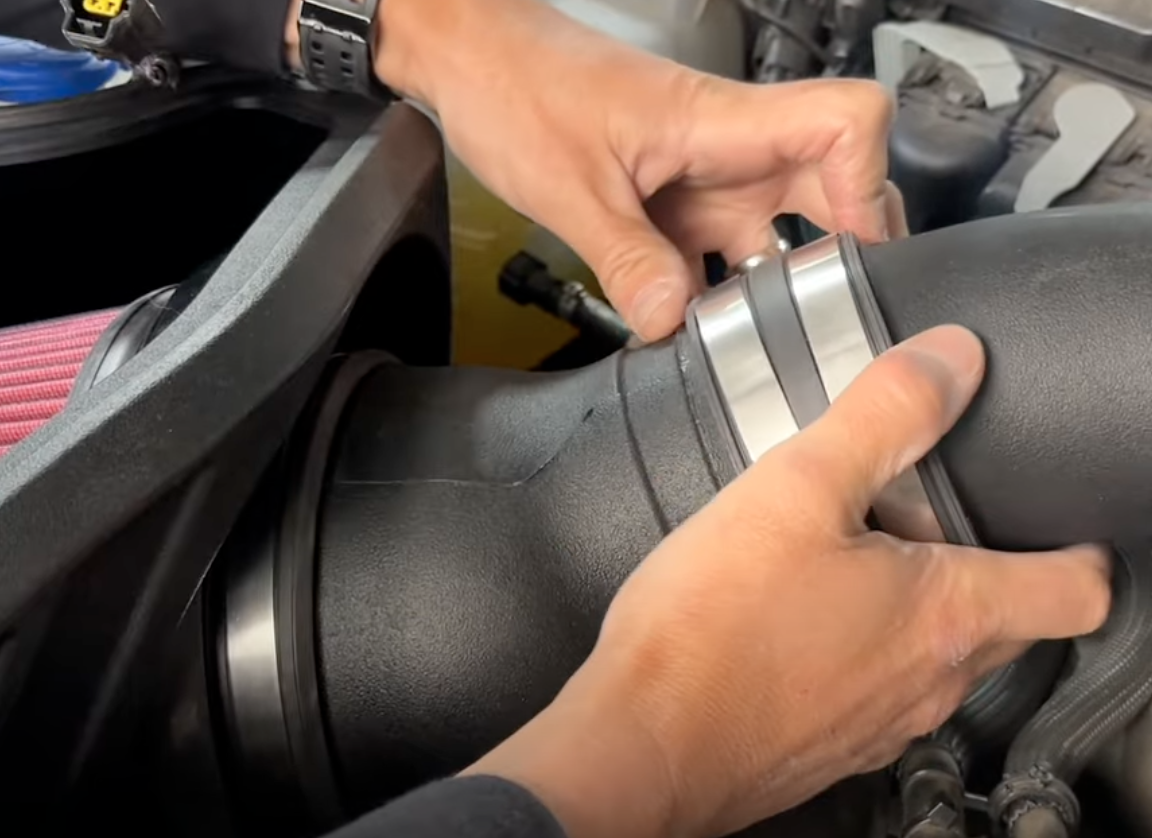
Install the cuppler down at the turbo, with the smaller diameter end going onto the turbo's inlet. Once installed, tighten the hose clamp that is closest to the turbo and leave the other one loose.
Tip: We recommend orientating the clamps to a position where it will be easy to access.

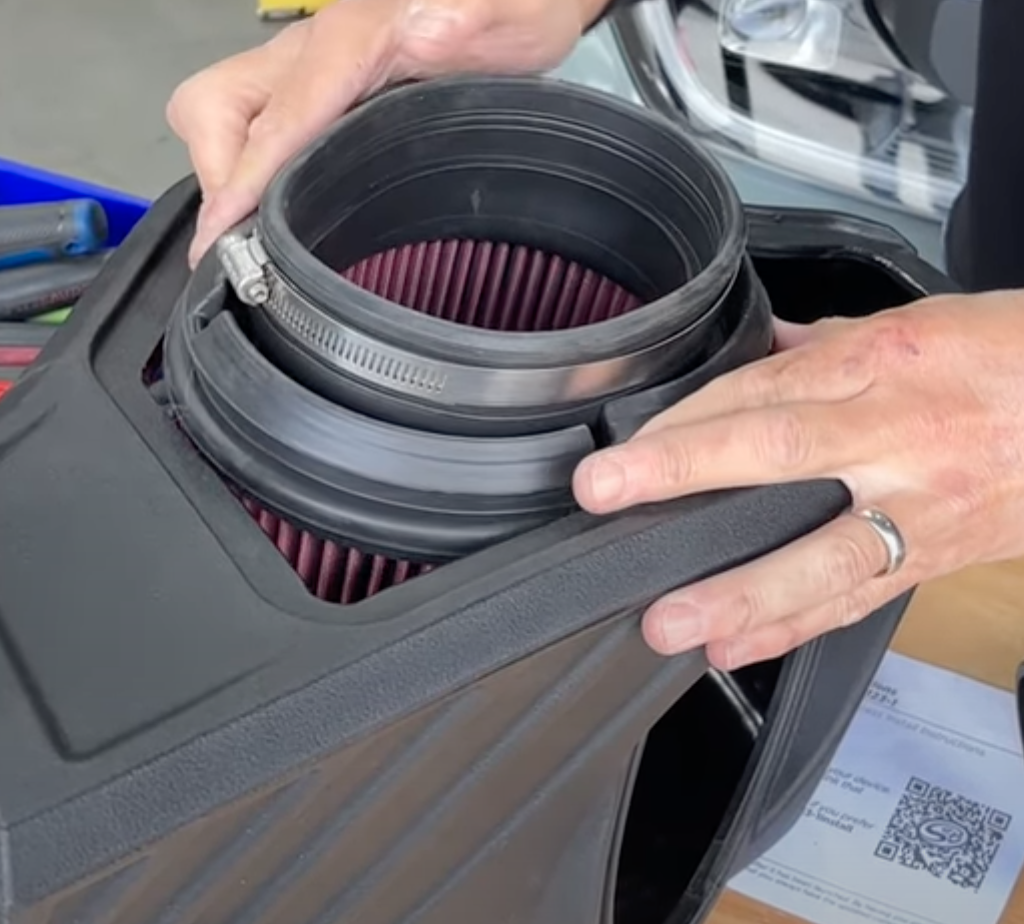
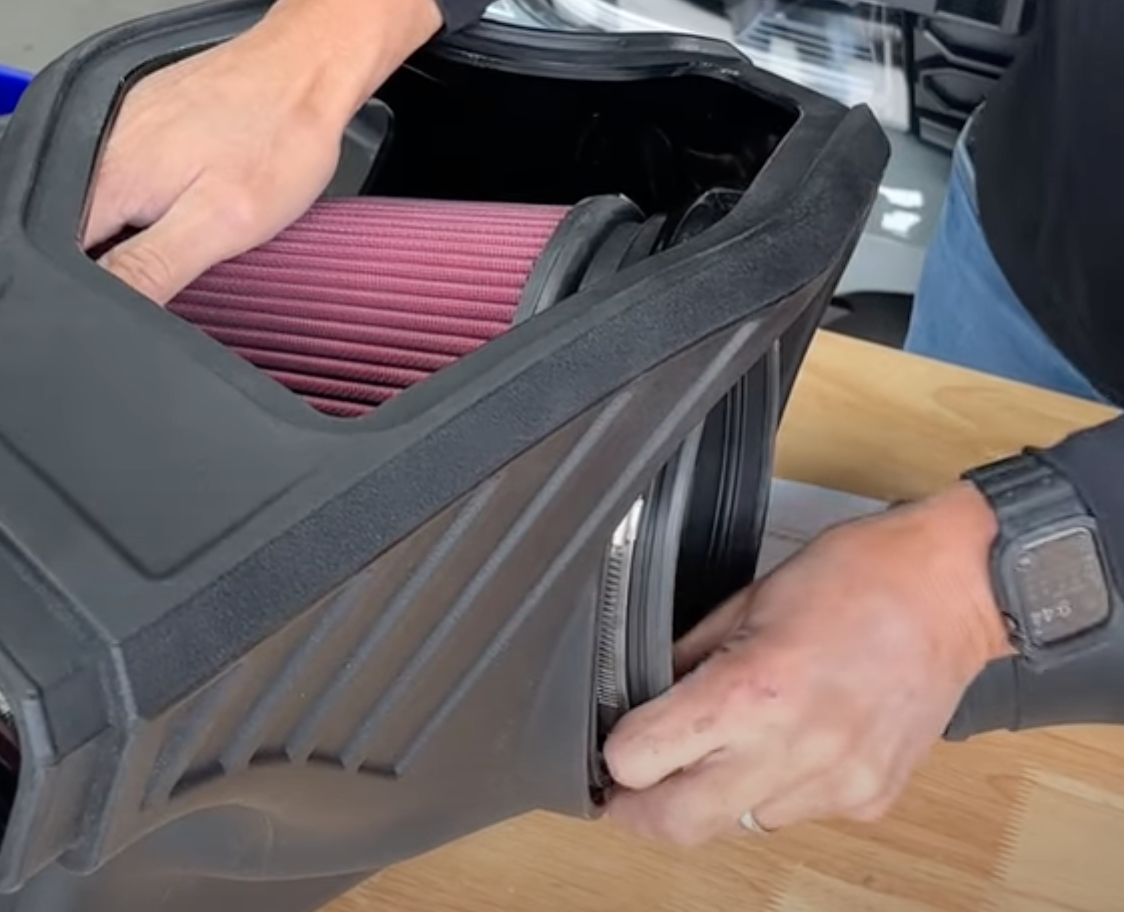
Install the air filter into the air box and pull on the base of the filter to snap it into the air box.
Tip: We recommend installing it vertically while compressing the sides of the filter to make it fit inside the box. Once inside, rotate the air filter to lay it in the box.
Install the silicone air scoop on the front of the air box.

Install the air box plug. You must install this air box plug if your vehicle is a 2025 or newer. The air box plug is optional on 2024 trucks. You will get a P2C90 code and check engine light on a 2025+ truck if the air box plug is not installed.
Tip: We recommend doing this if you live in a hot/dusty area.

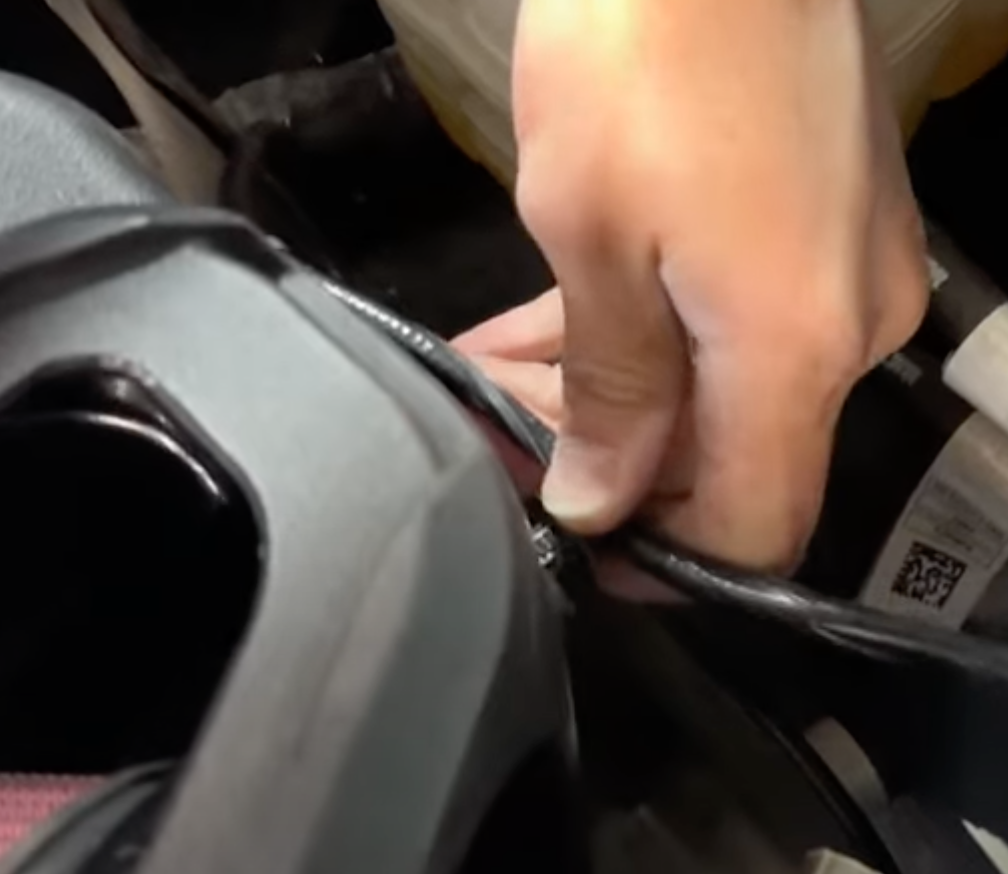
Install the air box into the stock location.
Tip: Line up the prongs on the bottom of the air box with the stock grommets on the wheel-well and push down to install.

Install the air scoop assembly.
Tip: You will need a flat head screw driver or a T30 Torx bit.

Remove the temp sensor from the stock intake tube.
Tip: To remove, lift the sensor above the lip of the socket and turn counter-clockwise then pull out.
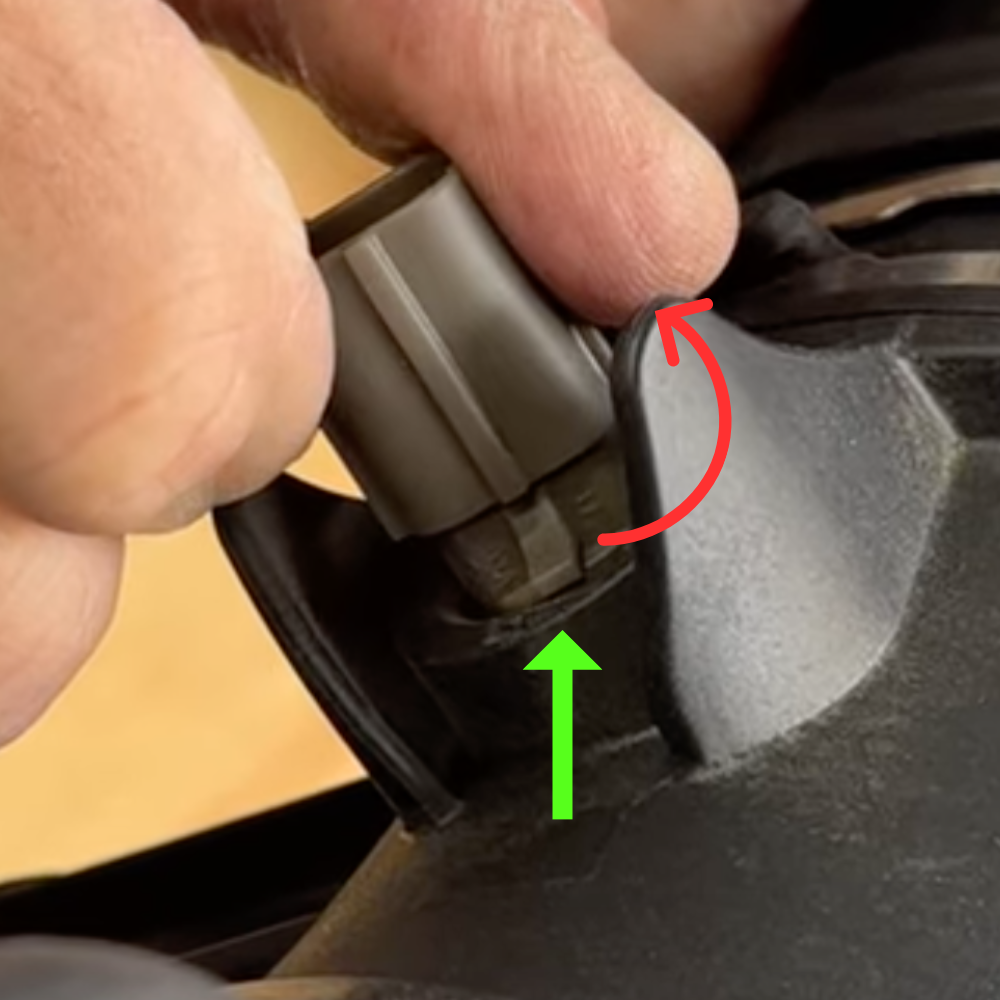
Install the temp sensor into the grommet on the small intake tube.
Tip: There is an arrow on the grommet showing you which way to turn the sensor. At the end of that arrow is a raised lip (green arrow). Push down and turn the sensor until it gets passed that lip.
.png?v=1750447699785)
Install the small intake tube assembly to the air box and turbo on the passenger side.
Tip: Once installed, tighten both the turbo and air filter hose clamps.

Install the long intake tube.
Tip: We recommend pre-installing the cuppler and clamps onto the air box side of the intake tube.

Once the intake tube is installed into the driver side cuppler, now it's time to connect it to the air box.
Tip: Go ahead and tighten the hose clamps in the air filter side first, then work your way down to the driver side.
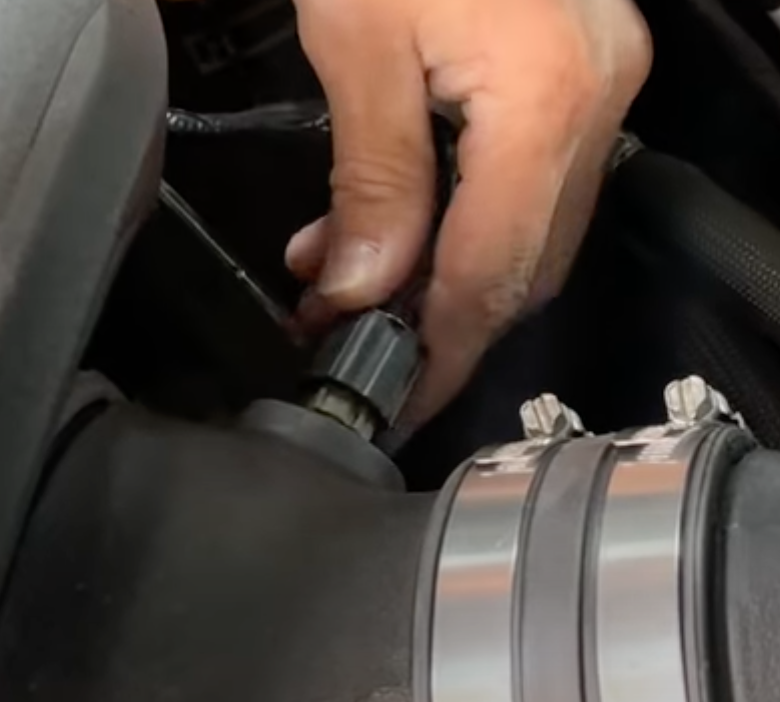
Re-install the OE bolt to the grommet on the long intake tube's L-bracket.
Tip: You'll need an 8mm or 5/16 socket.
Install both PCV hoses and the blowoff valve back onto the intake tube.
Tip: Once connected, make sure the locking tabs are back in place to prevent them from popping off.
.png?v=1750447847533)
Re-connect your temp sensor and clip it's wiring harness onto the S&B air box.
Remove the protective film from you air box window. Once done, install the window into the provided snap-in lid seal.
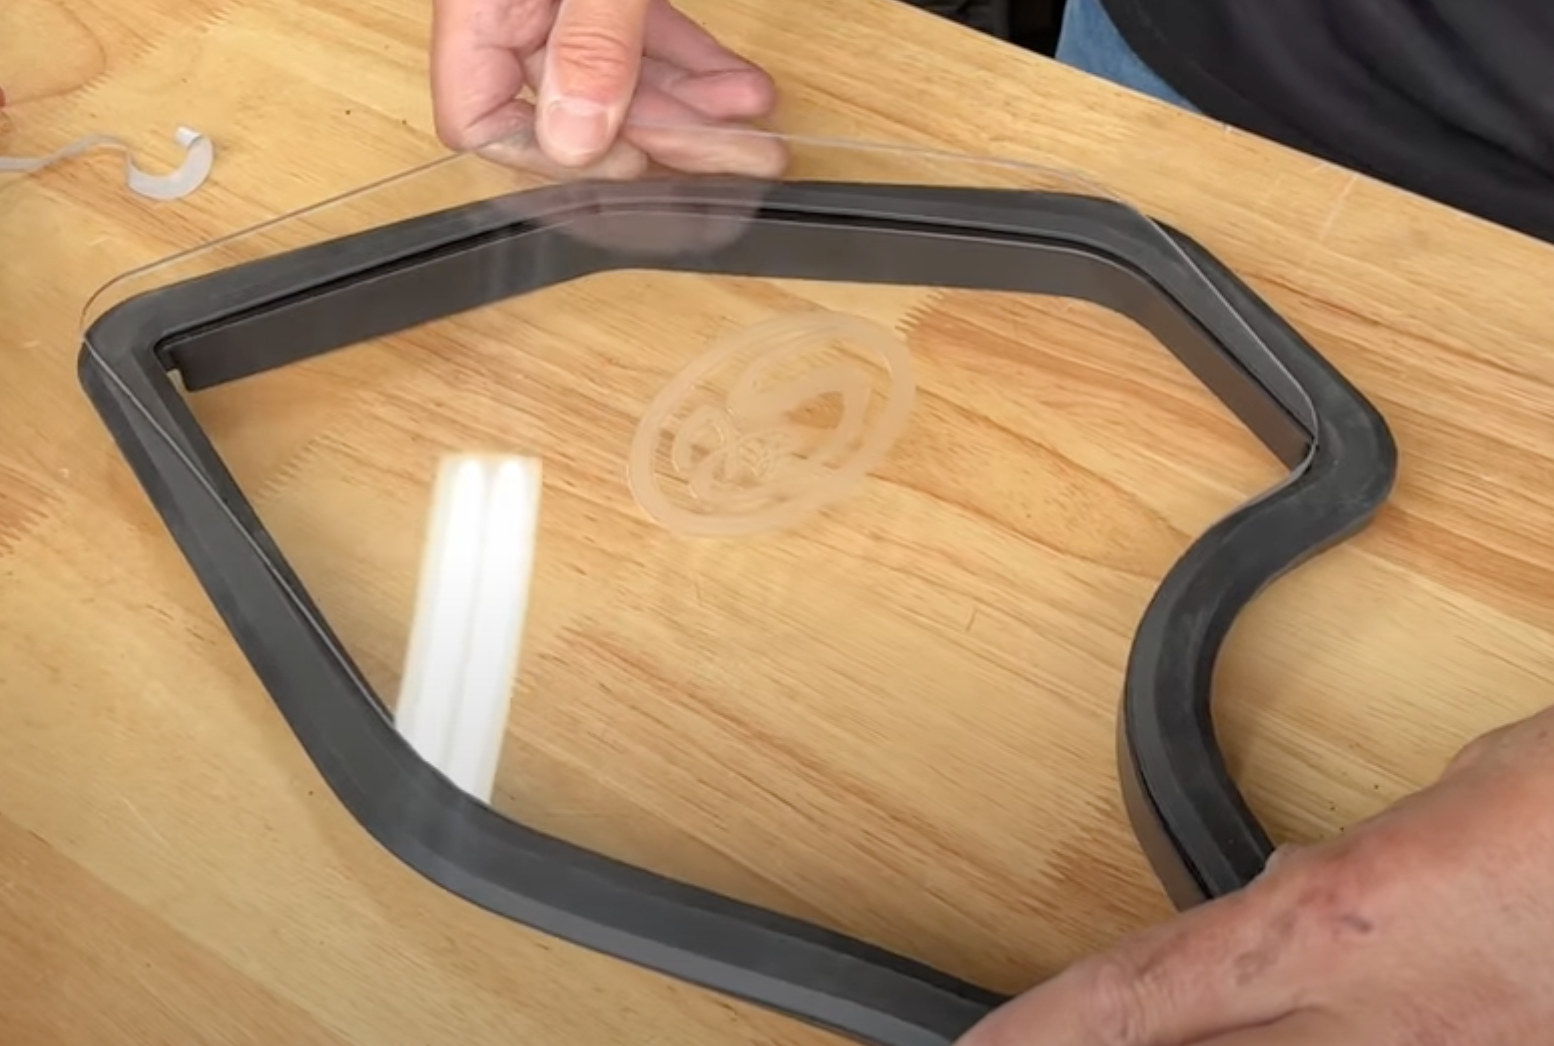
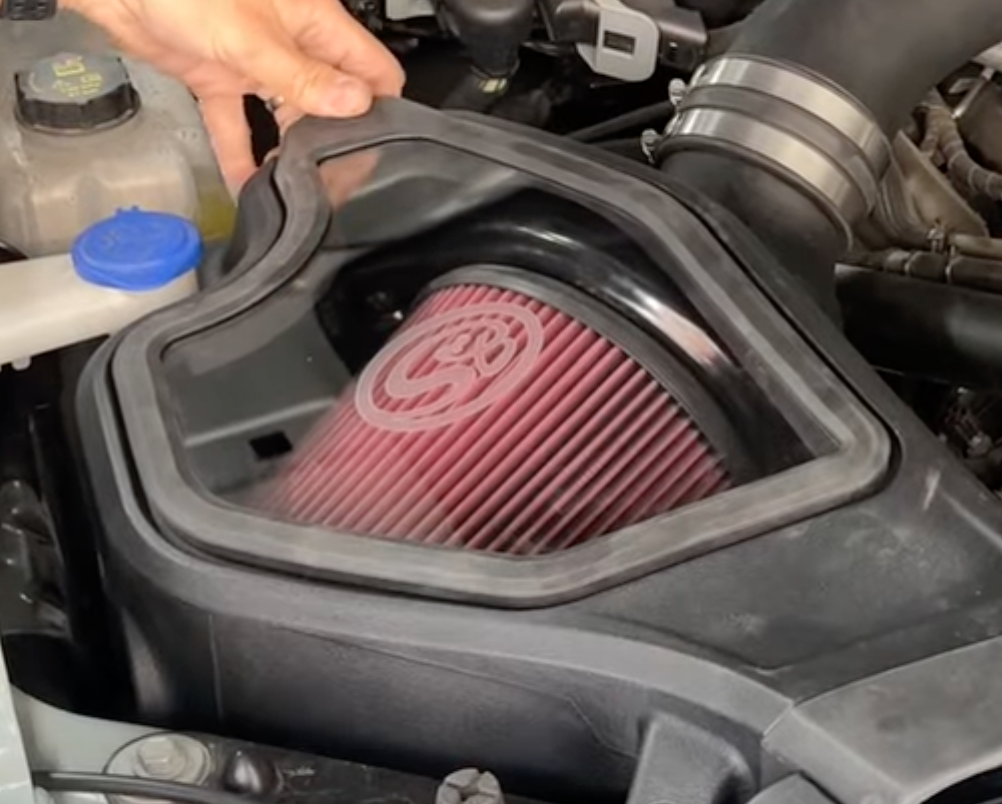
Install the snap-in lid onto the air box.
Re-install the negative battery terminal.
Tip: You will need a 10mm socket or wrench.
Your installation is now complete. Double check that all your connection points are tightened & secure.